•
All (rechargeable) batteries should be replaced at the same time. Mixing old and new
(rechargeable) batteries in the device can lead to (rechargeable) battery leakage and device
damage.
•
(Rechargeable) batteries must not be dismantled, short-circuited or thrown into fire. Never
recharge non-rechargeable batteries. There is a risk of explosion!
Operating elements
1
2
3
5
6
7
8
4
9
10
1 Indoor temperature, alarm and dual clock
2 Date
3 Time (hours, minutes, seconds)
4
SNOOZE*LIGHT
sensor button (not shown)
5
button
6
°C / °F
button
7
MODE
button
8
button (down)
9
button (up)
10 Battery compartment
Symbols on the LCD display
Symbol Meaning
Symbol Meaning
DCF symbol
DCF symbol (weak signal)
Date
Snooze function
Time zone
Month
Afternoon
Daylight saving time (summer time)
Morning
Celsius
Alarm 1
Fahrenheit
Alarm 2
Dual time
LLL
Temperature below -9.9 °C (outside
of the measurement range)
HHH
Temperature above +49.9 °C (outside of
the measurement range)
Operation
a) Inserting/changing the batteries
•
Insert the batteries before using the product for the first time. Change the batteries when the brightness of
the LCD display decreases significantly.
•
Remove the cover from the battery compartment (10).
•
Insert two 1.5 V/DC AAA batteries (included with the product) into the battery compartment. Ensure that
you observe the plus/+ and minus/- markings.
•
All symbols will appear on the LCD display and you will hear several beeps.
•
Replace the battery compartment cover.
You can operate the product with rechargeable batteries. However, rechargeable batteries have
a lower capacity and voltage (rechargeable battery = 1.2 V, conventional battery = 1.5 V),
therefore the battery life may be shorter. If you wish to use rechargeable batteries, always use
NiMH batteries with a low self-discharge. We recommend that you use high-quality alkaline
batteries for a longer battery life.
b) Setup
•
Place the radio alarm clock on a stable, horizontal surface.
•
Use suitable padding to protect the surfaces of valuable furniture against scratches.
•
To ensure optimal DCF reception, the radio alarm clock should not be placed next to other electronic
devices, cables or metal objects.
c)
Receiving a DCF signal
•
Once you have inserted the batteries, the alarm clock will automatically search for a DCF signal and the
DCF symbol will flash on the display.
•
It normally takes 3–5 minutes to receive a signal. Once a signal has been received, the DCF symbol and
the time will appear on the display
It takes a few minutes for the clock to detect and analyse the DCF signal. Do not move the alarm
clock during this time or press any buttons or switches.
Signal reception may be poor when the clock is near to double-glazed windows, reinforced
concrete, coated wallpapers or electronic devices, or when the clock is placed in a cellar.
If the time is not displayed after 5 minutes, move the radio alarm clock to another location and
try again. To search for a signal manually, press and hold the
°C/°F
button (6) for 3 seconds.
If a signal is not received, the radio symbol (
) will disappear from the display. Set the time
manually as described in "a) Setting the date and time".
Operating instructions
Radio alarm clock EFW135 (white)
Radio alarm clock EFW135 (black)
Item no. 1511421
Item no. 1508967
Intended use
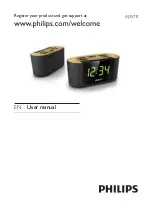
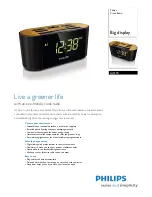
This radio alarm clock displays the time, date and indoor temperature. The time is set automatically using
a built-in DCF receiver. You can also set the time and time zone manually. The alarm clock displays the
temperature in °Celsius or °Fahrenheit and features a dual alarm with a snooze function. There is also a dual
clock that allows you to view the time in a different time zone.
It is intended for indoor use only. Do not use it outdoors. Contact with moisture, e.g. in bathrooms, must be
avoided under all circumstances.
For safety and approval purposes, you must not rebuild and/or modify this product. If you use the product
for purposes other than those described above, the product may be damaged. In addition, improper use can
cause hazards such as short circuits or fire. Read the instructions carefully and keep them. Make this product
available to third parties only together with its operating instructions.
This product complies with the statutory national and European requirements. All company names and
product names are trademarks of their respective owners. All rights reserved.
Delivery content
•
Radio alarm clock
•
2x AAA batteries
• Operating instructions
Up-to-date Operating Instructions
Download the latest operating instructions at www.conrad.com/downloads
or scan the QR code on this page.
Follow the instructions on the website.
Explanation of symbols
The symbol with the exclamation mark in the triangle is used to highlight important information
in these operating instructions. Always read this information carefully.
The arrow symbol indicates special information and advice on operation.
Safety instructions
Read the operating instructions carefully and especially observe the safety information.
If you do not follow the safety instructions and information on proper handling in this
manual, we assume no liability for any resulting personal injury or damage to property.
Such cases will invalidate the warranty/guarantee.
a) General information
• The device is not a toy. Keep it out of the reach of children and pets.
•
Do not leave packaging material lying around carelessly. This may become dangerous playing
material for children.
•
Protect the product from extreme temperatures, direct sunlight, strong jolts, high humidity,
moisture, flammable gases, vapours and solvents.
• Do not place the product under any mechanical stress.
•
If it is no longer possible to operate the product safely, take it out of operation and protect it
from any accidental use. Safe operation can no longer be guaranteed if the product:
-
is visibly damaged,
- is no longer working properly,
-
has been stored for extended periods in poor ambient conditions or
-
has been subjected to any serious transport-related stresses.
• Please handle the product carefully. Jolts, impacts or a fall even from a low height can damage
the product.
• Consult a technician if you are not sure how to use or connect the product.
•
Maintenance, modifications and repairs are to be performed exclusively by an expert or at a
qualified shop.
•
If you have questions which remain unanswered by these operating instructions, contact our
technical support service or other technical personnel.
b)
(Rechargeable) batteries
•
Correct polarity must be observed while inserting the (rechargeable) batteries.
•
(Rechargeable) batteries should be removed from the device if it is not used for a long period
of time to avoid damage through leaking. Leaking or damaged (rechargeable) batteries might
cause acid burns when in contact with skin, , therefore use suitable protective gloves to handle
corrupted (rechargeable) batteries.
•
(Rechargeable) batteries must be kept out of reach of children. Do not leave (rechargeable)
batteries lying around, as there is a risk that children or pets may swallow them.


