Euphonix Max Air Mixing Console Operation Manual
Center Section
135
7.3.1
Talkback
Touch the
Talkback
tab to display the Talkback section.
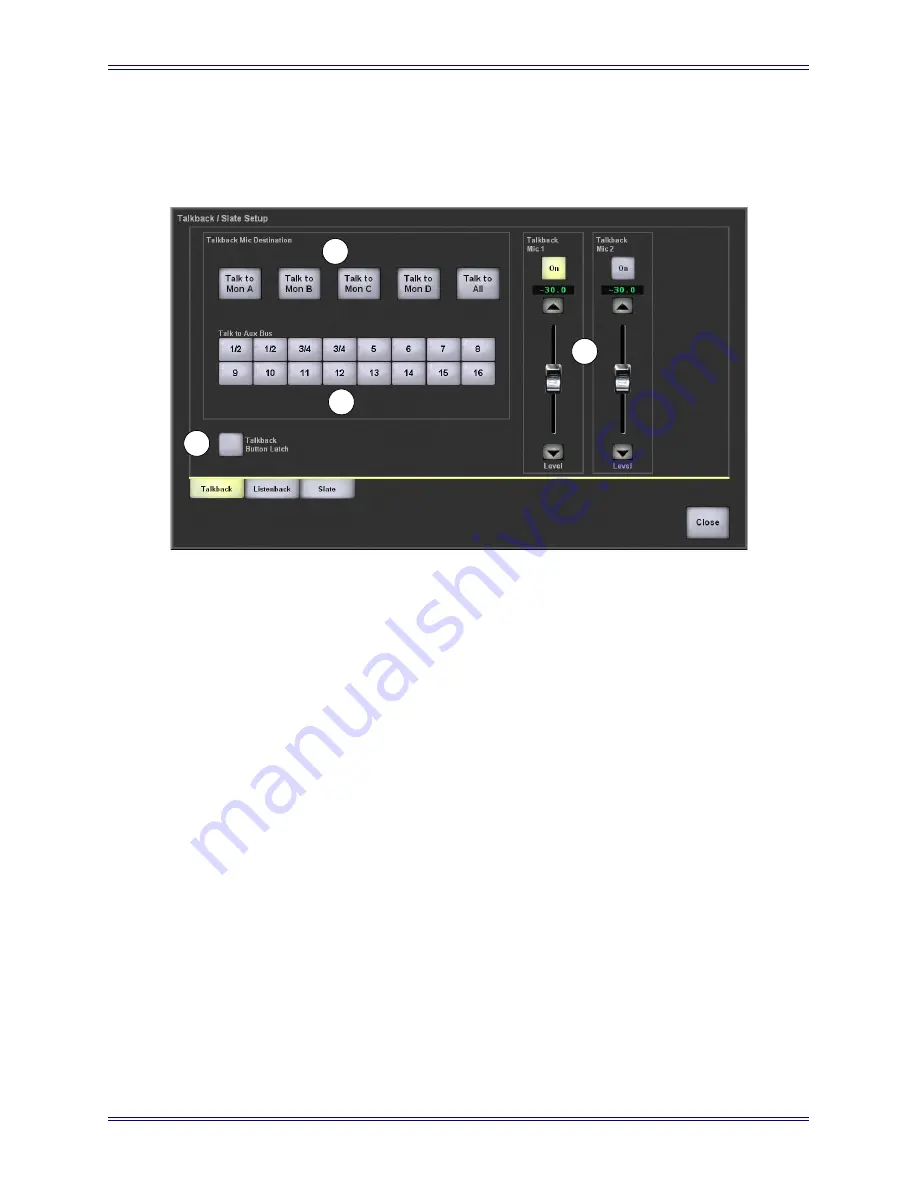
Figure 7-12
Talkback/Slate Setup Popup
Monitors
Talkback Mic 1 and Talkback Mic 2 can be routed to Mon A–D by touching the buttons
at the top of the Talkback Setup popup (1 in Figure 7-12). These buttons are momentary
unless the
Talkback Button Latch
button (4) is lit, in which case they can be toggled
on/off each time they are touched. The
Talkback Button Latch
button also latches the
four Talkback/Slate keys on the surface (Figure 7-11). More than one monitor can be
active by pressing multiple buttons and all can be active by pressing the
Talk to All
but-
ton.
When a talkback button is pressed, the monitors receiving talkback and the main control
room speaker are dimmed by the level set for the
Dim
key (see
Dim and Cut
on page
131).
Set Talkback Mic 1 and Talkback Mic 2 levels using the faders (2). Talkback Mic 1 and
Mic 2 can be turned on/off by toggling their
On
buttons.
Aux Busses
The same rules apply to the aux busses as monitors. Select the aux busses (single or
pairs) to route the talkback signals (3). They latch or are momentary based on the
Talk-
back Button Latch
button.
1
2
3
4
Summary of Contents for Max Air
Page 11: ...Euphonix Max Air Mixing Console Operation Manual xi Index 183 ...
Page 12: ...Euphonix Max Air Mixing Console Operation Manual xii ...
Page 24: ...Euphonix Max Air Mixing Console Operation Manual Introduction 24 ...
Page 26: ...Euphonix Max Air Mixing Console Operation Manual New Features in Version 1 4 26 ...
Page 44: ...Euphonix Max Air Mixing Console Operation Manual Quickstart to Common Tasks 44 ...
Page 86: ...Euphonix Max Air Mixing Console Operation Manual Touchscreen 86 ...
Page 154: ...Euphonix Max Air Mixing Console Operation Manual Control Groups and Multi Format Masters 154 ...
Page 160: ...Euphonix Max Air Mixing Console Operation Manual Layouts and Snapshots 160 ...
Page 188: ...Euphonix Max Air Mixing Console Operation Manual 188 ...


