Euphonix Max Air Mixing Console Operation Manual
Touchscreen
57
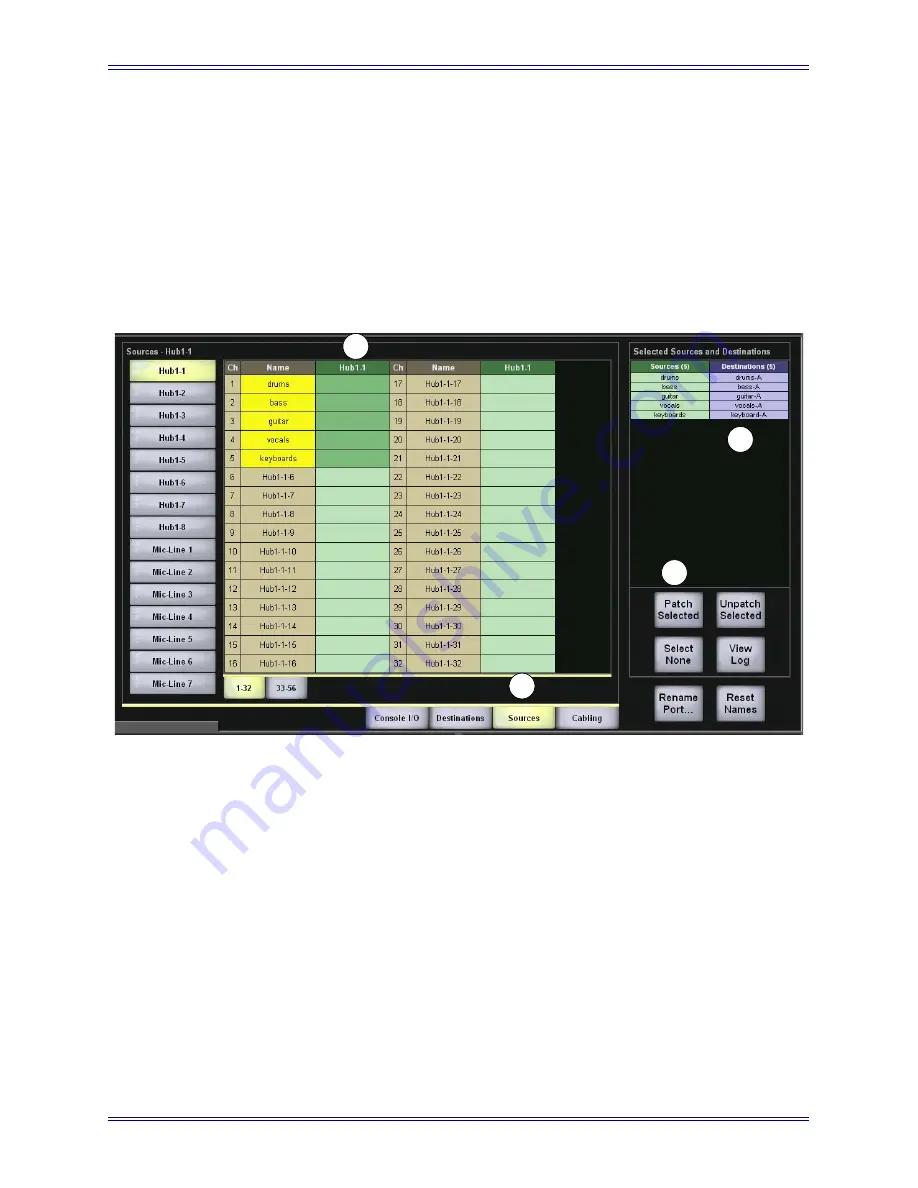
To complete this Patch example:
1.
Select the
Sources
tab (1 in Figure 4-13).
2.
Touch and drag through the first five cells in the Hub 1-1 column (2 in Figure
4-13).
Note that these names appear in the
Sources
column of the
Selected Sources
and Destinations
area next to their counterparts in the
Destinations
column (3 in
in Figure 4-13).
Figure 4-13
Sources and Destinations Selected
3.
Touch the
Patch Selected
button (4 in Figure 4-13) to make the Patch.
Note in Figure 4-14 that the
Selected Sources and Destinations
area is cleared
(1 in Figure 4-14) and the A Input names appear next to their source channels
(2 in Figure 4-14).
2
3
1
4
Summary of Contents for Max Air
Page 11: ...Euphonix Max Air Mixing Console Operation Manual xi Index 183 ...
Page 12: ...Euphonix Max Air Mixing Console Operation Manual xii ...
Page 24: ...Euphonix Max Air Mixing Console Operation Manual Introduction 24 ...
Page 26: ...Euphonix Max Air Mixing Console Operation Manual New Features in Version 1 4 26 ...
Page 44: ...Euphonix Max Air Mixing Console Operation Manual Quickstart to Common Tasks 44 ...
Page 86: ...Euphonix Max Air Mixing Console Operation Manual Touchscreen 86 ...
Page 154: ...Euphonix Max Air Mixing Console Operation Manual Control Groups and Multi Format Masters 154 ...
Page 160: ...Euphonix Max Air Mixing Console Operation Manual Layouts and Snapshots 160 ...
Page 188: ...Euphonix Max Air Mixing Console Operation Manual 188 ...


