


Euphonix Max Air Mixing Console Operation Manual
Touchscreen
66
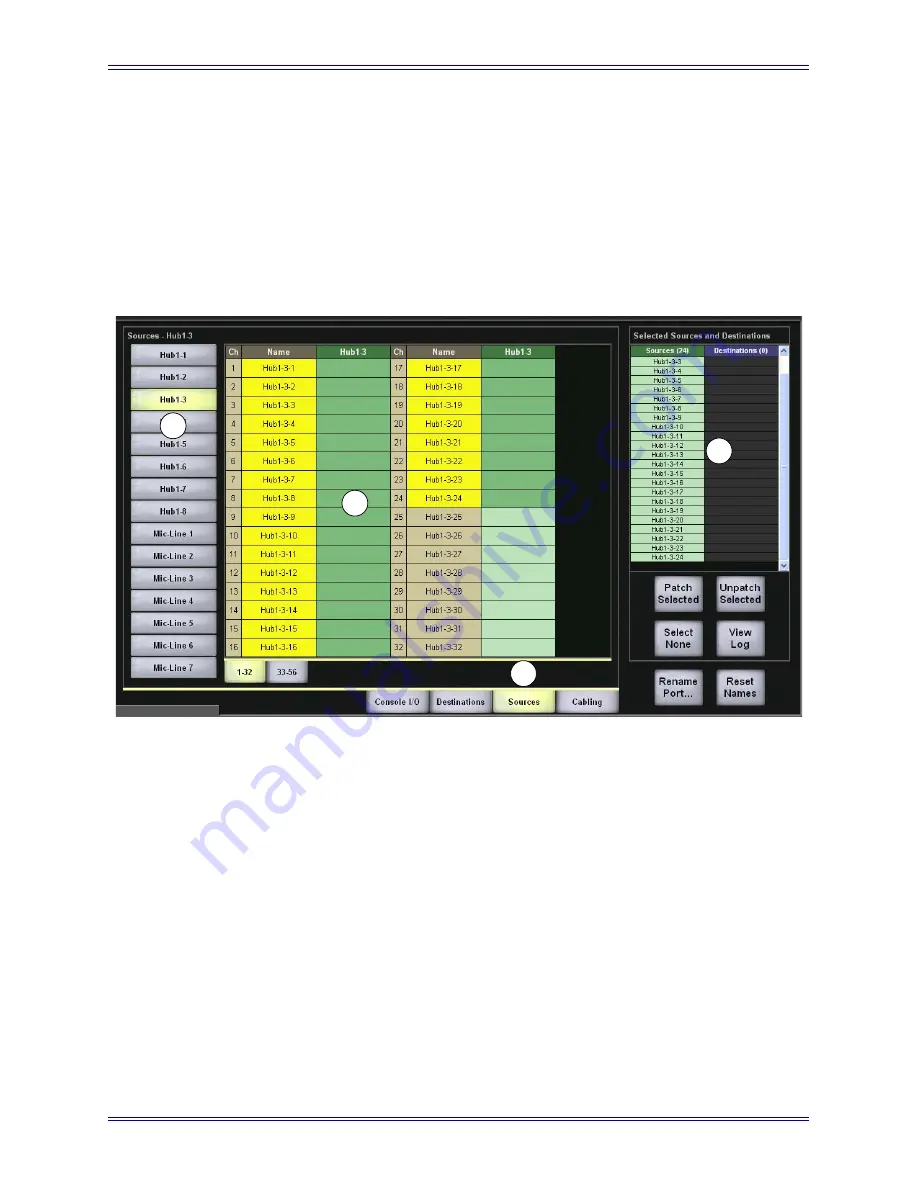
Patch the Multitrack Returns Into Channels 1–24
1.
Select the
Sources
tab (1 in Figure 4-22).
2.
Select the
Hub1-3
sub-category (2 in Figure 4-22).
3.
Touch and drag through the first 24 cells in Hub1-3 column (3 in Figure 4-22).
These cells are highlighted and their names appear in the
Sources
column in
the
Selected Sources and Destinations
area
on the right (4 in Figure 4-22).
Figure 4-22
Sources Selected
4.
Select the
Console I/O
category.
5.
Select the
A and B Inputs
sub-category.
6.
Touch and drag through the first 24 cells in the
A Input
column.
These cells are highlighted and their names appear in the
Destinations
column
in the
Selected Sources and Destinations
area
on the right.
7.
Touch the
Patch Selected
button to make the connection.
The sources and destinations appear in the
A Input
and
Name
columns, re-
spectively (1 in Figure 4-23). The sources and destinations are cleared from the
Selected Sources and Destinations
area (2 in Figure 4-23).
After connecting the 12 mics and the R-1 returns, the Console I/O A and B In-
puts View is shown in Figure 4-23.
1
2
3
4
Summary of Contents for Max Air
Page 11: ...Euphonix Max Air Mixing Console Operation Manual xi Index 183 ...
Page 12: ...Euphonix Max Air Mixing Console Operation Manual xii ...
Page 24: ...Euphonix Max Air Mixing Console Operation Manual Introduction 24 ...
Page 26: ...Euphonix Max Air Mixing Console Operation Manual New Features in Version 1 4 26 ...
Page 44: ...Euphonix Max Air Mixing Console Operation Manual Quickstart to Common Tasks 44 ...
Page 86: ...Euphonix Max Air Mixing Console Operation Manual Touchscreen 86 ...
Page 154: ...Euphonix Max Air Mixing Console Operation Manual Control Groups and Multi Format Masters 154 ...
Page 160: ...Euphonix Max Air Mixing Console Operation Manual Layouts and Snapshots 160 ...
Page 188: ...Euphonix Max Air Mixing Console Operation Manual 188 ...


