


10
Etisalat Travel Router USER GUIDE
Getting Started
Configuring your Router and setting up your
computer
Having physically connected your Router, the next step is to
configure the Router to establish a broadband connection.
Depending on your computers current settings you may first
need to reconfigure the TCP/IP (Network Settings) to access
your Router. Follow the instructions for your operating
system.
Windows Vista computers
1.
In the Windows task bar, click on Start and then click
Control Panel.
2.
Click on Network and Sharing Center. (Classic view only)
3.
Click on Manage Network Connections on the left menu.
4.
Right click on Local Area Connection and click on
Properties
5.
The Local Area Connection dialog box will display a list of
currently installed network items. Ensure that the check
box to the left of the item labelled Internet Protocol
Version 4 (TCP/IPv4) is checked. Select Internet Protocol
Version 4 (TCP/IPv4) and click on Properties.
6.
In the Internet Protocol Version 4 (TCP/IPv4) properties
dialog box, click the radio button labelled Obtain an
IP address automatically. Also click the radio button
labelled Obtain DNS server address automatically.
7.
Click OK twice to confirm your changes and close the
Control Panel.
Windows® XP computers
1.
In the Windows task bar, click the Start button, and then
click Control Panel.
2.
Click on Network & Internet Connections icon. (Category
mode only).
3.
Click the Network Connections icon.
4.
In the LAN or High-Speed Internet window, right-click
on the icon corresponding to your network interface
card (NIC) and select Properties. (Often, this icon is
labeled Local Area Connection).
5.
The Local Area Connection dialog box displays with a
list of currently installed network items. Ensure that
the check box to the left of the item labelled Internet
Protocol (TCP/IP) is checked. Select Internet Protocol
TCP/IP and click on Properties.
6.
In the Internet Protocol (TCP/IP) Properties dialog box,
click the radio button labelled Obtain an IP address
automatically. Also click the radio button labelled
Obtain DNS server address automatically.
7.
Click OK twice to confirm your changes, and close the
Control Panel.
Mac OSX 10.4
1.
Click the Apple icon and choose System Preferences.
2.
Click on the Network icon.
3.
Set Location to Automatic and Show to Built In Ethernet.
4.
Click on the TCP/IP tab.
5.
In the Configure option, choose Use DHCP with automatic
address.
6.
Click on Apply Now.
Setting up your Travel Router
The next step is to establish the broadband connection to
the Internet. Please follow the steps below to configure
your router via the user interface.
1.
Open your web browser (e.g. Internet Explorer/Firefox/
Safari) on your computer or smartphone and navigate to
http://192.168.20.1/
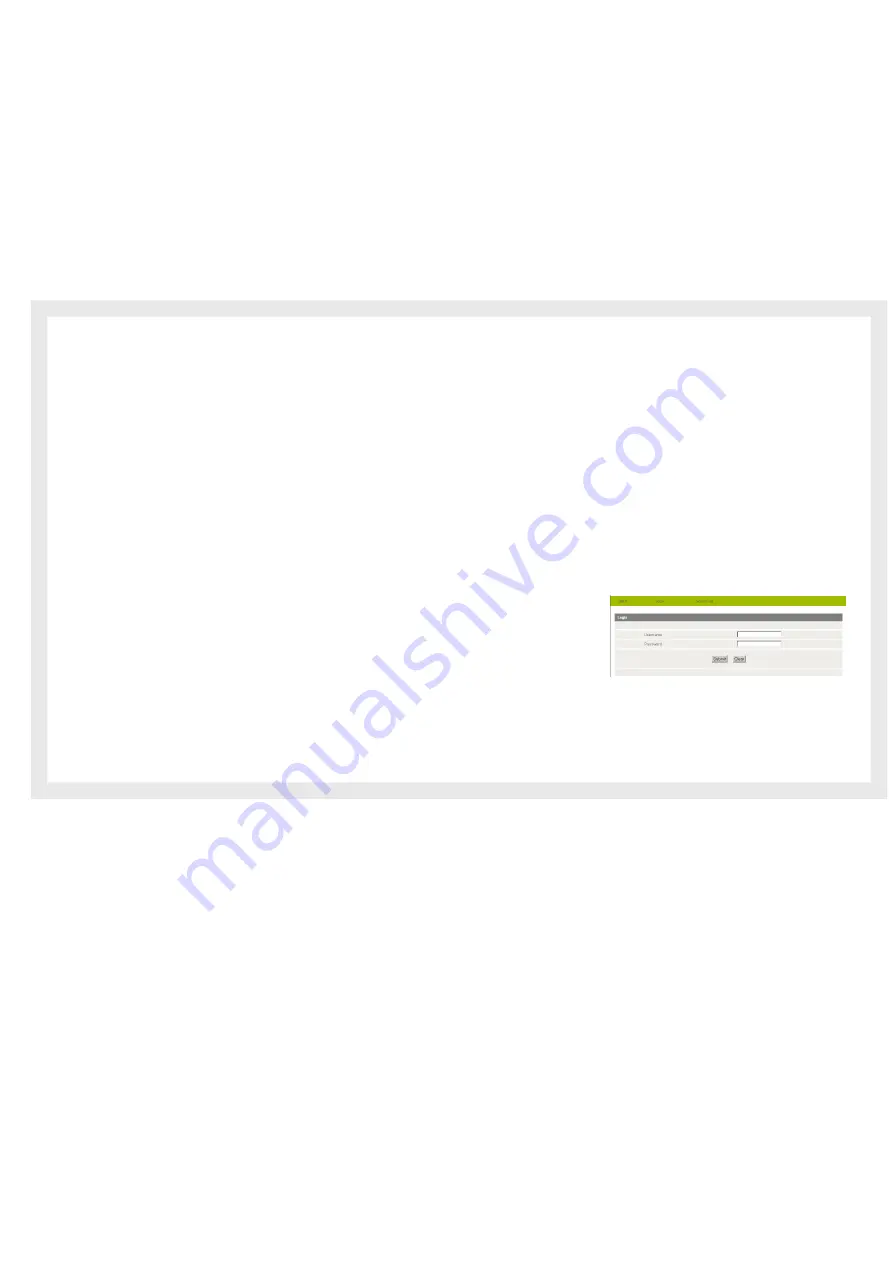
2.
Click Login and type “admin” (without quotes) in the
Username and Password fields. Then click on Submit.
Note:
Admin is the default username and password for the unit.
3.
Set up your WAN connection as follows:
Summary of Contents for Travel Router
Page 1: ...User Guide...
Page 4: ...Placement...
Page 7: ...Getting Started...
Page 12: ...Advanced...
Page 18: ...Wireless...
Page 23: ...Firewall...
Page 27: ...Administration...
Page 31: ...Trouble Shooting...
Page 34: ...Establishing Your Wireless Connection...
Page 38: ...Introduction...


