background image


EZ 1000 Series II Melter Part Manual


Chapter 9 Illustrated Parts List 


©2019 by Crafco, Inc. All Rights Reserved………………...………………………………..……………...Illustrated Parts List 9-75 

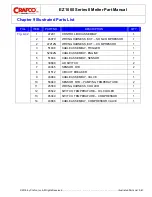
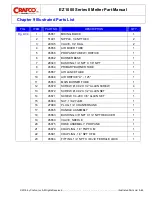
FIG. 

ITEM 

PART NO. 

DESCRIPTION 

QTY. 

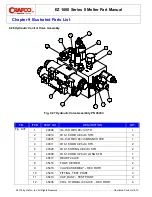
Fig. 9-39


HYDRAULIC TANK TO HYDRAULIC PUMP 


29818 

1 5/8 ORING X 1 5/16 JIC 

16G4H 16G-16FJX 16G-16FJX90S 17.25 

11.75 

HYDRAULIC HOSE 

29820 

1” ORING X 1” JIC 

2


HYDRAULIC PUMP TO HYDRAULIC VALVE 


29842 

¾ ORING X 5/8 JIC ELB. 

8M3K 8G-10FJX 8G-10FJX90S 19.75 

16.25 

HYDRAULIC HOSE 

29805 

5/8 BULKHEAD UNION 

29806 

ALT BULKHD UNION: USE 

IF TUBE NOT USED 

29807 

5/8 NUT 

47618N 

HYDRAULIC TUBE 

8M3K 8G-10FJX90S 8G-10FJX 118.5 

115 

ALT HOSE – USE IF TUBE 

NOT USED 

29805 

5/8 BULKHEAD UNION 

29807 

5/8 NUT 

8M3K 8G-10FJX 8G-8FJX90S 33.75 30.5  HYDRAULIC HOSE 

29897 

½ ORING X ½ JIC 

HYDRAULIC VALVE “AB” TO AGIT MOTOR FRONT PORT 


29919 

1/2 JIC X 3/8 0-RING 

6M3K 6G-6FJX 6G-8FJX90S 31 27.5 

HYDRAULIC HOSE 

46721 

TUBE, HYD. PRESSURE 

22029 

5/8 ORING X 3/8 JIC 

AGIT MOTOR FRONT PORT TO HYDRAULIC VALVE “AA” 


22029 

5/8 ORING X 3/8 JIC 

46722 

TUBE, HYD. RETURN 

6M3K 6G-6FJX 6G-6FJX90S 30.75 27.5  HYDRAULIC HOSE 

40311 

3/8 ORING X ½ JIC 

HYDRAULIC VALVE “PA” TO FLOW CONTROL #1 PORT 


40308 

3/8 ORING X 3/8 JIC 

6M3K 6G-8FJX 6G-6FJX90L 15.75 12.25  HYDRAULIC HOSE 

29896 

½ ORING X ½ JIC ELBOW 

Summary of Contents for Crafco 46200EB

Page 1: ...Parts Manual 26458 Revision Q ...

Page 2: ..._________________ 2nd Hose S N _______________________________ 1st Pump S N _______________________________ 2nd Pump S N ______________________________ Engine S N ________________________________ Compressor S N _____________________________ Gear Box S N Patcher ______________________ Blower S N Magnum ________________________ ...

Page 3: ...to include safety air shut off valve Updated Fig 9 22 parts list item 6 to PN 45614N Updated parts list of Fig 9 36 items 9 and 12 part numbers Updated section 9 16 image and parts list items 2 and 4 part numbers Updated Fig 9 38 and parts list item 3 and 4 part numbers Updated Fig 9 39 Updated Fig 9 40 Updated parts list item 3 and 4 for Fig 9 41 Updated section 5 13 Overnight Heater Use by addin...

Page 4: ...EZ1000 Series II Melter Electric Hose PN 47600EC100 EZ1000 Series II Melter Electric Hose PN 46200EB ...

Page 5: ...EZ1000 Series II Melter Standard Hose PN 47600SC100 EZ1000 Series II Melter Standard Hose PN 46200SB Picture Coming Soon ...

Page 6: ...e Start Up for Electric Hose 5 3 5 3 Machine Start Up for Electric Compressor 5 5 5 4 Altitude Compensation System 46200EB 46200SB Only 5 7 5 5 About the Heated Hose Wand Valve and Tip Guard 5 7 5 6 Electric Hose Care and Cautions 5 8 5 7 Storing the Electric Hose for Transport 5 8 5 8 Machine Start Up for Standard Hose 5 9 5 9 Machine Start Up for Standard Compressor 5 10 5 10 Loading Material in...

Page 7: ...nded Spare Parts 6 7 6 19 Recommended Fluids and Lubricants 6 7 6 20 Applicable Brands of Heat Transfer Oil 6 8 6 21 Typical Heat Transfer Oil Specifications 6 8 6 22 Material Pump Replacement 6 9 6 23 Wand Repair Instructions 6 11 6 24 Cable Replacement 6 11 6 25 Switch Replacement 6 11 6 26 Terminal Block Replacement 6 11 6 27 Wand Handle Replacement 6 12 6 28 Burner Fuel Filter Replacement 6 3 ...

Page 8: ...0 47600SB100 46200EB 46200SB 9 2 9 3 EZ1000 Series II Melter Options 9 8 9 4 Tank Detail 9 15 9 5 Plumbing 9 16 9 6 Control Box Assembly 47202 46200EB 9 18 9 7 Control Box Assembly 47201 46200SB 9 22 9 8 Control Box Assembly 47210 47600EC100 9 26 9 9 Control Box Assembly 47215 47600SC100 9 30 9 10 Engine Assembly Non Compressor 9 34 9 11 Engine Assembly 47600SC100 9 36 9 12 Engine Assembly 47600SC...

Page 9: ...ce 9 64 9 27 Jacketed Pump System 9 66 9 28 Hydraulic Control Valve Assembly 9 70 9 29 Hot Oil Pump and Motor 9 72 9 30 Hydraulic System Diagram for Jacketed Pump Machines with the 23 HP engine 46200EB 46200SB 9 74 9 31 Hydraulic System Diagram for Jacketed Pump Machines with the 42 HP engine 47600EC100 47600SC100 47600ECPA 47600SCPA 9 80 10 0 Tools and Accessories 10 1 ...

Page 10: ...Diesel Burner Schematic 4LE2 Engine 8 8 Fig 8 3 Diesel Burner Schematic 3C Engine 8 13 Fig 8 4 Diesel Burner Electrode Adjustment 8 17 Fig 8 5 Diesel Burner Air Settings 8 17 Fig 8 6 Checking Din Plug Voltage 8 23 Fig 8 7 Mixer Circuit 8 24 Fig 8 8 Hydraulic Valve Pressure Setting 8 26 Fig 8 9 Din Plug Layout 8 27 Fig 8 10 Junction Box Voltage Testing 8 30 Fig 8 11 Hose Circuit Schematic 8 31 Fig ...

Page 11: ...x Assembly 47215 47600SC100 9 32 Fig 9 18 Engine Assembly 46200EB 46200SB 9 34 Fig 9 19 Engine Assembly 47600SC100 9 36 Fig 9 20 Engine Assembly 47600SC 47600EC Air Filter Side 9 38 Fig 9 21 Engine Assembly 47600EC100 9 40 Fig 9 22 Material Flow Control Assembly 9 42 Fig 9 23 Compressor Valve Assembly 9 43 Fig 9 24 Diesel Burner 9 44 Fig 9 25 Material Pump Assembly 9 46 Fig 9 26 Compressor Assembl...

Page 12: ... Pump and Motor Assy Hot Oil 9 72 Fig 9 39 Hydraulic System Diagram non compressor 9 74 Fig 9 40 Hydraulic System Diagram non compressor 9 76 Fig 9 41 Hydraulic System Diagram non compressor 9 78 Fig 9 42 Hydraulic System Diagram compressor 9 80 Fig 9 43 Hydraulic System Diagram compressor 9 82 Fig 9 44 Hydraulic System Diagram compressor 9 84 ...

Page 13: ...Table 5 10 Starting the Burner for Standard Compressor 5 10 Table 5 11 Starting Burner for Standard Compressor continued 5 11 Table 5 12 Loading Material into the Sealant Tank 5 12 Table 5 13 Material Tank Depth Chart 5 13 Table 5 14 Dispensing the Material Electric Hose 5 14 Table 5 15 Dispensing the Material Standard Hose 5 15 Table 5 16 Shutting Down 46200EB 5 16 Table 5 17 Shutting Down 47600E...

Page 14: ...ble 8 11 Burner Electrical Troubleshooting 3C Engine continued 8 11 Table 8 12 Burner Electrical Troubleshooting 3C Engine continued 8 12 Table 8 13 Smoke Coming Out of Exhaust Stack 8 14 Table 8 14 Burner Lights but Shuts Down After 15 Seconds 8 14 Table 8 15 Testing the DC controller 8 15 Table 8 16 Burner Fuel Solenoid Testing 8 15 Table 8 17 Burner Ignition Coil Test 8 16 Table 8 18 Bleeding t...

Page 15: ...Troubleshooting 8 37 Table 8 34 Pump Electrical Troubleshooting continued 8 38 Table 8 35 Pump Electrical Troubleshooting continued 8 39 Table 8 36 Pump Electrical Troubleshooting continued 8 40 Table 8 37 Pump Hydraulic Troubleshooting 8 41 Table 8 38 Engine DTC Table PN 47600EC100 47600SC100 8 42 Table 8 39 Engine DTC Table PN 47600EC100 47600SC100 Continued 8 43 Table 8 40 Engine DTC Table PN 4...

Page 16: ......

Page 17: ...tructed in this manual Maintain your machine regularly as stated in this manual 1 1 How to use this manual This manual is formatted to start each new chapter on the right page There may be a blank page on the left page if the previous chapter ends on the right page If you are viewing this in a digital format PDF the following features are available 1 The Table of Contents List of Tables and List o...

Page 18: ......

Page 19: ...m all moving parts 2 3 Equipment or Operational Safety Do not operate the machine in buildings or work areas that do not have sufficient airflow Shut down the burner and the engine before refilling the fuel tank Make sure mixer stops before adding solid material to the sealant tank Lift the lid place the material on the lid and close the lid The mixer should restart automatically Always keep a cor...

Page 20: ...1 All Crafco Inc Equipment Using a Diesel Engine 2 4 2 WARNING Cancer and Reproductive Harm www P65Warnings ca gov 26471N WARNING Breathing diesel engine exhaust exposes you to chemicals known to the State of California to cause cancer and birth defects or other reproductive harm Always start and operate the engine in a well ventilated area If in an enclosed area vent the exhaust to the outside Do...

Page 21: ...notices The table below includes the most commonly used symbols and notices Symbol Item Remarks WARNING Warning Refers to possible bodily injury or death CAUTION Caution Refers to possible equipment damage or operational malfunction Severe Burn Hazard Hot material can cause severe burns Protective Shoes Wear hard soled work shoes Protective Gloves Wear heat resistant gloves Protective Face or Eye ...

Page 22: ...rved Safety 2 4 Symbol Item Remark Crush Hazard Keep feet and legs clear Pinch Hazard Keep hands and feet clear Exhaust Hazard Avoid breathing engine exhaust Read Manual Read and understand operator and safety manuals before operating machine Table 2 2 Safety Symbols and Notices continued ...

Page 23: ...been damaged by accident alteration abuse improper lubrication maintenance normal wear or other cause beyond our control The warranty provided herein extends only to the repair and or replacement of those components on the equipment covered above and does not cover labor costs The warranty does not extend to incidental or consequential damages incurred as a result of any defect covered by this war...

Page 24: ...f desired Note All engine warranties are covered through the engine manufacture If you need information for a distributor in your area please contact us and we will direct you to the closest engine distributor All parts returned are tested and evaluated If the part has been modified in anyway without prior consent from a Crafco Inc representative warranty is void Please follow the instructions sta...

Page 25: ...air thermostatic control Engine Isuzu diesel Three cylinder Model 3CH1 21 2 BHP 3000 RPM Four cylinder Model 4LE2T 48 0 BHP 2350 RPM Four cylinder Model 4LE2T 48 0 BHP 2350 RPM Drive Mechanism All hydraulic with infinite speed forward and reverse on material pump Fixed speed agitator Mixer Full sweep mixer with 2 horizontal paddles vertical risers Axle Capacity Dual 5 200lbs 2 358 7 kg Tires ST225...

Page 26: ......

Page 27: ...on the dipstick There are two other full marks representing 0 F 17 8 C and 150 F 65 6 C See Fig 5 2 Dipstick The oil level changes with temperature due to expansion and contraction DO NOT overfill or spillage may occur when the oil is heated and expands See Fig 5 3 Heat Transfer Oil Dipstick 5 Make sure all toggle switches are turned OFF and all temperature control dials are set to their minimum s...

Page 28: ...ructions 2019 by Crafco Inc All Rights Reserved Operating Instructions 5 2 Fig 5 1 Hydraulic Fluid Level and Temp Gauge Fig 5 2 Dipstick Fig 5 3 Heat Transfer Oil Dipstick Dipstick for Heat Transfer Oil Level at 0 F Level at 70 F Level at 150 F Bottom of Dipstick ...

Page 29: ...tant The solid material in the tank melts first around the walls bottom and around the center tower of the tank The material temperature sensor is located by the wall therefore it is possible that at the beginning of the melting process the indicated temperature reaches operating value but the material between the center tower and the outside wall of the tank is still solid This is normal and when...

Page 30: ...s application temperature open TANK and RECIRCULATION valves 15 Reverse pump for 3 5 minutes by turning the pump toggle switch to PUMP REVERSE When pump turns freely return switch to ON ELECTRIC position 16 Depress wand trigger to recirculate material back into the tank to get material flowing freely through the pump Ensure wand tip is fully inserted into the shoebox with the door closed 17 When a...

Page 31: ...reset burner hold the RESET toggle switch in the DOWN position for 5 seconds then release The burner should ignite If the burner still does not ignite refer to 8 0 1 Symptoms Burner will Not Ignite to determine the malfunction Important The solid material in the tank melts first around the walls bottom and around the center tower of the tank The material temperature sensor is located by the wall t...

Page 32: ...lication temperature open TANK and RECIRCULATION valves 14 Reverse pump for 3 5 minutes by turning the pump toggle switch to PUMP REVERSE When pump turns freely return switch to ON ELECTRIC position 15 Depress wand trigger to recirculate material back into the tank to get material flowing freely through the pump Ensure wand tip is fully inserted into the shoebox with the door closed 16 When applic...

Page 33: ...tor The pistol grip actuator is equipped with an electric switch which when depressed sends a signal to actuate the pump The wand is equipped with a trigger lock to prevent accidental pump actuation when it is not pumping material The trigger must be in the LOCKED position at all times except when intentionally pumping material The Valve The wand has a disposable duckbill valve on the end which sh...

Page 34: ...ank Crafco Inc recommends you do not work directly under the boom this may cause damage to the hose 4 Follow all machine instructions in this manual CAUTION Hose damage occurs if The hose is bent or moved when cold The hose is twisted or bent at a sharp radius The hose is moved before being heated a minimum of 30 minutes and set at 380 F The operator crosses over or under the hose causing the wire...

Page 35: ...ll therefore it is possible that at the beginning of the melting process the indicated temperature reaches operating value but the material between the center tower and the outside wall of the tank is still solid This is normal and when the heated hose is ready for operation most of the material in the tank will be melted and heated to the proper application temperature 7 Allow the heat transfer o...

Page 36: ...PLICATOR VALVE close RECIRCULATION VALVE 5 9 Machine Start Up for Standard Compressor Step Action 1 Fully open the exhaust stack 2 Turn the key to the ON position Allow engine controller to boot up 2a To start engine press Auto then RUN Engine will preheat then start The engine will start and run at 1000 RPM for 30 seconds then the RPM will increase to medium RPM When the material temperature reac...

Page 37: ...ger Note Mixer speed is preset at the factory and cannot be adjusted The mixer cannot be engaged until the material reaches 275 F 135 C CAUTION Jamming the mixer can cause the hydraulic oil to overheat and damage the machine 9 The pump light will come ON when the material temperature reaches 275 F 135 C indicating the temperature interlock will allow material pump operation NOTE Hose temperature d...

Page 38: ...ents hot material from getting on operators and causing severe burns Never throw blocks of material directly into tank Hot material splash hazard will result 1 To load material into the sealant tank first open the lid 2 Place the solid material on the lid then close the lid 3 Continue adding solid material at intervals to allow the mixer to rotate without jamming Note If blocks of solid material a...

Page 39: ... 749 21 8 74 00 280 12 188 37 713 06 9 83 25 315 14 178 84 676 98 10 92 50 350 15 169 54 641 78 11 102 00 386 11 160 25 606 61 12 111 00 420 18 150 95 571 41 13 120 50 456 14 141 65 536 20 14 129 75 491 16 132 36 501 04 15 139 00 526 17 123 06 465 83 16 148 25 561 19 113 76 430 63 17 157 75 597 15 104 47 395 46 18 167 00 632 16 95 17 360 26 19 176 25 667 18 85 87 325 05 20 185 75 703 14 76 57 289 ...

Page 40: ... the lowest setting by turning the speed control knob fully clockwise 3 Insert the wand tip into the shoebox depress trigger on the wand and slowly increase pump speed until the pump motor starts to turn 4 Adjust the pump speed for the desired flow rate for the application The rate of flow may be varied while the pump is running CAUTION Never open flow control more than 2 full turns when using an ...

Page 41: ...4 Open recirculation valve to get the desired flow rate 5 This method of operation will give maximum pump life If the sealant does not flow from the applicator wand close hand wand valve and place hose and wand back into the oven to allow the sealant to become more liquid and then repeat procedure 6 Once sealant is flowing freely reverse pump and install desired sealing tip or disk and you are rea...

Page 42: ...tch to the OFF position 7 Stop the engine by turning the key to the OFF position Step Action 1 Leaving the hose in the boom swing the boom clockwise towards the front of the machine and lock the boom into position with the latch provided CAUTION DO NOT kink or twist the hose or permanent damage may result 2 Place the wand in the wand holder and lock the wand into position with the latch provided 3...

Page 43: ...OFF position IMPORTANT Ensure the hose is not touching the tank wall or plumbing Step Action 1 Close recirculation valve and reverse the pump for approximately 3 minutes 1a Remove wand from hose and wrap hose up in oven while reversing the pump 2 Close the APPLICATOR VALVE 3 Open recirculation valve Close the TANK VALVE 4 Turn Off pump reverse switch 5 Turn the mixer toggle switch to the OFF posit...

Page 44: ...own suitable extension cord 2 Attach each extension cord to its own outlet rated for 15 amps minimum CAUTION Certain machines may have 2 overnight heaters depending on the size of the material tank Attaching both heaters to the same outlet will most likely pop the circuit breaker inline from the power source Combining both heaters together will draw too much amperage for most common 15 amp circuit...

Page 45: ...ard warm the heat transfer oil to 300 F 149 C for two to three hours to evaporate the moisture Failure to follow this procedure will cause the heat transfer oil to overflow the tank resulting in possible machine damage and or personal injury Best practice is to check in the material tank prior to starting the burner If water is present try and remove as much as possible heat the material to 300 F ...

Page 46: ...beled compressor The compressor is operated hydraulically and runs continuously When air is not being discharged the compressor automatically closes the intake valve and goes into an idle state which takes less energy to operate but still maintains the RPM There is an internal air leak at the air muffler that provides lubrication of the compressor Do not replace the air muffler with aftermarket pa...

Page 47: ...esult in damage and possible fire WARNING Mount the machine a minimum of 3 76mm above the truck bed Depending on the machine and airflow you may have to mount it higher to prevent excessive temperatures on the machine and truck bed 1 Mount with four diameter Grade 5 bolts or 12mm Grade 10 9 minimum using the loading tubes at each corner of the machine to secure it in place WARNING Leave 15 381mm c...

Page 48: ......

Page 49: ... B Oil filter service kit 45328B 10 000 Hrs Maintenance Kit C Separator Service Kit 45328C 6 3 Hydraulic System Check hydraulic fluid daily See Table 5 1 Preparing the Machine for Start Up Step 3 Change hydraulic filter every 250 hours of machine operation Replace if necessary Change hydraulic fluid every 500 hours of operation 6 4 Heat Transfer Oil Check the oil level at the start of every day Se...

Page 50: ...ggered 180 apart Each ring should be seated firmly before the next ring is installed The packing gland nuts should first be evenly tightened with a wrench to seat the packing firmly in the stuffing box and against the shaft DO NOT over tighten the packing The gland nuts should then be backed off until finger tight Follow adjusting pump packing at the beginning of this section 6 8 Lug Nuts Torque a...

Page 51: ...OPERATION 6 13 Cleaning Material Tank and Sensor Area The material tank needs to be cleaned every year or as needed for proper operation As the machine is used material builds up around the tank walls and sensor guard The built up material prevents heat from getting to the fresh material and causes longer heat up times The built up material will also prevent the material temperature sensor from re...

Page 52: ... dirt or the restriction indicator is still high after servicing the primary filter then the safety filter needs to be changed Other engine maintenance Refer to the manufacturer s operating and maintenance instructions for the engine Material Sensor Tube Check for HTO fluid X Add As needed Heat Transfer Oil Check X Change X Hydraulic Oil Check X Change X Hydraulic Oil Filter Change X Burner Check ...

Page 53: ... repairs to prevent costly downtime See Table 6 5 Recommended Spare Parts 3 Make necessary adjustments and tighten all loose nuts or screws 4 Watch for leaks Tighten fittings or repair as necessary 5 Clean the external surfaces of the machine at regular intervals Note Refer to the material manufacturer s instructions for recommendations 6 Follow the recommended maintenance per Table 6 2 Maintenanc...

Page 54: ...00 47176N 1 Engine Fuel Filter 47600EC100 47600SC100 47167N 1 Engine Oil Filter 46200EB 46200SB 45389 1 Engine Oil Filter 47600EC100 47600SC100 47168N 1 Engine Air Filter 46200EB 46200SB 45391 1 Engine Air Filter 47600EC100 47600SC100 47169N 1 Engine Safety Air Filter 47600EC100 47600SC100 47186N 1 Nozzle Burner All 41881 1 Packing Material Pump All 29990S 1 Hydraulic Oil Filter All 45438 Table 6 ...

Page 55: ...cation Recommended Full Point Machine No Fuel Diesel 1 Cold climate Diesel 2 Warm Climate 30 Gals 136 4 l All Models Engine Oil Refer to engine manual 3 Qt 46200EB 46200SB 2 75 gal 10 4 l 47600EC100 47600SC100 Engine Antifreeze Shell Dexcool ELC AF C Ref Manual All Models Hydraulic Oil Shell AW Hydraulic 46 24 Gals 109 1 l All Models Heat Transfer Oil Shell Turbo T 68 Group II Table 6 7 Applicable...

Page 56: ...sfer Oil 3 Shell Turbo T 68 Group II Phillips 66 Magnus Oil 68 Shell Turbo T 68 Group II CAUTION The heat transfer oil in this machine is a grade that has been tested and recommended by Crafco Inc Using a grade of oil not specifically recommended by Crafco Inc is cause for warranties to be voided All oils subjected to high temperatures deteriorate with time and lose many of their characteristics T...

Page 57: ...bly into new pump 10 Install material pump in heat compartment Flange gasket P N 29060 will also need to be installed at this time using 8 3 8 16 x 1 bolts 2 flat washers per bolt 1 on each side of flange lock washer and hex nuts Use 4 1 2 13 x 1 3 4 bolts flat washer lock washer and hex nuts to attach pump to pump base Leave all hardware loose until everything is installed 11 Install double elbow...

Page 58: ... Series II Melter Part Manual Chapter 6 Maintenance Instructions 2019 by Crafco Inc All Rights Reserved Maintenance Instructions 6 10 Step 5 Step 3 Step 7 Step 8 Step 4 Step 6 Fig 6 3 Material Pump Replacement ...

Page 59: ...tall Note white black wire is routed under switch see Fig 6 6 Wire Routing on open terminals of terminal block Make sure to install completely under the clamp before tightening screws Torque screws to 16 in lbs Bend all 3 wires over the top of terminal block see Fig 6 5 Terminal Block Wiring 10 Replace top wand handle half 11 Use blue Locktite on all external handle screws before installation Inst...

Page 60: ...in and spring 3 Remove 2 4 40 x 1 2 pan head screws from switch then remove switch from handle 4 Remove 2 10 32 x 5 8 round head machine screw from terminal block then remove terminal block from handle 5 Flip wand over and remove the remaining 2 1 4 20 x 1 2 screws from the handle Remove handle from wand tube 6 Install new handle by reversing previous steps Fig 6 4 Switch Wire Location Fig 6 5 Ter...

Page 61: ...t Manual Chapter 6 Maintenance Instructions 2019 by Crafco Inc All Rights Reserved Maintenance Instructions 6 2 Fig 6 7 Actuator Spring Location Fig 6 8 Actuator Trigger Assembly Switch lever location Spring location Pin location ...

Page 62: ... 3 Close the ball valve that is located inline before the burner fuel filter assembly 4 Unscrew the filter from the assembly using an oil filter or strap style wrench 5 Screw the new filter into place and tighten by hand 6 Open the ball valve to allow fuel to flow 7 Turn on the power key and turn on the main power switch The burner should self prime and start It may take a couple cycles to fill th...

Page 63: ...m you are checking has a ground wire attached then use that ground or you can use a non painted surface on the frame 7 2 Checking AC Voltage with Multimeter Connect the probes to the meter See Fig 7 1 Standard Multimeter Set range to a position that includes 24 volts or higher There are three steps to test the generator voltage All 3 values should be in the range of 24 30 volts AC Touch red probe ...

Page 64: ...ric hose always use a clamp on amp meter See Fig 7 2 Clamp On Amp Meter Multimeter The amperage in the hose can reach as high as 35 amps Clamp the meter around one wire at a time Remember most clamp on meters do not work on DC current Fig 7 1 Standard Multimeter Ohms Ω Sensors Hyd Coils Burner Ignition Coils Use these ports Do not use the fuse port it is for amps Audible Continuity Hose wand and w...

Page 65: ... Crafco Inc All Rights Reserved How to Use a Multimeter 7 3 Fig 7 2 Clamp On Amp Meter Multimeter Ohms Ω Sensors Hyd Coils Burner Ignition Coil Audible Continuity Hose Wand and wire connection DC Voltage Everything except Generator AC Voltage Generator Output AC Amps Hose Current ...

Page 66: ......

Page 67: ... Step 4 4 Is the BURNER LOCKOUT Alarm sounding Yes hold BURNER RESET switch down for 5 seconds No go to Step 5 5 Are both the Material and Hot Oil temperature dials set above the current temperatures Yes go to Step 6 No set the Material temperature according to the type of material you are using and the Hot Oil 100 F above the Material set point 6 Does either readout display a 1 NOTE This occurs o...

Page 68: ...ack wire on the relay Yes check for poor connection or broken wire between the burner relay in the control box and the plug on the burner No go to Step 1b 1b Is there 12Vdc between the WHT RED wire on the burner relay in the control box and the black wire on the relay Yes go to Step 1c No check for poor connection or broken wire between the burner relay in the control box and the burner reset swit...

Page 69: ...to Step 5 5 Is there 12Vdc between gray wire labeled GRY 2 and nearby ground source Yes replace terminal block No go to Step 5a 5a Is there 12Vdc between terminal 7 gray wire and terminal 5 black wire of the hot oil PAKSTAT Yes check for loose or broken wires between terminal block and terminal 7 of the hot oil PAKSTAT No go to Step 5b 5b Is there 12Vdc between terminal 6 gray wire and terminal 5 ...

Page 70: ...l block No go to Step 8a 8a Is there 12Vdc between orange wire labeled ORN 2 on upper terminal blocks and a nearby ground source black wire Yes replace terminal block No go to Step 9 9 Is there 12Vdc between terminal 3 orange wire and terminal 5 black wire on hot oil PAKSTAT Yes check for loose or broken wires between terminal 3 of the hot oil PAKSTAT and terminal block No go to Step10 10 Is there...

Page 71: ...ween ACC of ignition switch and bottom terminal of circuit breaker No go to Step 13a 13a Is there 12Vdc between B blue wire of ignition switch and nearby ground source black wire Yes replace ignition switch No go to Step 14 14 Is there 12Vdc between blue wire on starter solenoid and nearby ground source black wire or bare metal on engine case Yes check for loose or broken wire between starter sole...

Page 72: ...erminal 9 of the material PAKSTAT and terminal block No go to Step 8a 8a Is there 12Vdc between orange wire labeled ORN 2 on upper terminal blocks and a nearby ground source black wire Yes replace terminal block No go to Step 9 9 Is there 12Vdc between terminal 3 orange wire and terminal 5 black wire on hot oil PAKSTAT Yes check for loose or broken wires between terminal 3 of the hot oil PAKSTAT a...

Page 73: ...nd bottom terminal red wire of main power switch No go to Step 12c 12c Is there 12Vdc between bottom terminal of circuit breaker red wire and nearby ground source black wire Yes replace circuit breaker No go to Step 13 13 Is there 12Vdc between white wire next to 15A fuse in the ECM panel and nearby ground source black wire Yes check for loose or broken wires between ECM and bottom terminal of cir...

Page 74: ... 15 BLK 16 WHT BLK ORN 2 BLK 5 GRY 3 GRY 2 WHT GRN 1 WHT GRN 2 HOSE 51691 MATERIAL 51672 51836 52342N 51834 43984 HOT OIL 43391 MAT L HOSE BLK 16 ORN 2 BRN 16GA TO ENG CTRL YEL 1 RED 2 BRN ALARM RED 3 RED 3 ORN 2 ORN 2 WHTRED 3 RED 1 RED 3 RED 3 13 19 RED 6 ENGINECONTROLLER BLK GND BLK ENG RED 10 WHT RED 3 YEL 1 BLK 17 TAN ENG RED 2 RED 6 Detail View A A RED 1 GRN TRG RED TRG RED BLK 2 RED BLK 2 W...

Page 75: ...ker of the frame solenoid and the ground wire attached to the mounting bolt Yes replace frame solenoid No go to step 2 2 Is there 12Vdc between the circuit breaker red wire going to frame solenoid located under the battery and the ground lug on the battery tray Yes check for loose or broken wires between circuit breaker and frame solenoid No go to Step 2a 2a Is there 12Vdc between the circuit brea...

Page 76: ...etween gray wire labeled GRY 2 on terminal block lower right hand corner and nearby ground source Yes replace terminal block No go to Step 5a 5a Is there 12Vdc between terminal 7 gray wire and terminal 5 black wire of the hot oil PAKSTAT Yes check for loose or broken wires between terminal block and terminal 7 of the hot oil PAKSTAT No go to Step 5b 5b Is there 12Vdc between terminal 6 gray wire a...

Page 77: ...nd terminal block No go to Step 8a 8a Is there 12Vdc between orange wire labeled ORN 2 on the terminal block left side middle and a nearby ground source black wire Yes replace terminal block No go to Step 9 9 Is there 12Vdc between terminal 3 orange wire and terminal 5 black wire on hot oil PAKSTAT Yes check for loose or broken wires between terminal 3 of the hot oil PAKSTAT and terminal block No ...

Page 78: ...en ACC of ignition switch and bottom terminal of circuit breaker No go to Step 13a 13a Is there 12Vdc between B blue wire of ignition switch and nearby ground source black wire Yes replace ignition switch No go to Step 14 14 Is there 12Vdc between blue wire on starter solenoid and nearby ground source black wire or bare metal on engine case Yes check for loose or broken wire between starter soleno...

Page 79: ...WHT GRN 1 WHT GRN 2 HOSE 51691 MATERIAL 51672 51836 52339 51834 43984 HOT OIL 43391 MAT L HOSE ORN 2 RED BLK 3 BLK 11 WHT 3 BLK 12 WHT 4 BLK 6 PNK 4 PNK 3 BRN ALARM WHT RED Soln GRN ENABLE BLK GND WHT GRN 4 WHT GRN 5 WHT BLK WHT BLK RED BLK 3 PRP 3 WHT RED SOLN RED 2 BRN ALARM ORN 2 ORN 2 WHTRED 3 RED ENG PLUG RED 3 RED 3 BURNER PLUG RED 12vdc 12 GA BATTERY 12vdc 14 GA 14 GA GROUND GRN BRNR WHT RE...

Page 80: ...in the correct position Loosen the clamp holding the electrodes in place so they can be adjusted Inspect the porcelain ceramic insulator for any cracks Also check the tip of each of the electrodes to make sure they still have a sharp point and are not rounded off 5 If it has been longer than 500 hours since the last time the burner nozzle was replaced Crafco recommends replacing the burner nozzle ...

Page 81: ...ll the time Blue Igniter wire should have 12Vdc 5 Twist the yellow wires together once voltage registers on the orange blue and purple wires Orange Blower Motor wire should maintain 12Vdc Blue Igniter wire should lose voltage after 15 seconds Purple Valve wire should maintain 12Vdc 6 If any of the above tests fail replace the DC Controller 8 0 5 Burner Fuel solenoid Testing Step Fuel Solenoid Test...

Page 82: ...he Diesel Burner 1 Place an oil pan under the machine in front of the burner 2 Using a 3 8 wrench loosen the bleeder valve on the fuel pump refer to Fig 8 5 Diesel Burner Air Settings for bleeder location See note below if compressor unit 3 Turn the ignition key to the ON position then turn the power toggle switch to the ON position Fuel should flow out of the bleeder valve You want the fuel to be...

Page 83: ... FUEL PRESSURE GAUGE KIT BLEEDER NOZZLE LINE NUT COPPER FUEL LINE NUT AIR SHUTTER SCREW IGNITION COIL LOCKING TAB FUEL PRESSURE ADJUSTMENT SCREW FUEL PRESSURE GAUGE AIR BAND AIR SETTING AIR SHUTTER AIR BAND SCREW Fig 8 4 Diesel Burner Electrode Adjustment Fig 8 5 Diesel Burner Air Settings Air Shutter 8 Air Band 0 Fuel Pressure 140 PSI Adjustment Plate 3 ...

Page 84: ...this built up material Remove as much as possible all around the tank including the roof of the material tank Remove all the old sealant chunks from the bottom of the material tank This should be done every year or as conditions require 3 Check your level of the heat transfer oil there are 3 marks on the dipstick is for 0 70 F 150 These temperatures represent the temperature of the heat transfer o...

Page 85: ...h to the Reverse position Is the agitator moving Yes allow mixer to reverse for 15 seconds and then move the Mixer toggle switch to the Forward position Go to Step 6 No go to Table 8 21 Mixer Electrical Troubleshooting 6 Open the Material loading door Are there several unmelted blocks in the tank Yes this may cause the agitator to jam Use the mixer toggle switch to move the agitator forward and ba...

Page 86: ...le switch bottom post brown wire and nearby ground wire black wire With the Mixer toggle switch in the Forward position See Fig 8 7 Mixer Circuit Yes replace din plug No go to Step 2a 2a Is there 12Vdc between the Mixer toggle switch center post red wire and nearby ground source black wire Yes replace mixer toggle switch No go to step 2b 2b Is there 12Vdc at the lower terminal block red wire label...

Page 87: ... two terminal blocks No go to step 4a 4a Is there 12Vdc between the Material PAKSTAT terminal 2 pink wire and terminal 8 black ground wire Refer to Fig 8 7 Mixer Circuit Yes check for loose connections or broken wires between PAKSTAT terminal 2 and terminal block No go to Step 4b 4b Is there 12Vdc between the Material PAKSTAT terminal 1 orange wire and terminal 8 black ground wire Yes replace the ...

Page 88: ...ires between circuit breaker and toggle switch No go to step 8a 8a Is there 12Vdc between the bottom terminal of circuit breaker red wire labeled RED 2 and nearby ground source black wire Yes replace circuit breaker No go to step 9 9 Is there 12Vdc between ignition switch ACC terminal and nearby ground source black wire Yes check for loose connections or broken wires between ACC terminal and circu...

Page 89: ...EZ 1000 Series II Melter Part Manual Chapter 8 Troubleshooting 2019 by Crafco Inc All Rights Reserved Troubleshooting 8 23 Fig 8 6 Checking Din Plug Voltage ...

Page 90: ...MIXER REV 3 BLU MIXER 3 BLU MIXER 4 BRN MIXER FWD 4 RED LID P S ORN 2 YLW 5 RED BLK 4 RED 1 PRP 3 BLK 7 BLK 2 GREEN 6 GRN TRG RED TRG RED BLK 2 RED BLK 2 BRN ALARM WHT RED Soln GRN ENABLE BLK GND BLU GEN WHT COMP WHT RED 4 RED LID RED LID WHT GRN 4 WHT GRN 5 WHT BLK WHT BLK BRN MIXER FWD 4 BLU MIXER FWD 4 BRN MIXER REV 3 BLU MIXER REV 3 RED 9 RED 2 RED 3 ORN 2 RED ENG PLUG RED 3 RED 3 LID SWITCH D...

Page 91: ... box move the Mixer toggle switch to the Forward position and read the pressure gauge If the pressure needs to be adjusted use the pressure relief valve labeled RVA loosen the jam nut and adjust the pressure with the allen screw at the end of the relief Turn clockwise to increase pressure and counter clockwise to decrease pressure then tighten the jam nut to lock the pressure Next turn OFF the Isu...

Page 92: ...ief Set 1000 PSI RVA Agitator Pressure Relief Set 1500 PSI RVHO Hot Oil Pump Pressure Relief Set 800 PSI Jam Nut Allen Screw Fig 8 8 Hydraulic Valve Pressure Setting Agitation Direction Counterclockwise Hydraulic Flow EB SB 10 8 GPM 2400 RPM Hydraulic Flow EC SC 7 94 GPM 2350 RPM Hydraulic Flow EC SC 22 8 GPM 2350 RPM Compressor Relief 2500 PSI ...

Page 93: ... II Melter Part Manual Chapter 8 Troubleshooting 2019 by Crafco Inc All Rights Reserved Troubleshooting 8 27 Mixer Forward Mixer Reverse Pump Reverse Pump Forward Mounting Plate Mounting Tube Fig 8 9 Din Plug Layout ...

Page 94: ...ing NOTE Use Fig 8 11 Hose Circuit Schematic while troubleshooting the hose electrical system Step Possible Cause If 1 Is there 12Vdc between BATT terminal of the generator and a nearby ground source lug on battery tray Yes go to Step 2 No go to Step 6 2 Is there 24Vac between the white green and black wires NOTE Do this test inside the junction box Check between black and white black and green an...

Page 95: ... Inc to send back the hose for repair 4 Check for continuity in the wand between D E and A NOTE Check between D and E D and A and A and E Yes go to Step 5 No this wand needs to be repaired or replaced Contact Crafco Inc to send back the wand for repair 5 Is there 12Vdc between wire labeled BLU GEN on the upper terminal block and nearby ground source black wire Yes check for loose or broken connect...

Page 96: ...nd source Yes replace Hose Selector switch No go to Step 9 9 Is there 12Vdc between pink wire labeled PNK 3 on the upper terminal block and a nearby ground source black wire Yes check for loose or broken wire between terminal block and hose selector switch No go to Step 9a 9a Is there 12Vdc between pink wire labeled PNK 2 on upper terminal block and nearby ground source black wire Yes replace term...

Page 97: ...N 2 BLK 5 GRY 3 GRY 2 WHT GRN 1 WHT GRN 2 HOSE 51691 MATERIAL 51672 51836 52339 51834 43984 HOT OIL 43391 MAT L HOSE BLK 12 BLK 11 WHT 3 WHT 2 BLK 10 WHT BLK ORN 2 BLK 11 WHT 3 BLK 12 WHT 4 BLU GEN BRN TO ENG CTRL PNK 4 PNK 3 BLK GND BLU GEN WHT BLK WHT BLK RED 2 ORN 2 ORN 2 WHTRED 3 RED ENG PLUG RED 3 RED 3 RTD Sensor 1 08K Ohms 70 F 24 Vac 3 Phase 30 35 Amps Cold 20 24 Amps Hot 12 Vdc 5 7 Amps B...

Page 98: ...ting 8 32 HEATER BLACK HEATER WHITE HEATER GREEN SENSOR WHITE SENSOR BLACK TRIGGER GREEN TRIGGER RED HEATER BLUE TRIGGER RED TRIGGER RED SENSOR BLACK SENSOR WHITE HEATER BLUE HEATER BLUE TRIGGER RED TRIGGER RED C B HEAT ELEM BLUE HEAT ELEM BLUE HEAT ELEM BLUE E D A KETTLE END WAND END Fig 8 12 Junction Box Wiring ...

Page 99: ...ock and the trigger depressed to perform this test Yes go to Table 8 32 Basic Visual Pump Troubleshooting No go to Step 2 2 Disconnect the electrical connector between the hose and wand check for continuity between C and B wand side Yes this hose needs to be repaired or replaced Contact Crafco Inc to send back the hose for repair No this wand needs to be repaired or replaced Go to Wand Repair Inst...

Page 100: ...108 1 1110 3 1112 4 1114 6 1116 7 1118 9 1121 0 1123 2 90 1125 3 1127 5 1129 6 1131 8 1133 9 1136 1 1138 2 1140 4 1142 5 1144 7 100 1146 8 1149 0 1151 1 1153 2 1155 4 1157 5 1159 7 1161 8 1164 0 1166 1 110 1168 3 1170 4 1172 5 1174 7 1176 9 1179 0 1181 1 1183 3 1185 4 1187 5 120 1189 7 1191 8 1194 0 1196 1 1198 2 1200 4 1202 5 1204 6 1206 8 1208 9 130 1211 0 1213 2 1215 3 1217 5 1219 6 1221 7 1223...

Page 101: ...5 1764 5 1766 6 1768 6 1770 6 1772 7 400 1774 7 1776 8 1778 8 1780 8 1782 9 1784 9 1786 9 1789 0 1791 0 1793 1 410 1795 1 1797 1 1799 2 1801 2 1803 2 1805 3 1807 3 1809 3 1811 4 1813 4 420 1815 4 1817 5 1819 5 1821 5 1823 6 1825 6 1827 6 1829 6 1831 7 1833 7 430 1835 7 1837 8 1839 8 1841 8 1843 8 1845 9 1847 9 1849 9 1851 9 1854 0 440 1856 0 1858 0 1860 0 1862 1 1864 1 1866 1 1868 1 1870 2 1872 2 ...

Page 102: ...al pump shaft coupler Is it spinning clockwise Yes shut down machine and look for a plug in the plumbing No adjust the material flow control to increase the flow Still no go to Step 5 5 Inside the control box and under the front panel find the relay cube for the pump It is found near the middle left hand side of the box It is a clear yellow cube with a green button facing the top of the control bo...

Page 103: ...ep 10 for an Electric Hose No for a Standard Hose is normal because this circuit is not used 2a Is there 12Vdc between green wire labeled TRIGGER GRN in junction box and nearby ground source NOTE Wand trigger must be actuated during this test Yes go to Step 3 No see Table 8 29 Trigger is not Working 3 Is there 12Vdc between green wire on terminal 14 of pump relay and black wire terminal 13 pump re...

Page 104: ...een red wire labeled RED 4 upper terminal block and nearby ground source black wire Yes replace terminal block No go to Table 8 23 Mixer Electrical Troubleshooting continued steps 9 10a 7 Is there 12Vdc between red wire labeled RED 9 on top right hand terminal of pump switch and a nearby ground source Yes check for loose or broken wire between pump switch and pump relay No go to Step 7a 7a Is ther...

Page 105: ...es check for loose or broken wire between PAKSTAT and terminal block NOTE This wire has a diode that could be bad and cause an open circuit No go to Step 12a 12a Is there 12Vdc between pink wire on terminal 1 of hose PAKSTAT and terminal 8 black ground wire Yes replace the hose PAKSTAT No go to Step 13 13 Is there 12Vdc between pink wire labeled PNK 1 upper terminal blocks and nearby ground source...

Page 106: ...T BLK RED 8 ORN 2 BLK 5 HOSE 51691 MATERIAL 51672 51836 51834 43984 HOT OIL 43391 MAT L HOSE BLU PMP RED 8 BRN 3 BLK 16 RED BLK 3 RED BLK 3 BLK 12 BLK 11 WHT 3 WHT 2 BLK 10 WHT BLK RED BLK 2 RED BLK 2 PMP REV 1 PMP FWD 2 BRN PUMP REV 1 RED LID P S BRN PUMP FWD 2 ORN 2 BLK 11 BLK 12 WHT 4 BLU GEN RED 8 PNK 4 PNK 3 GRN TRG RED TRG RED BLK 2 RED BLK 2 BLK GND RED LID RED LID BRN PMP REV 1 BLU PMP REV...

Page 107: ...mp hydraulic motor cap off the fitting on the motor and use a 3000 PSI gauge with the proper JIC fitting attach it to the hose Start the Isuzu engine turn ON the main power in the control box pull the wand trigger and read the pressure gauge If the pressure needs to be adjusted use the pressure relief valve marked RVP loosen the jam nut and adjust the pressure with the allen screw at the end of th...

Page 108: ...ase go here http www isuzuengines com network or call 734 582 9470 and they can help you locate your closest repair center To use the table find the SPN and FMI from the control panel screen and match it to the first column in the table listed as SPN FMI Please see the following figure below Engine DTC Table 47600EC100 47600SC100 8 5 2 SPN FMI Failure Type 10001 13 EGR zero point learning malfunct...

Page 109: ...ensor malfunction high voltage 108 4 Baro pressure sensor malfunction low voltage 110 0 Over heat 110 3 Water temp sensor malfunction high voltage 110 4 Water temp sensor malfunction low voltage 1131 3 Manifold temp sensor malfunction high voltage 1131 4 Manifold temp sensor malfunction low voltage 1239 1 Common rail pressure down No pump pressure feed 1239 17 Common rail pressure down pump pressu...

Page 110: ... Injection nozzle 2 driving system disconnection 653 5 Injection nozzle 3 driving system disconnection 654 5 Injection nozzle 4 driving system disconnection 676 5 Glow relay malfunction 677 5 Starter cut relay malfunction 723 2 Crank sensor malfunction no or abnormal signal 91 2 Accelerator sensor 1 2 comparison malfunction 91 3 Accelerator sensor 1 2 malfunction high voltage 91 4 Accelerator sens...

Page 111: ... EZ1000 Series II Standard Base Diesel Melter with 100CFM Air Compressor PN47600SC100 Illustrations are designed to show general shape and size of a part and the relationship that part has to other parts Actual size and shape of parts or components may differ or vary from the actual part or component 9 1 Ordering Crafco Parts Crafco distributors and Crafco Pavement Preservation Supply Centers are ...

Page 112: ...ll Rights Reserved Illustrated Parts List 9 2 9 2 EZ1000 Series II EZ1000 Melters 47600EC100 47600SB100 46200EB 46200SB 1 2 3 4 5 6 7 7a 7b 7c 8 9 10 11 12 13 14 15 16 17 18 19 20 21 22 23 24 Fig 9 1 EZ1000 Series II Melters 47600EC100 47600SB100 NOT SHOWN 46200EB NOT SHOWN 46200SB NOT SHOWN ...

Page 113: ...98 HYDRAULIC FILTER ASSEMBLY 1 7a 45438 HYDRAULIC FILTER ELEMENT 1 7b 45440 O RING HYDRAULIC FILTER 1 7c 45497 GASKET HYDRAULIC FILTER 1 8 47201 CONTROL BOX ASSEMBLY 46200SB 1 8 47202 CONTROL BOX ASSEMBLY 46200EB 1 8 47210 CONTROL BOX ASSEMBLY 47600EC100 1 8 47215 CONTROL BOX ASSEMBLY 47600SC100 1 9 43355 OVERFLOW TANK 1 10 46265 DIPSTICK 1 11 26025 AIR BREATHER 1 12 42574 MOTOR HYDRAULIC AGITATOR...

Page 114: ...ed Parts List 2019 by Crafco Inc All Rights Reserved Illustrated Parts List 9 4 25 26 27 28 29 30 31 32 33 34 37 38 39 40 41 42 43 45 46 47 48 49 50 53 52 51 Fig 9 2 EZ1000 Series II Melter 47600EC100 47600SB100 NOT SHOWN 46200EB NOT SHOWN 46200SB NOT SHOWN ...

Page 115: ... 31 45491N HYDRAULIC PUMP ASSEMBLY 47600EC100 SC100 1 32 20130 SAFETY CHAIN 2 33 46182 FENDER ASSEMBLY D S 2 34 52200 WAND ASSEMBLY ELECTRIC OPT 34 41629 WAND STANDARD HOSE See options OPT 35 41208 HANDLE W VALVE See options OPT 36 45372 EXHAUST PIPE EB SB 1 37 41881 NOZZLE BURNER Not Shown 1 38 46053 HOSE HANGER 1 39 51065 CORD GRIP 3 40 39608 SWITCH LID 1 41 23095 BUSHING JACK ASSEMBLY 1 42 2308...

Page 116: ...ed Parts List 2019 by Crafco Inc All Rights Reserved Illustrated Parts List 9 6 25 26 27 28 29 30 31 32 33 34 37 38 39 40 41 42 43 45 46 47 48 49 50 53 52 51 Fig 9 3 EZ1000 Series II Melter 47600EC100 47600SB100 NOT SHOWN 46200EB NOT SHOWN 46200SB NOT SHOWN ...

Page 117: ...List 2019 by Crafco Inc All Rights Reserved Illustrated Parts List 9 7 FIG ITEM PART NO DESCRIPTION QTY Fig 9 3 50 47060N TANK DIESEL 1 51 46041 DRIP PAN 1 52 47482N HOSE AIR 3 4 X 50 FT 47600EC100 47600SC100 1 53 47483N LANCE AIR HIGH OUTPUT 47600EC100 47600SC100 1 ...

Page 118: ...fco Inc All Rights Reserved Illustrated Parts List 9 8 9 3 EZ1000 Series II Melter Options FIG ITEM PART NO DESCRIPTION QTY Fig 9 4 1 46170K STROBE LIGHT KIT 1 2 43549 KIT SPARE TIRE 1 3 47485N RACK AIR HOSE 1 4 46260 TOOL BOX LARGE 1 1 3 4 2 Fig 9 4 EZ1000 Series II Melter Options ...

Page 119: ...EZ 1000 Series II Melter Part Manual Chapter 9 Illustrated Parts List 2019 by Crafco Inc All Rights Reserved Illustrated Parts List 9 9 This page left blank intentionally ...

Page 120: ...EZ 1000 Series II Melter Part Manual Chapter 9 Illustrated Parts List 2019 by Crafco Inc All Rights Reserved Illustrated Parts List 9 10 1 7 2 3 5 6 4 Fig 9 5 EZ1000 Series II Melter Options ...

Page 121: ...G ITEM PART NO DESCRIPTION QTY Fig 9 5 1 51399 CONVEYOR ASSEMBLY 1 2 46280K ARROW BOARD 1 3 46279 KIT GRAVITY FEED 1 4 26098 TOOL BOX 1 5 24190K HEATER FIREROD 110V 1 5a 24194K HEATER FIREROD 220V 1 6 41259K KIT 100 PROPANE TANK 1 7 47500 ENGINE COVER ASSEMBLY 4600EC100 47600SC100 1 N A 47525N INSULATION KIT ENG CVR 47600EC100 47600SC100 1 ...

Page 122: ...EZ 1000 Series II Melter Part Manual Chapter 9 Illustrated Parts List 2019 by Crafco Inc All Rights Reserved Illustrated Parts List 9 12 10 8 11 9 7 4 6 2 1 3 Fig 9 6 EZ1000 Series II Melter Options ...

Page 123: ...REEL STAINLESS STEEL 1 2 47652N MOUNT REEL 1 3 47650N FLEXHOSE X 55 1 4 47480N COMPRESSOR ASSEMBLY 1 5 29878 MALE ELBOW ADAPTOR NOT SHOWN 1 6 26058 FIRE EXTINGUISHER W COVER 1 7 26058 BRACKET FIRE EXTINGUISHER 1 8 41208 HANDLE ASSEMBLY WITH VALVE 1 9 27009 20 SEALANT HOSE 1 10 41629 HAND WAND ASSEMBLY 1 11 46160K LIGHT BAR KIT 1 12 45650 HOT AIR LANCE NOT SHOWN 1 13 47491N KIT WATER SEPARATOR FILT...

Page 124: ...nc All Rights Reserved Illustrated Parts List 9 14 ITEM PART NO DESCRIPTION QTY Fig 9 7 N A 46374 INSULATION KIT ENG CVR 46200EB 46200SB 1 1 45535 ENGINE COVER ASSEMBLY 46200EB 46200SB 1 2 44151 PLATE SUPPORT ENGINE COVER 2 3 46748 GAS SPRING 1 1 2 Fig 9 7 EZ1000 Series II Melter Options ...

Page 125: ...9 4 Tank Detail 1 2 7 6 4 5 3 FIG ITEM PART NO DESCRIPTION QTY Fig 9 8 1 46246 PADDLE AGITATOR 2 2 42574 MOTOR HYDRAULIC AGITATOR 1 3 46050 SHAFT ASSEMBLY AGITATOR 1 4 46380 BURNER 14 VOLT DIESEL 1 5 46058 BURNER BOX ASSEMBLY 1 5a 43179 BURNER BOX INSULATION KIT 1 6 42573 MOUNTING PLATE MOTOR 1 7 40030 SPACER MOTOR 4 Fig 9 8 Tank Detail ...

Page 126: ...rt Manual Chapter 9 Illustrated Parts List 2019 by Crafco Inc All Rights Reserved Illustrated Parts List 9 16 9 5 Plumbing 4 11 10 9 3 5 6 3 7 22 23 21 20 16 18 14 15 24 4 4 16 1 2 25 26 12 19 17 3 4 8 3 4 29 13 Fig 9 9 Plumbing ...

Page 127: ... GATE 1 10 28060 NIPPLE 2 NPT X 5 LG 1 11 28213 ELBOW 2 NPT 1 12 46371 TEE LOWER SUCTION 1 13 29060 GASKET 3 CIRCULAR FLANGED 2 14 28258 TEE 2 PIPE 1 15 28242 ELBOW 2 45 PIPE 1 16 28358 BUSHING 2 X 1 HEX HEAD REDUCER 2 17 28285 PLUG 1 SQ HEAD PIPE 1 18 28190 NIPPLE 2 NPT X 14 5 LG 1 19 28183 COUPLING 2 PIPE 1 20 27048 SWIVEL 1 PIPE 1 21 28225 ELBOW 1 STREET 1 22 28351 BUSHING 1 X 3 4 HEX HEAD REDU...

Page 128: ... WHT 4 WHT 3 BLK 11 ORN 4 GRN BLK YLW RED 6 RED BLU YLW BLK BLK BLU BRN 1 YLW 2 GRY 5 BLK 2 BLU 1 PNK 1 PRP 1 PNK 1 GRY 1 ORN 1 PNK 2 ORN 1 PNK 2 BLK 4 ORN 1 BLK 4 WHT 2 BLK 10 WHT BLK WHT BLK 8 5 4 1 14 13 12 9 WHT RED 2 WHT RED RED BLK 3 RED BLK 3 WHT GRN WHT RED BLK 6 WHT GRN 1 WHT RED 1 LIGHT WHT GRN 2 BLK 15 BLK 16 PRP 2 WHT 1 COMP BLK 15 RED 1 BLK YLW RED WHT BLK WHT BLK WHT GRN 5 WHT GRN 4 ...

Page 129: ...9 51803 MOUNTING RAIL 2 10 51802 END BRACKET 2 11 51800 FEED THROUGH TERMINAL 40 12 51801 JUMPER 2 POLE 3 13 51804 JUMPER 3 POLE 1 14 50251 READOUT DIGITAL 3 15 43391 TEMPERATURE CONTROLLER 150 550 1 16 51651 LIGHT 12VDC 4 17 50719 SWITCH TOGGLE 2 18 51665 CIRCUIT BREAKER 15 AMP 1 19 50593 KNOB TEMP CONTROL 3 20 51834 CABLE ASSEMBLY SENSOR 1 21 51835 CABLE ASSEMBLY POWER 1 22 51836 CABLE ASSEMBLY ...

Page 130: ...16 BLK 1 BLK 12 WHT 4 WHT 3 BLK 11 ORN 4 GRN BLK YLW RED 6 RED BLU YLW BLK BLK BLU BRN 1 YLW 2 GRY 5 BLK 2 BLU 1 PNK 1 PRP 1 PNK 1 GRY 1 ORN 1 PNK 2 ORN 1 PNK 2 BLK 4 ORN 1 BLK 4 WHT 2 BLK 10 WHT BLK WHT BLK 8 5 4 1 14 13 12 9 WHT RED 2 WHT RED RED BLK 3 RED BLK 3 WHT GRN WHT RED BLK 6 WHT GRN 1 WHT RED 1 LIGHT WHT GRN 2 BLK 15 BLK 16 PRP 2 WHT 1 COMP BLK 15 RED 1 BLK YLW RED WHT BLK WHT BLK WHT G...

Page 131: ... HOUR METER 1 31 41994 IGNITION SWITCH 1 32 45950 SOCKET CONNECTOR 1 33 45970 WIRING HARNESS EXTENSION 1 34 51698 RIBBON CABLE 5 1 35 51811 SWITCH HOSE SELECTOR 1 36 32522 SWITCH PUMP 1 37 44975 GAUGE WATER TEMPERATURE Not Shown OPT 38 44976 GAUGE OIL PRESSURE Not Shown OPT 39 44977 GAUGE VOLT METER Not Shown OPT 40 44987 RESISTANCE CONTROL 1 41 44989 LIGHT AMBER 2 42 44988 LIGHT RED 1 ...

Page 132: ...LK 8 WHT RED 3 WHT GRN 3 BLK 16 BLK 1 ORN 4 GRN WHT RED BLK WHT GRN WHT RED BLK YLW RED 6 RED BLU YLW BLK BLK BLU BRN 1 YLW 2 GRY 5 BLK 2 GRY 1 ORN 1 PNK 2 ORN 1 ORN 1 BLK 4 WHT BLK WHT BLK RED 2 WHT GRN 1 WHT GRN 2 GRY 5 RED 4 RED 2 BRN 5 RED 3 WHT 2 BLK 8 BLK 6 RED 8 RED BLK 2 RED BLK 2 8 5 4 1 14 13 12 9 BLK 13 BRN PUMP REV 1 BLU PMP FWD 2 BRN PUMP FWD 2 BRN 5 PNK 3 ORN 2 ORN 2 BLK 5 FUTUREOIL ...

Page 133: ...ING RAIL 2 10 51802 END PLATE 2 11 51800 FEED THROUGH TERMINAL 33 12 51801 JUMPER 2 POLE 1 13 51804 JUMPER 3 POLE 2 14 50251 READOUT DIGITAL 3 15 43391 TEMPERATURE CONTROLLER 150 550 1 16 51651 LIGHT 12VDC 3 17 50719 SWITCH TOGGLE 2 18 51665 CIRCUIT BREAKER 15 AMP 1 19 50593 KNOB TEMP CONTROL 3 20 51834 CABLE ASSEMBLY SENSOR 1 21 51835 CABLE ASSEMBLY POWER 1 22 51836 CABLE ASSEMBLY TRIGGER SENSOR ...

Page 134: ...RED 2 BLK 8 WHT RED 3 WHT GRN 3 BLK 16 BLK 1 ORN 4 GRN WHT RED BLK WHT GRN WHT RED BLK YLW RED 6 RED BLU YLW BLK BLK BLU BRN 1 YLW 2 GRY 5 BLK 2 GRY 1 ORN 1 PNK 2 ORN 1 ORN 1 BLK 4 WHT BLK WHT BLK RED 2 WHT GRN 1 WHT GRN 2 GRY 5 RED 4 RED 2 BRN 5 RED 3 WHT 2 BLK 8 BLK 6 RED 8 RED BLK 2 RED BLK 2 8 5 4 1 14 13 12 9 BLK 13 BRN PUMP REV 1 BLU PMP FWD 2 BRN PUMP FWD 2 BRN 5 PNK 3 ORN 2 ORN 2 BLK 5 FUT...

Page 135: ...9 13 31 44990 KEY AND TUMBLER 1 31a 41994 IGNITION SWITCH W O TUMBLER 1 32 45950 SOCKET CONNECTOR 1 33 45970 WIRING HARNESS EXTENSION 1 34 51698 RIBBON CABLE 5 2 35 44976 GAUGE OIL PRESSURE OPT 36 44977 GAUGE VOLT METER OPT 37 43984 CABLE ASSEMBLY VALVE 1 38 44987 RESISTANCE CONTROL 1 39 44989 LIGHT AMBER 1 40 44988 LIGHT RED 2 41 51678 SWITCH DPDT 2 42 32522 SWITCH PUMP 1 ...

Page 136: ... 5 OF 51532 HOSE 51691 MATERIAL 51672 51836 52342N 51834 43984 HOT OIL 43391 MAT L HOSE BLU PMP MOUNT SWITCH NOTCH DOWN BRN 2 RED 8 BRN 3 BLK 16 BRN 4 RED BLK 3 RED BLK 3 BLK 12 BLK 11 WHT 3 WHT 2 BLK 10 WHT BLK RED BLK 2 RED BLK 2 BRN MIXER REV 3 BLU MIXER 3 PMP REV 1 BLU MIXER 4 PMP FWD 2 BRN PUMP REV 1 BRN MIXER FWD 4 RED LID P S BRN PUMP FWD 2 ORN 2 RED BLK 3 BLK 11 WHT 3 BLK 12 WHT 4 BLK 6 BL...

Page 137: ...1 9 51803 MOUNTING RAIL 2 10 51802 END PLATE 2 11 51800 FEED THROUGH TERMINAL 33 12 51801 JUMPER 2 POLE 5 13 51804 JUMPER 3 POLE 1 14 50251 READOUT DIGITAL 3 15 43391 TEMPERATURE CONTROLLER 150 550 1 16 51651 LIGHT 12VDC 4 17 24021 CORD CONNECTOR 3 18 51665 CIRCUIT BREAKER 15 AMP 1 19 50593 KNOB TEMP CONTROL NOT SHOWN 3 20 51834 CABLE ASSEMBLY SENSOR 1 21 52339 CABLE ASSEMBLY ENGINE 1 22 51836 CAB...

Page 138: ...EZ 1000 Series II Melter Part Manual Chapter 9 Illustrated Parts List 2019 by Crafco Inc All Rights Reserved Illustrated Parts List 9 28 Fig 9 15 Control Box Assembly 47210 47600EC100 ...

Page 139: ...TION QTY Fig 9 15 29 46239 SWITCH ON OFF W KEY 1 30 51852 CONTACT BLOCK N O 2 31 52338 SWITCH SPST ON ON 1 32 46494 ALARM PIEZO 1 33 32532 FUSE ASSY STROBE LIGHT 1 33a 32508 FUSE 15A INCLUDED IN 32532 1 34 51811 SWITCH HOSE SELECTOR 1 35 32522 SWITCH DPDT ON OFF ON 1 36 47209 CONTROLLER ENGINE 1 37 51698 CABLE 5 RIBBON NOT SHOWN 1 38 50719 SWITCH TOGGLE SPST 1 ...

Page 140: ...TEMP 43397 BLU PMP BRN 2 RED 8 BRN 3 BLK 16 BRN 4 BRN MIXER REV 3 BLU MIXER 3 PMP REV 1 BLU MIXER 4 PMP FWD 2 BRN PUMP REV 1 BRN MIXER FWD 4 RED LID P S BRN PUMP FWD 2 RED 2 BLK 6 BRN ALARM RED 3 RED 3 BLK FUSE BLK FUSE ORN 2 BRN TO ENG CTRL YLW 5 RED BLK 4 RED 1 PRP 3 BLK 7 BLK 2 GREEN 6 RED 8 GRN TRG RED TRG RED BLK 2 RED BLK 2 BRN ALARM WHT RED Soln GRN ENABLE BLK GND BLU GEN WHT COMP WHT RED 4...

Page 141: ...AIL 2 9 51802 END PLATE 2 10 51800 FEED THROUGH TERMINAL 24 11 51801 JUMPER 2 POLE 3 12 51804 JUMPER 3 POLE 1 13 50251 READOUT DIGITAL 3 14 43391 TEMPERATURE CONTROLLER 150 550 1 15 51651 LIGHT 12VDC 3 16 24021 CORD CONNECTOR 3 17 51665 CIRCUIT BREAKER 15 AMP 1 18 50593 KNOB TEMP CONTROL NOT SHOWN 3 19 51834 CABLE ASSEMBLY SENSOR 1 20 52339 CABLE ASSEMBLY ENGINE 1 21 51836 CABLE ASSEMBLY TRIGGER S...

Page 142: ...BLU BLK LIGHT RED 5 RED 9 WHT RED 1 WHT 1 PNK 3 BRN 3 BRN 4 BRN 2 RED 8 ORN 2 BLK 5 GRY 3 GRY 2 WHT GRN 1 WHT GRN 2 HOT OIL 43391 MAT L PUMP TEMP 43397 RED 2 BLK 6 BRN ALARM RED 3 RED 3 BLK FUSE ORN 2 RED 8 WHT 4 BLK 12 PNK 3 BLK 5 ORN 2 WHTRED 3 RED ENG CNTRL RED 4 RED ENG PLUG RED 3 RED 3 RED 5 27 28 29 30 32 33 34 35 BLK FUSE 31 36 Fig 9 17 Control Box Assembly 47215 47600SC100 ...

Page 143: ...ON QTY Fig 9 17 27 46239 SWITCH ON OFF 1 28 51852 CONTACT BLOCK N O 2 29 52338 SWITCH SPST ON ON 1 30 46494 ALARM PIEZO 1 31 32532 FUSE ASSY STROBE LIGHT 1 31a 32508 FUSE 15A INCLUDED IN 32532 1 32 32522 SWITCH DPDT ON OFF ON 1 33 47209 CONTROLLER ENGINE 1 34 51698 CABLE 5 RIBBON NOT SHOWN 2 35 50719 SWITCH TOGGLE SPST 1 36 43397 TEMPERATURE CONTROLLER 100 400 1 ...

Page 144: ...ter Part Manual Chapter 9 Illustrated Parts List 2019 by Crafco Inc All Rights Reserved Illustrated Parts List 9 34 9 10 Engine Assembly Non Compressor Fig 9 18 Engine Assembly 46200EB 46200SB 4 5 6 7 8 9 11 12 10 13 1 2 3 ...

Page 145: ...5444U UPPER RADIATOR HOSE 1 3 47138N UPPER RADIATOR ISOMOUNT 1 4 45443N RADIATOR KIT RADIATOR SHROUD FINGER GUARD CAP 1 5 45444L LOWER RADIATOR HOSE 1 6 41872 LOWER RADIATOR ISOMOUNT 2 7 43612 GENERATOR 24VAC 46100EB ONLY 1 8 45748 BELT DRIVE GEN 46100EB ONLY 1 9 41867 FUEL FILTER 1 10 45389 OIL FILTER 1 11 29399 ISOMOUNTS 4 12 45439 HYDRAULIC PUMP 1 13 45391 AIR FILTER ELEMENT 1 14 47155N RADIATO...

Page 146: ...Series II Melter Part Manual Chapter 9 Illustrated Parts List 2019 by Crafco Inc All Rights Reserved Illustrated Parts List 9 36 9 11 Engine Assembly 47600SC100 Fig 9 19 Engine Assembly 47600SC100 3 4 1 2 12 11 ...

Page 147: ...IPTION QTY Fig 9 19 1 47110 ENGINE 4LE2T NO GEN STD HOSE 1 2 47167N FUEL FILTER 1 3 47168N OIL FILTER 1 4 45491N HYDRAULIC PUMP 1 5 47173N WORKSHOP MANUAL OPT 6 47171N MANUAL PARTS OPT 7 47172N OWNERS MANUAL 1 8 47177N BELT ENGINE FAN Not Shown 1 9 47181N THERMOSTAT Not Shown 1 10 47182N PUMP WATER Not Shown 1 11 47185N FUEL PUMP 1 12 47176N FILTER FUEL PRE 1 ...

Page 148: ...Manual Chapter 9 Illustrated Parts List 2019 by Crafco Inc All Rights Reserved Illustrated Parts List 9 38 9 12 Engine Assembly 47600SC 47600EC Air Filter Side Fig 9 20 Engine Assembly 47600SC 47600EC Air Filter Side 13 14 15 16 17 ...

Page 149: ...Parts List 2019 by Crafco Inc All Rights Reserved Illustrated Parts List 9 39 FIG ITEM PART NO DESCRIPTION QTY Fig 9 21 13 47169N AIR FILTER ELEMENT 1 14 47186N SAFETY ELEMENT 1 15 47175N RESTRICTION INDICATOR 1 16 47179N STARTER 1 17 47180N ALTERNATOR ENGINE 1 ...

Page 150: ...ries II Melter Part Manual Chapter 9 Illustrated Parts List 2019 by Crafco Inc All Rights Reserved Illustrated Parts List 9 40 9 13 Engine Assembly 47600EC100 Fig 9 21 Engine Assembly 47600EC100 5 6 1 2 4 12 3 19 ...

Page 151: ...LT NOT SHOWN 1 4 47167N FUEL FILTER 1 5 47168N OIL FILTER 1 6 45491N HYDRAULIC PUMP 1 7 47169N AIR FILTER ELEMENT 1 8 47173N WORKSHOP MANUAL OPT 9 47171N MANUAL PARTS OPT 10 47172N OWNERS MANUAL 1 11 47175N RESTRICTION INDICATOR Not Shown 1 12 47176N FILTER FUEL PRE Not Shown 1 13 47177N BELT ENGINE FAN Not Shown 1 14 47178N CAP RAIN Not Shown 1 15 47179N STARTER Not Shown 1 16 47180N ALTERNATOR E...

Page 152: ...o Inc All Rights Reserved Illustrated Parts List 9 42 9 14 Material Flow Control Assembly 1 1 1 3 2 Fig 9 22 Material Flow Control Assembly FIG ITEM PART NO DESCRIPTION QTY Fig 9 22 1 29896 3 8 TUBE X 1 2 O RING ELBOW 3 2 46077 KNOB ONLY 1 3 46060 HYDRAULIC FLOW CONTROL NO FITTINGS 1 ...

Page 153: ...alve Assembly FIG ITEM PART NO DESCRIPTION QTY Fig 9 23 1 45417 VALVE RELIEF 1 2 45429 VALVE LOGIC RELIEF 1 3 45426 COIL SOLENOID VALVE 1 4 45424 VALVE SOLENOID 1 5 FITTING 12 ORB X 10 JIC STRAIGHT 2 6 45614N FLOW CONTROL PRESSURE COMP 1 7 45414 FITTING TEST POINT 1 8 45413 CAP DUST 1 9 TEE 12 ORB X 12 JIC RUN 1 1 2 3 4 6 5 8 9 7 Fig 9 23 Compressor Valve Assembly ...

Page 154: ...lter Part Manual Chapter 9 Illustrated Parts List 2019 by Crafco Inc All Rights Reserved Illustrated Parts List 9 44 9 16 Diesel Burner Assembly 9 1 4 6 8 3 5 1 10 11 12 14 13 6 BACK VIEW SIDE VIEW 7 Fig 9 24 Diesel Burner ...

Page 155: ...ANSFORMER 1 2 41870 CAD EYE NOT SHOWN 1 3 42335 DC CONTROLLER 1 4 41890 BLOWER MOTOR 1 5 41970 COUPLING FUEL PUMP 1 6 41892 PUMP FUEL 1 7 41932 VALVE STEM FUEL SOLENOID 1 8 41933 COIL FUEL SOLENOID 1 9 41881 NOZZLE 1 10 41953N STD HEAD F22 BURNER 1 11 41964N GASKET AIR TUBE TO HOUSING 1 12 46381N AIR TUBE W HEAD ELECTRODE MOUNT 1 13 41993 ELECTRODE ASSY COMES WITH 2 1 14 41966N AIR GUIDE BURNER 1 ...

Page 156: ...g 9 25 1 22027 MOTOR HYDRAULIC 1 2 42070 MATERIAL PUMP ASSEMBLY JACKETED 1 2a 29990S PACKING RING SET OF 7 1 3 43129 MOUNTING PLATE ASSEMBLY 1 4 29913 FITTING 10 ORB X 6 JIC STRAIGHT 2 5 42073N PUMP REBUILD KIT SEE NOTE Fig 9 25 Material Pump Assembly 1 2 3 4 NOTE If the case bores are larger than 3 851 diameter and end plates have any wear not flat then the rebuild kit may not work or wear proper...

Page 157: ...EZ 1000 Series II Melter Part Manual Chapter 9 Illustrated Parts List 2019 by Crafco Inc All Rights Reserved Illustrated Parts List 9 47 This page left blank intentionally ...

Page 158: ...Part Manual Chapter 9 Illustrated Parts List 2019 by Crafco Inc All Rights Reserved Illustrated Parts List 9 48 9 18 Air Compressor Assembly 1 2 3 4 5 6 7 8 9 10 11 12 13 14 15 16 17 18 19 20 21 22 Fig 9 26 Compressor Assembly ...

Page 159: ...E FITTING 1 8 47481N MATTEI COMPRESSOR 100 CFM 1 9 45347 SHAFT COMPRESSOR DRIVE 1 10 45346 PLATE MOTOR ADAPTER 1 11 45327 MOUNTING PLATE VALVE 1 12 45425 VALVE HYDRAULIC 1 13 29881 STRAIGHT THREAD CONNECTOR 6MJX 4MP 1 14 45476 RETURN LINE COMPRESSOR 1 15 45475 SUPPLY LINE COMPRESSOR 1 16 29819 FITTING 12 ORB X 12 JIC STRAIGHT 2 17 43874 MOTOR HYDRAULIC 1 18 45326 FITTING 12 BSPP X 12 JIC STRAIGHT ...

Page 160: ...ed Parts List 9 50 9 19 High Output Air Lance Assembly FIG ITEM PART NO DESCRIPTION QTY Fig 9 27 1 47483N LANCE AIR HIGH OUTPUT WITH SWVL CPLR 1 2 70250 3 4 SWIVEL 1 3 47488N FITTING 3 4 AIR HOSE 1 4 47491N OPTIONAL WATER SEPARATOR KIT 1 N A 47482N 3 4 X 50 FT AIR HOSE 1 1 2 3 4 Fig 9 27 High Output Air Lance Assembly ...

Page 161: ...EZ 1000 Series II Melter Part Manual Chapter 9 Illustrated Parts List 2019 by Crafco Inc All Rights Reserved Illustrated Parts List 9 51 This page left blank intentionally ...

Page 162: ...EZ 1000 Series II Melter Part Manual Chapter 9 Illustrated Parts List 2019 by Crafco Inc All Rights Reserved Illustrated Parts List 9 52 9 20 Wand Assembly 1 2 3 4 6 7 8 9 10 11 Fig 9 28 Wand Assembly ...

Page 163: ...DESCRIPTION QTY Fig 9 28 1 52204 COVER WAND 1 2 50278 TIP GUARD LONG CLAMP ON 1 3 52206 CORD ASSEMBLY 1 4 52201RN HANDLE WAND RIGHT W INSERTS GEN 2 1 5 52201LN HANDLE WAND LEFT NOT SHOWN GEN 2 1 6 52208 SWITCH WAND 1 7 52202N ACTUATOR TRIGGER GEN 2 1 8 52207 SPRING ACTUATOR 1 9 52209 PIN ACTUATOR 1 10 52203N LOCK TRIGGER GEN 2 1 11 51656 TERMINAL STRIP 1 ...

Page 164: ...r Part Manual Chapter 9 Illustrated Parts List 2019 by Crafco Inc All Rights Reserved Illustrated Parts List 9 54 9 21 Diesel Fuel Line Schematic Non Compressor 1 3 2 4 5 6 7 Fig 9 29 Diesel Fuel Line Schematic Non Compressor ...

Page 165: ... DIESEL FUEL TANK TO BURNER FUEL FILTER 26782 FITTING 1 4 MPT X 5 16 JIC ELBOW 1 26767 FITTING 5 HOSE PUSH ON 1 29650N HOSE 5 16 x 55 FUEL LINE 1 29984 HOSE BARB 1 4MPT X 5 16 HOSE 1 29195 BALL VALVE 1 4 NPT 1 29984 HOSE BARB 1 4MPT X 5 16 HOSE 1 29648N HOSE ASSEMBLY 5 16 X 10 1 47345N FILTER ASSEMBLY 1 4 BURNER FUEL FILTER TO BURNER INLET 29664N HOSE ASSEMBLY 5 16 X 22 1 26767 FITTING 5 HOSE PUSH...

Page 166: ...lter Part Manual Chapter 9 Illustrated Parts List 2019 by Crafco Inc All Rights Reserved Illustrated Parts List 9 56 9 22 Diesel Fuel Line Schematic Compressors 1 3 2 4 5 6 7 Fig 9 30 Diesel Fuel Line Schematic Compressors ...

Page 167: ...IESEL FUEL TANK TO BURNER FUEL FILTER 26782 FITTING 1 4 MPT X 5 16 JIC ELBOW 1 26767 FITTING 5 HOSE PUSH ON 1 29650N HOSE 5 16 x 55 FUEL LINE 1 29984 HOSE BARB 1 4MPT X 5 16 HOSE 1 29195 BALL VALVE 1 4 NPT 1 29984 HOSE BARB 1 4MPT X 5 16 HOSE 1 29648N HOSE ASSEMBLY 5 16 X 10 1 47345N FILTER ASSEMBLY 1 6 BURNER FUEL FILTER TO BURNER INLET 29664N HOSE ASSEMBLY 5 16 X 22 1 26767 FITTING 5 HOSE PUSH O...

Page 168: ...IGGER RED 17 1 16 15 14 12 13 6 11 10 9 8 7 7 5 3 2 4 BURNER PLUG YELLOW GREEN 45762 HYD OIL COOLER 24000 BATTERY RED BLK RED BLK PUMPING TEMP BATT BLUE WIRE TO GENERATOR LID SWITCH P S LID SWITCH D S RED TO OIL PRESS SWITCH WHT RED TO OIL PRESS SWITCH BLU BLU BLU BLU PNK RED BLK RED BLK WHITE WIRE TO TEMPERATURE SWITCH BLK WHT WHT GRN WHT GRN BLK WHT HOT OIL MATERIAL SENSOR BRN BRN PUMP REV 1 PUM...

Page 169: ... ASSEMBLY TRIGGER 1 4 52342N CABLE ASSEMBLY ENGINE 1 5 51834 CABLE ASSEMBLY SENSOR 1 6 39608 LID SWITCH 2 7 43465 SENSOR RTD 2 8 46791 JUNCTION BOX HOSE 1 9 31512 CIRCUIT BREAKER 1 10 43612 GENERATOR NON COMPRESSOR 1 10 46322 GENERATOR COMPRESSOR 1 11 43984 CABLE ASSEMBLY VALVE 1 12 56940 SENSOR RTD PUMPING TEMPERATURE 2 13 43947 CABLE ASSEMBLY HOSE 1 14 45569 WIRING HARNESS COOLER 1 15 45542 SWIT...

Page 170: ...BRN MATERIAL SENSOR HOT OIL SENSOR BLK WHT WHT GRN WHT GRN BLK WHT WHITE WIRE TO TEMPERATURE SWITCH PUMPING TEMP SENSOR WHT BLK SENSOR WHITE SENSOR BLK BLK RED BLK RED BLU BLU BLU BLU WHT RED TO OIL PRESS SWITCH RED TO OIL PRESS SWITCH LID SWITCH D S LID SWITCH P S 45762 HYDRAULIC OIL COOLER PNK 2 3 4 5 6 7 9 11 12 13 1 14 1 2 3 4 DIN PLUG LOCATION 10 7 8 BURNER PLUG YELLOW GREEN 24000 BATTERY GRE...

Page 171: ...RESSOR 1 2 47212N WIRING HARNESS EXT COMPRESSOR 1 3 51836 CABLE ASSEMBLY TRIGGER 1 4 52342N CABLE ASSEMBLY ENGINE 1 5 51834 CABLE ASSEMBLY SENSOR 1 6 39608 LID SWITCH 2 7 43465 SENSOR RTD 2 8 31512 CIRCUIT BREAKER 1 9 43984 CABLE ASSEMBLY VALVE 1 10 56940 SENSOR RTD PUMPING TEMPERATURE 2 11 45569 WIRING HARNESS COOLER 1 12 45542 SWITCH TEMPERATURE OIL COOLER 1 13 45349 SWITCH TEMPERATURE COMPRESSO...

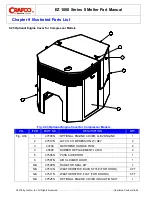
Page 172: ...500N OPTIONAL ENGINE COVER 4LE2 ENGINE 1 2 47510N LATCH COMPRESSION W KEY 4 3 43746 NEOPRENE HANDLE TRIM 2 4 45600 RUBBER REPLACEMENT LATCH 2 5 47506N PASS SIDE DOOR 1 6 47507N AIR CLEANER DOOR 1 N A 47509N RADIATOR SEAL KIT 1 N A 47519N WEATHERSTRIP BULB STYLE FOR HOOD 9 FT N A 47511N WEATHERSTRIP FLAT FOR DOORS 6 FT N A 47525N OPTIONAL ENGINE COVER INSULATION KIT 1 2 1 4 5 6 3 Fig 9 33 Optional ...

Page 173: ...EZ 1000 Series II Melter Part Manual Chapter 9 Illustrated Parts List 2019 by Crafco Inc All Rights Reserved Illustrated Parts List 9 63 This page left blank intentionally ...

Page 174: ...9 Illustrated Parts List 2019 by Crafco Inc All Rights Reserved Illustrated Parts List 9 64 9 26 Hot Air Lance 16 1 7 1 3 2 1 1 6 1 11 1 8 1 17 1 4 1 9 1 5 1 19 1 18 1 23 1 10 1 15 1 12 4 14 1 13 1 20 1 21 1 22 1 2 2 Fig 9 34 Hot Air Lance Option ...

Page 175: ...1 4 NPT X 1 8 NPT 1 8 45654 PRIMARY BURNER TUBE 1 9 45657 AIR LANCE TUBE 1 10 45668 AIR ORIFICE A 125 1 11 45653 MAIN BURNER TUBE 1 12 45670 SCREW 10 32 X 1 2 ALLEN SCREW 4 13 45672 SCREW 10 32 X 1 2 ALLEN SET 1 14 45671 SCREW 1 4 20 X 3 8 ALLEN SET 1 15 45669 NUT 1 8 27 JAM 1 16 27990 PLUG 1 4 COUNTERSUNK 1 17 45655 HANDLE ASSEMBLY 1 18 45663 BUSHING 3 8 NPT X 1 4 NPT REDUCER 1 19 45659 VALVE NEE...

Page 176: ... 1000 Series II Melter Part Manual Chapter 9 Illustrated Parts List 2019 by Crafco Inc All Rights Reserved Illustrated Parts List 9 66 9 27 Jacketed Pump System 3 2 4 5 1 6 7 Fig 9 35 Jacketed Pump System ...

Page 177: ... VALVE HA PORT TO HOT OIL MOTOR 29919 1 2 JIC X 3 8 0 RING ADAPTOR 1 6M3K6G 6FJX 6G 8FJX90S 22 18 5 HYDRAULIC HOSE 1 40311 STRAIGHT THD ADAPTER 1 3 HYDRAULIC VALVE HB PORT TO HOT OIL MOTOR 40311 STRAIGHT THD ADAPTER 1 6M3K6G 6FJX 6G 6FJX90S 20 25 17 HYDRAULIC HOSE 1 40311 STRAIGHT THD ADAPTER 1 4 41696 PUMP AND MOTOR ASSY HOT OIL 1 5 42070 MATL PUMP ASSY JACKETED 1 6 43129 PUMP MOUNTING PLATE 1 7 ...

Page 178: ...Z 1000 Series II Melter Part Manual Chapter 9 Illustrated Parts List 2019 by Crafco Inc All Rights Reserved Illustrated Parts List 9 68 8 9 11 12 7 14 7 13 8 9 13 10 7 6 10 Fig 9 36 Jacketed Pump System ...

Page 179: ...9 FIG ITEM PART NO DESCRIPTION QTY Fig 9 36 6 47674N NIPPLE 1 2 14 NPT 11 5 1 7 41499 1 2 HOT OIL BALL VALVE 2 8 47656N FLEX HOSE ASSEMBLY 33 1 9 47657N FLEX HOSE ASSEMBLY 23 1 10 47658N FLEX HOSE ASSEMBLY 25 1 11 29844 ADAPTER JIC MP 8MJ 8MP 2 12 40316 MALE ADAPTER 2 13 29846 ADAPTER JIC MP 12MJ 8MP 2 14 47675N NIPPLE 1 2 14 NPT 6 5 1 ...

Page 180: ...433 FIG ITEM PART NO DESCRIPTION QTY Fig 9 37 1 29896 3 4 16 ORB X 8 JIC STR 1 2 29919 9 16 18 ORB X 8 JIC STR 3 3 29976 3 4 16 ORB X 8 JIC BRANCH TEE 1 4 40311 9 16 18 ORB X 6 JIC STR 2 5 40320 9 16 18 ORING X 8 JIC STR 2 6 40308 9 16 18 ORB X 6 JIC LONG STR 1 7 45417 RELIEF VALVE 3 8 45416 FLOW DIVIDER 2 9 45418 VALVE ASSEMBLY REX ROTH 2 10 45414 FITTING TEST POINT 3 11 45413 CAP DUST TEST POINT...

Page 181: ...EZ 1000 Series II Melter Part Manual Chapter 9 Illustrated Parts List 2019 by Crafco Inc All Rights Reserved Illustrated Parts List 9 71 This page left blank intentionally ...

Page 182: ...ter Part Manual Chapter 9 Illustrated Parts List 2019 by Crafco Inc All Rights Reserved Illustrated Parts List 9 72 9 29 Hot Oil Pump and Motor 12 11 10 7 6 7 8 9 3 2 11 2 1 13 14 15 4 5 Fig 9 38 Pump and Motor Assy Hot Oil ...

Page 183: ...FLAT WASHER 7 28646 4 5 16 LOCK WASHER 8 28717 2 5 16 18 X 1 1 4 BOLT 9 41689 1 H O MOUNTING PLATE 10 28715 2 5 16 18 X 3 4 BOLT 11 29844 2 ADAPTER JIC MP 8MJ 8MP 12 41280 1 HOT OIL CIRCULATING PUMP 13 41180 1 COUPLING HALF 1 2 BORE 14 41182 1 SPIDER FOR COUPLING 15 41695 1 COUPLING HALF 5 8 BORE NS 45622 1 OIL PUMP REBUILD KIT INCLUDES BELOW 6 SCREWS 1 IDLER PIN 1 HEAD 1 IDLER 3 PACKING GLANDS NS...

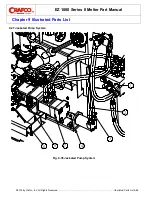
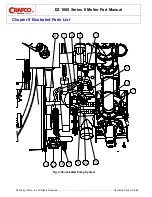
Page 184: ... 9 30 Hydraulic System Diagram for Jacketed Pump Machines with the 23 HP engine 46200EB 46200SB 2 1 3 6 8 7 4 3 5 9 2 1 BOTM PORT TOP PORT 10 45762 OIL COOLER FRONT PORT REAR PORT 2 1 3 4 DIN PLUG LOCATION 41696 HOT OIL PUMP AND MOTOR ASSEMBLY 11 12 REAR PORT FRONT PORT MIXER MTR PUMP MTR Fig 9 39 Hydraulic System Diagram non compressor ...

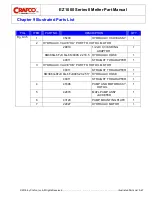
Page 185: ...807 5 8 NUT 1 47618N HYDRAULIC TUBE 1 8M3K 8G 10FJX90S 8G 10FJX 118 5 115 ALT HOSE USE IF TUBE NOT USED 1 29805 5 8 BULKHEAD UNION 1 29807 5 8 NUT 1 8M3K 8G 10FJX 8G 8FJX90S 33 75 30 5 HYDRAULIC HOSE 1 29897 ORING X JIC 1 3 HYDRAULIC VALVE AB TO AGIT MOTOR FRONT PORT 29919 1 2 JIC X 3 8 0 RING 1 6M3K 6G 6FJX 6G 8FJX90S 31 27 5 HYDRAULIC HOSE 1 46721 TUBE HYD PRESSURE 1 22029 5 8 ORING X 3 8 JIC 1 ...

Page 186: ...All Rights Reserved Illustrated Parts List 9 76 2 1 3 6 8 7 4 3 5 9 2 1 BOTM PORT TOP PORT 10 45762 OIL COOLER FRONT PORT REAR PORT 2 1 3 4 DIN PLUG LOCATION 41696 HOT OIL PUMP AND MOTOR ASSEMBLY 11 12 REAR PORT FRONT PORT MIXER MTR PUMP MTR Fig 9 40 Hydraulic System Diagram non compressor ...

Page 187: ...RAULIC VALVE TANK PORT 29896 ORING X JIC ELBOW 1 8M3K 8G 8FJX 8G 8FJX90S 37 25 33 75 HYDRAULIC HOSE 1 29976 ORING RUN TEE 1 9 HYDRAULIC VALVE TANK TO HYDRAULIC OIL COOLER 29976 ORING RUN TEE 1 8M3K 8G 10FJX 8G 8FJX90S 20 25 17 HYDRAULIC HOSE 1 29805 5 8 BULKHEAD UNION 1 29807 5 8 NUT 1 47617N HYDRAULIC TUBE 1 8M3K 8G 10FJX90S 8G 10FJX 80 5 77 ALT HOSE USE IF TUBE NOT USED 1 29805 5 8 BULKHEAD UNIO...

Page 188: ...All Rights Reserved Illustrated Parts List 9 78 2 1 3 6 8 7 4 3 5 9 2 1 BOTM PORT TOP PORT 10 45762 OIL COOLER FRONT PORT REAR PORT 2 1 3 4 DIN PLUG LOCATION 41696 HOT OIL PUMP AND MOTOR ASSEMBLY 11 12 REAR PORT FRONT PORT MIXER MTR PUMP MTR Fig 9 41 Hydraulic System Diagram non compressor ...

Page 189: ... DESCRIPTION QTY Fig 9 41 11 HYDRAULIC VALVE HA PORT TO HOT OIL MOTOR REAR PORT 29919 1 2 JIC X 3 8 0 RING ADAPTOR 1 6M3K6G 6FJX 6G 8FJX90S 22 18 5 HYDRAULIC HOSE 1 40311 STRAIGHT THD ADAPTER 1 12 HOT OIL MOTOR FRONT PORT TO HYDRAULIC VALVE HB PORT 40311 STRAIGHT THD ADAPTER 1 6M3K6G 6FJX 6G 6FJX90S 20 25 17 HYDRAULIC HOSE 1 40311 STRAIGHT THD ADAPTER 1 ...

Page 190: ...C100 47600SC100 47600ECPA 47600SCPA FRONT PORT 2 1 3 4 DIN PLUG LOCATION 15 REAR PORT FRONT PORT REAR PORT FRONT PORT REAR PORT 1 2 3 MATERIAL PUMP MOTOR 22027 AGITATOR 42574 HOT OIL PUMP AND MOTOR ASSEMBLY 41696 OIL COOLER 45762 COMPRESSOR MOTOR HYDRAULIC PUMP 45491N HYDRAULIC TANK HYDRAULIC VALVE ASSY 45433 FLOW CONTROL COMPRESSOR VALVE ASSY 11 12 7 5 8 10 1 13 2 6 4 3 9 14 Fig 9 42 Hydraulic Sy...

Page 191: ...7 5 8 NUT 1 47618N HYDRAULIC TUBE 1 8M3K 8G 10FJX90S 8G 10FJX 118 5 115 ALT HOSE USE IF TUBE NOT USED 1 29805 5 8 BULKHEAD UNION 1 29807 5 8 NUT 1 8M3K 8G 10FJX 8G 8FJX90S 33 75 30 5 HYDRAULIC HOSE 1 29897 ORING X JIC 1 3 HYDRAULIC VALVE AB TO AGIT MOTOR FRONT PORT 29919 1 2 JIC X 3 8 0 RING 1 6M3K 6G 6FJX 6G 8FJX90S 31 27 5 HYDRAULIC HOSE 1 46721 TUBE HYD PRESSURE 1 22029 5 8 ORING X 3 8 JIC 1 4 ...

Page 192: ...LUG LOCATION 15 REAR PORT FRONT PORT REAR PORT FRONT PORT REAR PORT 1 2 3 MATERIAL PUMP MOTOR 22027 AGITATOR 42574 HOT OIL PUMP AND MOTOR ASSEMBLY 41696 OIL COOLER 45762 COMPRESSOR MOTOR HYDRAULIC PUMP 45491N HYDRAULIC TANK HYDRAULIC VALVE ASSY 45433 FLOW CONTROL COMPRESSOR VALVE ASSY 11 12 7 5 8 10 1 13 2 6 4 3 9 14 Fig 9 43 Hydraulic System Diagram compressor ...

Page 193: ...YDRAULIC VALVE TANK PORT 29896 ORING X JIC ELBOW 1 8M3K 8G 8FJX 8G 8FJX90S 37 25 33 75 HYDRAULIC HOSE 1 29976 ORING RUN TEE 1 9 HYDRAULIC VALVE TANK TO HYDRAULIC OIL COOLER 29976 ORING RUN TEE 1 8M3K 8G 10FJX 8G 8FJX90S 20 25 17 HYDRAULIC HOSE 1 29805 5 8 BULKHEAD UNION 1 29807 5 8 NUT 1 47617N HYDRAULIC TUBE 1 8M3K 8G 10FJX90S 8G 10FJX 80 5 77 ALT HOSE USE IF TUBE NOT USED 1 29805 5 8 BULKHEAD UN...

Page 194: ...LUG LOCATION 15 REAR PORT FRONT PORT REAR PORT FRONT PORT REAR PORT 1 2 3 MATERIAL PUMP MOTOR 22027 AGITATOR 42574 HOT OIL PUMP AND MOTOR ASSEMBLY 41696 OIL COOLER 45762 COMPRESSOR MOTOR HYDRAULIC PUMP 45491N HYDRAULIC TANK HYDRAULIC VALVE ASSY 45433 FLOW CONTROL COMPRESSOR VALVE ASSY 11 12 7 5 8 10 1 13 2 6 4 3 9 14 Fig 9 44 Hydraulic System Diagram compressor ...

Page 195: ...O HYDRAULIC VALVE HB PORT 40311 STRAIGHT THD ADAPTER 1 6M3K6G 6FJX 6G 6FJX90S 20 25 17 HYDRAULIC HOSE 1 40311 STRAIGHT THD ADAPTER 1 13 COMPR VALVE TO HYD OIL COOLER 29900 ORING RUN TEE 1 16M3K 16G 12FJX 16G 16FJX90S 72 65 5 HYDRAULIC HOSE 1 29951 1 ORING RUN TEE 1 14 HYDRAULIC PUMP PRESSURE TO COMPRESSOR VALVE I PORT 29978 ORING X 5 8 JIC ELB 1 10M3K 10G 12FJX 10G 10FJX90S 54 50 25 HYDRAULIC HOSE...

Page 196: ......

Page 197: ...4 Disk Assembly 27164 6 Disk Assembly Crafco Swivel Disk Applicator 27120 3 Swivel Applicator 27130 4 Swivel Applicator Crafco Sealing Foot Flush 27154 1 4 Flush 27155 3 8 Flush Crafco Sealing Foot Protruded 27159 1 4 Protruding 27160 3 8 Protruding Crafco Joint Sealing Tip 27146 1 4 Sealing Tip 27147 3 8 Sealing Tip Crafco Round Sealing Tip 27170 3 8 Sealing Tip 27171 1 2 Sealing Tip Crafco Cold ...

Page 198: ... and Accessories 10 2 Crafco Heavy Duty Squeegee with Aluminum Handle 27199 27195 Replacement Blade Super Shot Drip Stopper Use with 50270 Duckbill 27114 Tip Adapter 27115 Shroud Tip Adapter Crafco Duckbill 50270 Crafco Pour Pot with Wheels 40200 Crafco Hand Held Pour Pot 40201 Crafco High Velocity Heat Lance 45650 ...

Page 199: ...ter Part Manual Chapter 10 Tools and Accessories 2019 by Crafco Inc All Rights Reserved Tools and Accessories 10 3 Crafco Low Velocity Heat Lance 32259 Crafco Hand Torch W 20ft Hose 25012 W 12ft Hose 25016 W 50ft Hose 25021 ...

Page 200: ......

Page 201: ......

Page 202: ... 2019 Crafco Inc ...

Reviews: