


17
18
Test Mode
The system can be put into Test Mode for installation & testing purposes.
To enter Test Mode press the
[ ]
button on the Control Panel three times. The Control
Panel will enter into a 10 minute Test Mode. During Test Mode the Control Panel will
beep 3 times whenever a sensor is triggered. After 10 minutes Test Mode will end
automatically. It is also possible to exit Test Mode by pressing the
[ ]
button.
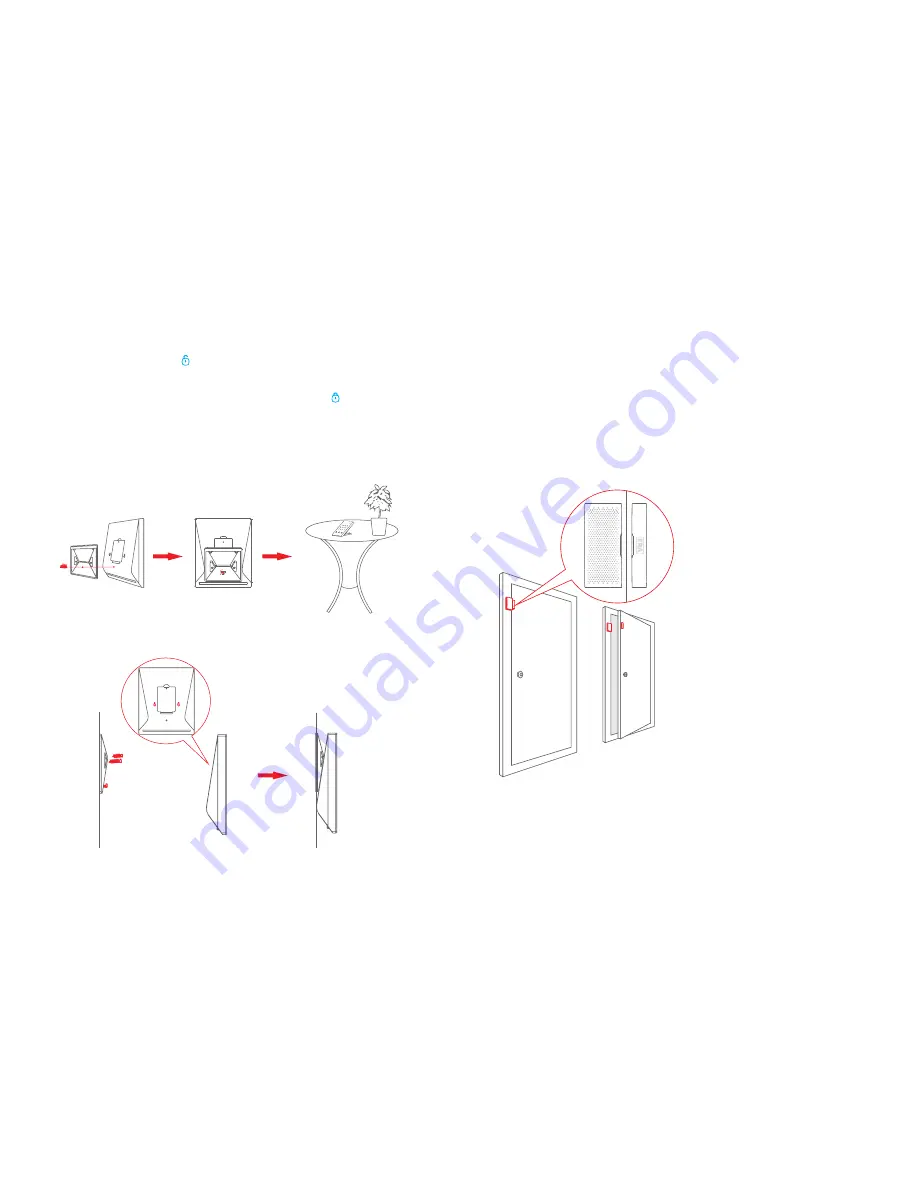
Positioning the Control Panel
The Control Panel can either be mounted to a suitable wall using the fixing kit supplied,
or for portability can be fitted with the free-standing bracket.
②
①
Fitting a Door/Window Sensor
Test the Sensor prior to installation to ensure that it is in working order.
Step 1:
Choose a suitable installation location. A Sensor can be fitted to a door, window
or any other object that opens/closes. If fitted to a metal door, place a spacer (not
supplied) under the Transmitter and the Magnet.
Step 2:
Secure the Sensor parts in place with the self-adhesive pads supplied. The
distance between the transmitter and magnet must not exceed 1cm when in the closed
position.
The Magnet can be positioned either side of the Sensor.
When the transmitter and magnet are separated by more than 2cm the LED indicator
on the transmitter will blink once indicating that the Sensor has been activated.
Note: Avoid placing ther door/window Sensor in an area where a lot of metal is
present as this may affect performance. Always check that the LED indicator blinks
when opening the door or window.