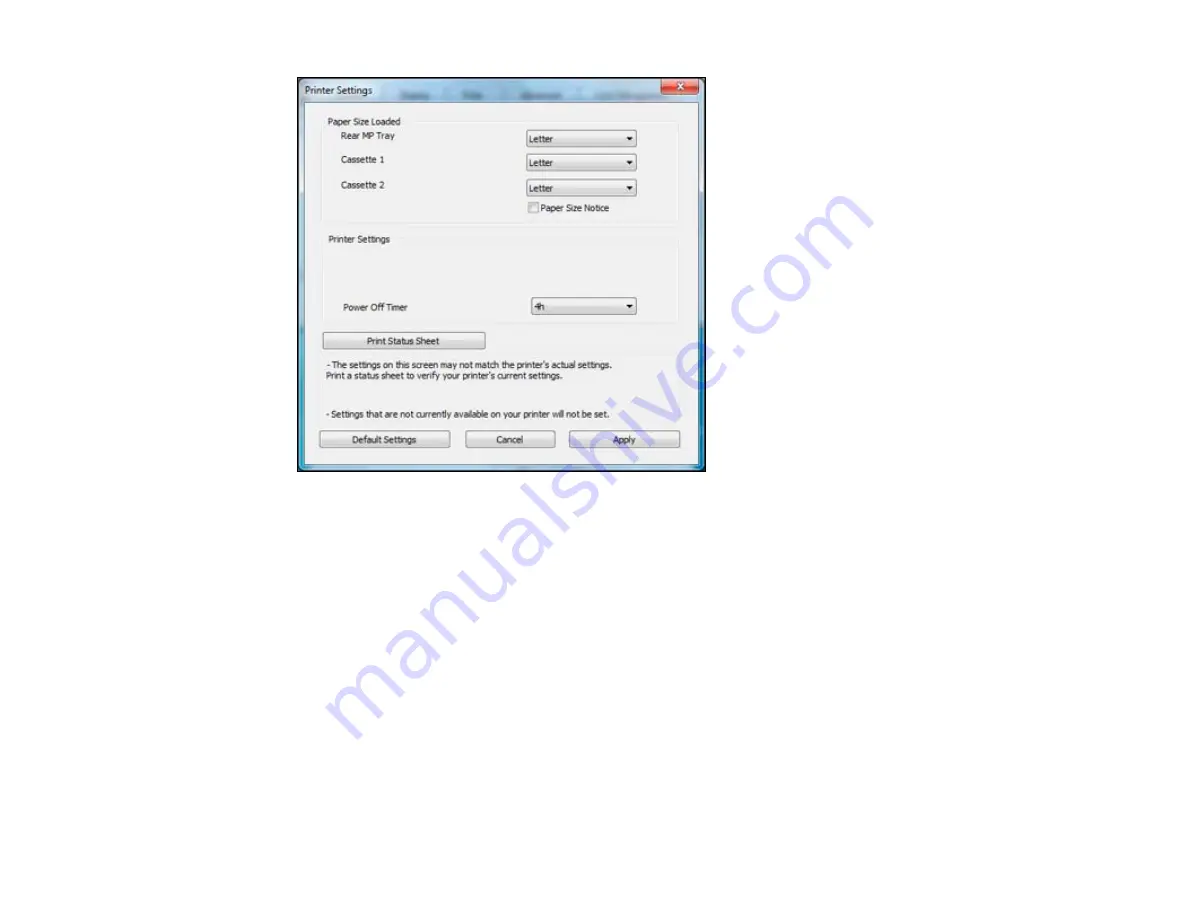
4.
Select the paper size you loaded in each paper source as the
Paper Size Loaded
. If your paper
doesn't match any of the sizes listed for the rear MP tray, select
Others
.
Note:
If you have not installed a second paper cassette, you cannot change the settings for
Cassette 2.
5.
If you want the printer software to warn you if you try to print with the wrong paper size, select the
Paper Size Notice
checkbox.
Note:
If you turn on
Paper Size Notice
, the printer will prevent you from printing with the wrong
paper size settings. If you turn this option off and you try to print with the wrong settings, the printer
will print even if the image size exceeds the printable area, and your printout may be smudged.
6.
Click
Apply
.
7.
When you see the confirmation message, click
Yes
.
44
Summary of Contents for WorkForce Pro WP-4090
Page 1: ...WorkForce Pro WP 4090 User s Guide ...
Page 2: ......
Page 9: ...WorkForce Pro WP 4090 User s Guide Welcome to the WorkForce Pro WP 4090 User s Guide 9 ...
Page 19: ...4 Click Add a network wireless or Bluetooth printer You see a window like this 19 ...
Page 24: ...8 Click Next You see this window 24 ...
Page 30: ...4 Load a stack of paper printable side down in the cassette as shown 30 ...
Page 54: ...54 ...
Page 88: ...88 ...
Page 109: ...Parent topic Printing From a Computer 109 ...
Page 123: ...Related concepts Purchase Epson Ink Cartridges and Maintenance Box 123 ...
Page 145: ...3 Remove any paper inside including torn pieces 4 Close the front cover 145 ...


