


44
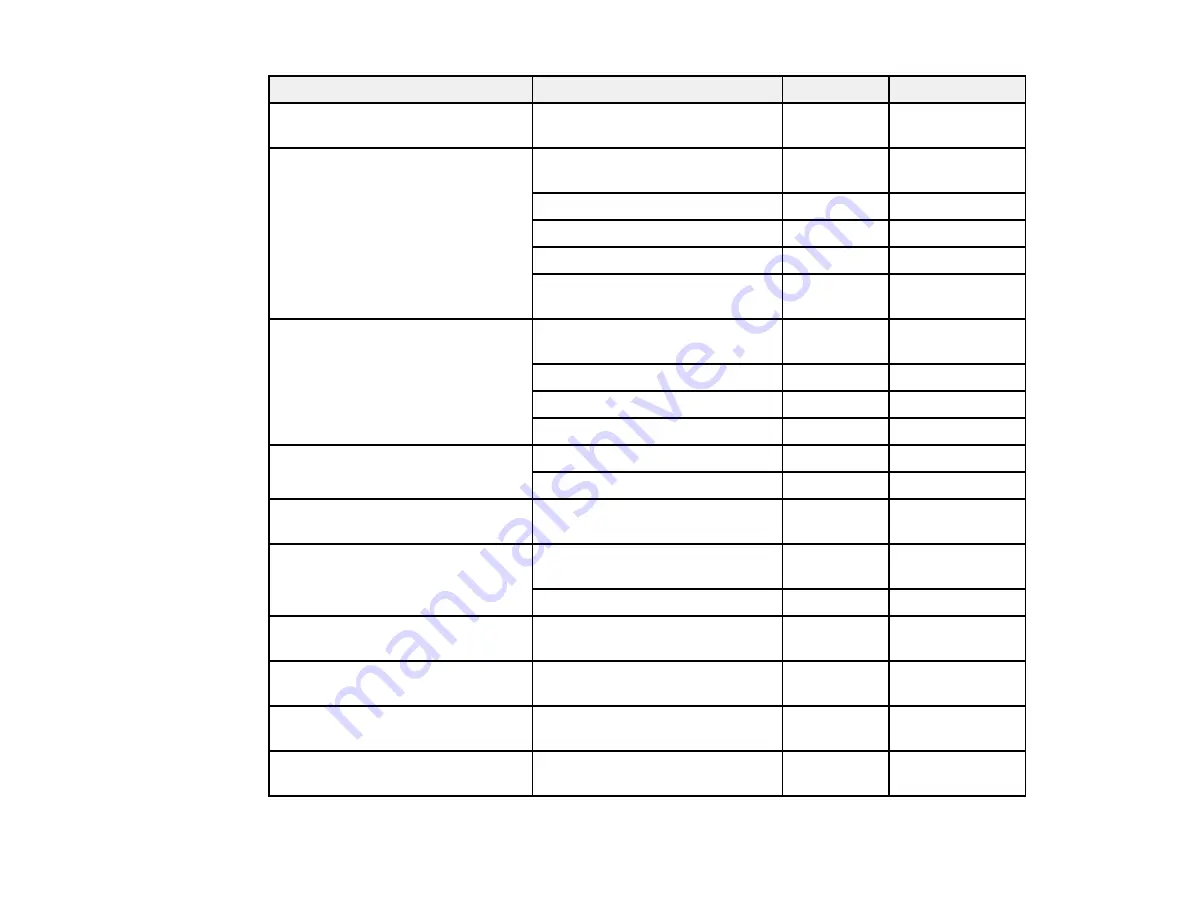
Paper Type
Size
Part number Sheet count
Epson Standard Proofing Paper
(240)
13 × 19 inches (330 × 483 mm)
S045115
100
Epson Ultra Premium Photo Paper
Luster
A3 (11.7 × 16.5 inches
[297 × 420 mm])
S041406
50
13 × 19 inches (330 × 483 mm)
S041407
50
13 × 19 inches (330 × 483 mm)
S041604
100
17 × 22 inches (432 × 559 mm)
S042084
25
13 inches (330 mm) × 32.8 feet
(10 m)
S041409
1 roll
Epson Ultra Premium Presentation
Paper Matte
A3 (11.7 × 16.5 inches
[297 × 420 mm])
S041343
50
13 × 19 inches (330 × 483 mm)
S041339
50
13 × 19 inches (330 × 483 mm)
S041605
100
17 × 22 inches (432 × 559 mm)
S041908
100
Epson UltraSmooth Fine Art Paper 13 × 19 inches (330 × 483 mm)
S041896
25
17 × 22 inches (432 × 559 mm)
S041897
25
Epson Watercolor Paper Radiant
White
13 × 19 inches (330 × 483 mm)
S041351
20
Epson Exhibition Canvas Matte
13 inches (330 mm) × 20 feet
(6.1 m)
S045255
1 roll
17 × 22 inches (432 × 559 mm)
S045255
25
Epson Exhibition Canvas Satin
13 inches (330 mm) × 20 feet
(6.1 m)
S045248
1 roll
Epson Exhibition Canvas Gloss
13 inches (330 mm) × 20 feet
(6.1 m)
S045241
1 roll
Epson Exhibition Canvas Natural
Matte
13 inches (330 mm) × 20 feet
(6.1 m)
S045241
1 roll
Epson Exhibition Canvas Natural
Satin
13 inches (330 mm) × 20 feet
(6.1 m)
S045396
1 roll
Summary of Contents for SureColor P10000
Page 1: ...Epson SureColor P10000 P20000 User s Guide ...
Page 2: ......
Page 8: ......
Page 48: ...48 Related references Printable Area Specifications ...
Page 61: ...61 7 Attach the roll core holder to the paper stop and push it in until it clicks into place ...
Page 62: ...62 8 Unlock the paper stop and slide it to the left ...
Page 76: ...76 5 Align the tensioner with the right edge of the paper as shown ...
Page 80: ...80 Parent topic Using the Optional Auto Take up Reel ...
Page 94: ...94 You can also place the same print data multiple times as shown here ...
Page 173: ...173 7 Remove the thumb screws ...
Page 174: ...174 8 Slide the upper cover to the left and remove it ...
Page 175: ...175 9 Close the ink cartridge cover ...
Page 176: ...176 10 Use a cleaning stick to clean the front and back edges on the bottom of the print head ...
Page 178: ...178 12 Open the ink cartridge cover and attach the upper cover ...
Page 179: ...179 13 Secure the upper cover with the thumb screws and close the ink cartridge cover ...
Page 181: ...181 15 Use a cleaning stick to clean the outside of the front print head wipers ...


