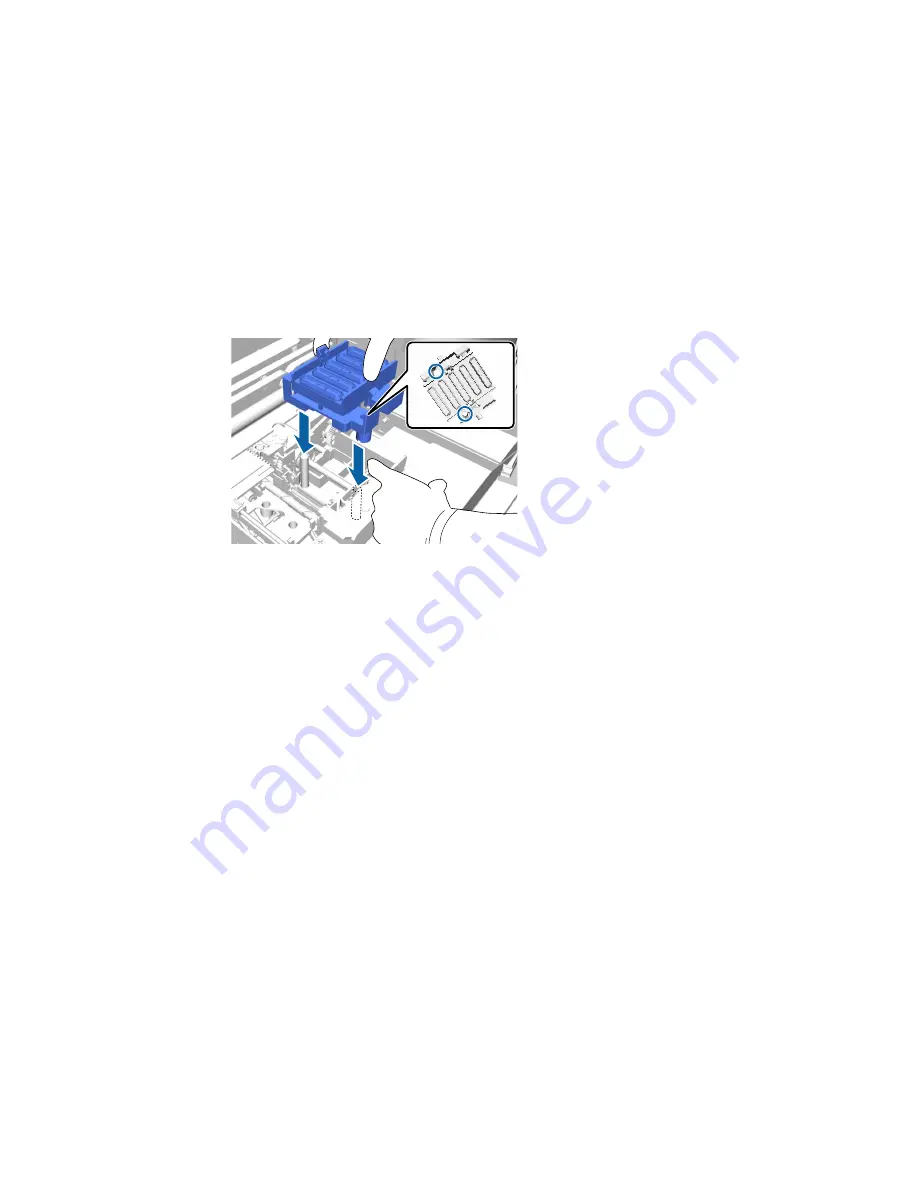
13. Press the lever forward as shown, and install the new anti-drying cap, placing the holes in the anti-
drying cap over the posts on the printer.
14. Close the printer cover.
15. Press the
OK
button.
16. Press the up or down arrow button to highlight
Yes
, and press the
OK
button.
17. Press the
OK
button again to move the print head to the flushing pad replacement position.
Parent topic:
Replacing the Head Cleaning Set
Related tasks
Replacing the Flushing Pad
Replacing the Flushing Pad
Replace the flushing pad after replacing the wiper unit and anti-drying caps included in the head cleaning
set.
Note:
The flushing pad, wiper unit, and anti-drying caps should all be replaced at the same time.
92
Summary of Contents for SureColor F2000 Series
Page 1: ...Epson SureColor F2000 Series User s Guide ...
Page 2: ......
Page 8: ......
Page 42: ...4 Smooth out the print surface so that it is flat 42 ...
Page 56: ...Parent topic Fixing the Ink 56 ...
Page 84: ...9 Wipe the top edge of the suction cap with a large cleaning stick 84 ...
Page 93: ...1 Open the printer cover 2 Unpack the new flushing pad 93 ...
Page 101: ...2 Open the cartridge cover 101 ...
Page 109: ...8 Grasp the tab on the air filter and lift it up to remove it 109 ...
Page 116: ...Note Do not apply force to the gears shown below when cleaning A malfunction may occur 116 ...
Page 175: ...CPD 40257R1 Parent topic Copyright Notice 175 ...


