


3.
Press the right arrow button on the control panel to display the Settings menu.
4.
Press the up or down arrow button to highlight
Printer Setup
, and press the right arrow button.
5.
Press the up or down arrow button to highlight
Head Alignment
, and press the right arrow button.
6.
Press the up or down arrow button to highlight the size of the installed platen, and press the right
arrow button.
7.
Press the
OK
button.
8.
Confirm that the T-shirt is loaded properly, then press the
OK
button again.
The check pattern is printed.
Note:
The check pattern is printed at the same size as the top surface of the parallel adjustment
plate.
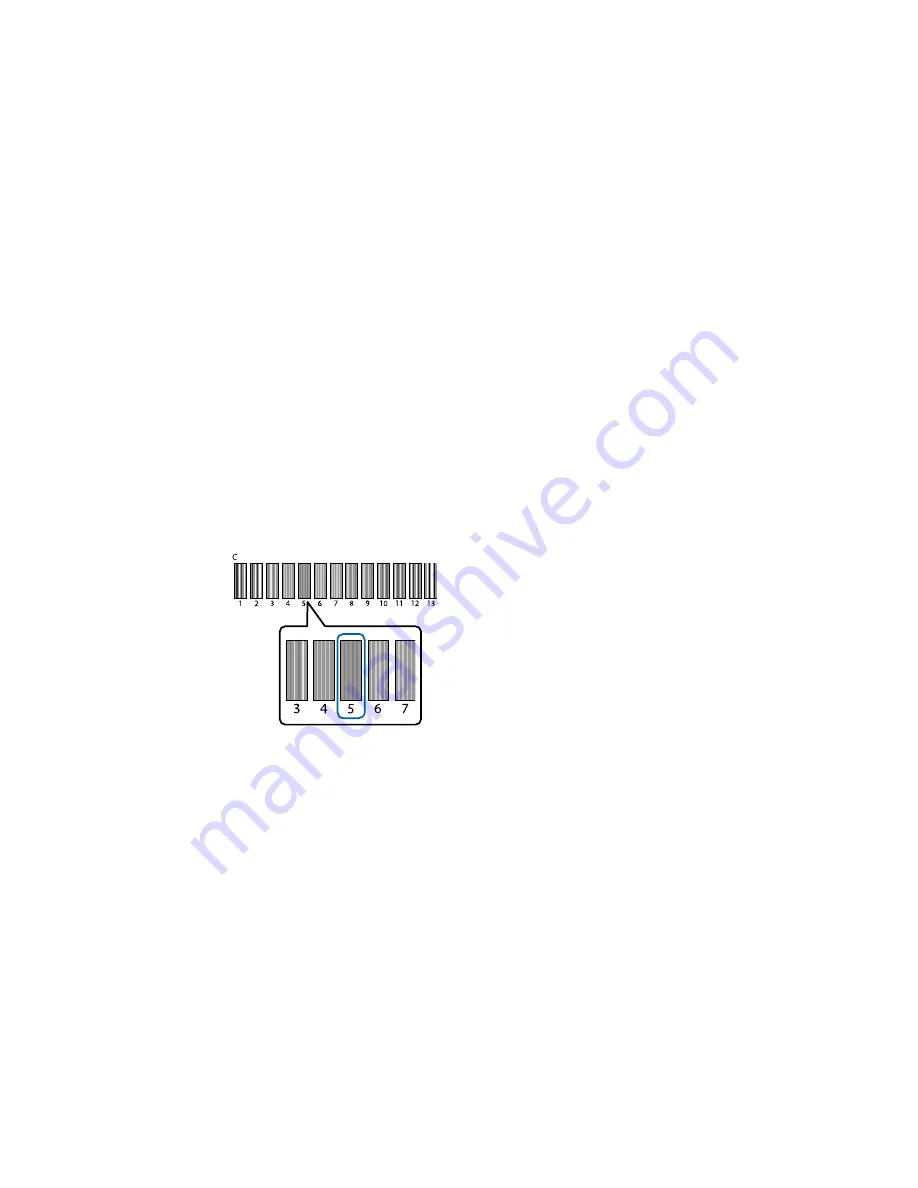
9.
Look at the printed check pattern, and choose the pattern number with the least amount of white
space between the lines. For example, in the image here,
5
is the best pattern.
10. When
C
is displayed on the control panel, press the up or down arrow button to select the best
pattern number, and press the
OK
button.
If there is no optimum number in the check pattern, select
1
or
13
(whichever is better), and perform
Head Alignment again.
11. Select the best pattern number for all the ink colors and press the
OK
button when you are finished.
You return to the Standby screen.
73
Summary of Contents for SureColor F2000 Series
Page 1: ...Epson SureColor F2000 Series User s Guide ...
Page 2: ......
Page 8: ......
Page 42: ...4 Smooth out the print surface so that it is flat 42 ...
Page 56: ...Parent topic Fixing the Ink 56 ...
Page 84: ...9 Wipe the top edge of the suction cap with a large cleaning stick 84 ...
Page 93: ...1 Open the printer cover 2 Unpack the new flushing pad 93 ...
Page 101: ...2 Open the cartridge cover 101 ...
Page 109: ...8 Grasp the tab on the air filter and lift it up to remove it 109 ...
Page 116: ...Note Do not apply force to the gears shown below when cleaning A malfunction may occur 116 ...
Page 175: ...CPD 40257R1 Parent topic Copyright Notice 175 ...


