


4.
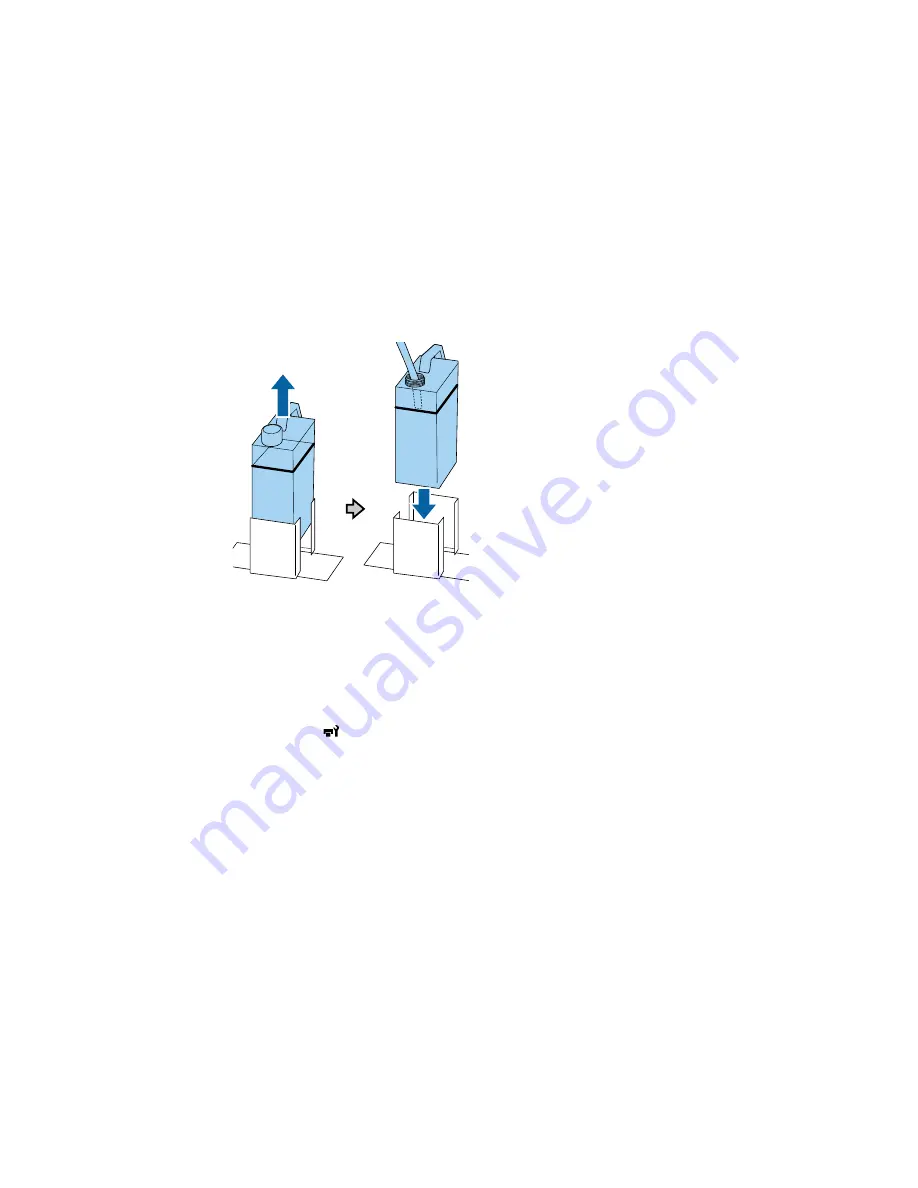
Remove the used waste ink bottle from the waste ink bottle holder and insert the new bottle. Make
sure the new waste ink bottle is seated correctly in the waste ink holder.
Note:
Verify that the waste ink tube is still inserted into the neck of the bottle. If the waste ink tube
comes out of the bottle, waste ink will spill out.
5.
Press the
OK
button.
6.
Press the
OK
button to clear the waste ink counter.
Note:
If you replaced the waste ink bottle before the replacement message appeared on the control
panel, press the
maintenance button and select
Waste Ink Counter
to clear the waste ink
counter.
Parent topic:
Disposing of Used Consumables and Optional Parts
Related references
Waste Ink Disposal Guidelines
80
Summary of Contents for SureColor F2000 Series
Page 1: ...Epson SureColor F2000 Series User s Guide ...
Page 2: ......
Page 8: ......
Page 42: ...4 Smooth out the print surface so that it is flat 42 ...
Page 56: ...Parent topic Fixing the Ink 56 ...
Page 84: ...9 Wipe the top edge of the suction cap with a large cleaning stick 84 ...
Page 93: ...1 Open the printer cover 2 Unpack the new flushing pad 93 ...
Page 101: ...2 Open the cartridge cover 101 ...
Page 109: ...8 Grasp the tab on the air filter and lift it up to remove it 109 ...
Page 116: ...Note Do not apply force to the gears shown below when cleaning A malfunction may occur 116 ...
Page 175: ...CPD 40257R1 Parent topic Copyright Notice 175 ...


