EPSON Stylus Pro 7600/9600
Revision A
Disassembly & Assembly
Disassembly and Assembly of Ink Supply Mechanism
197
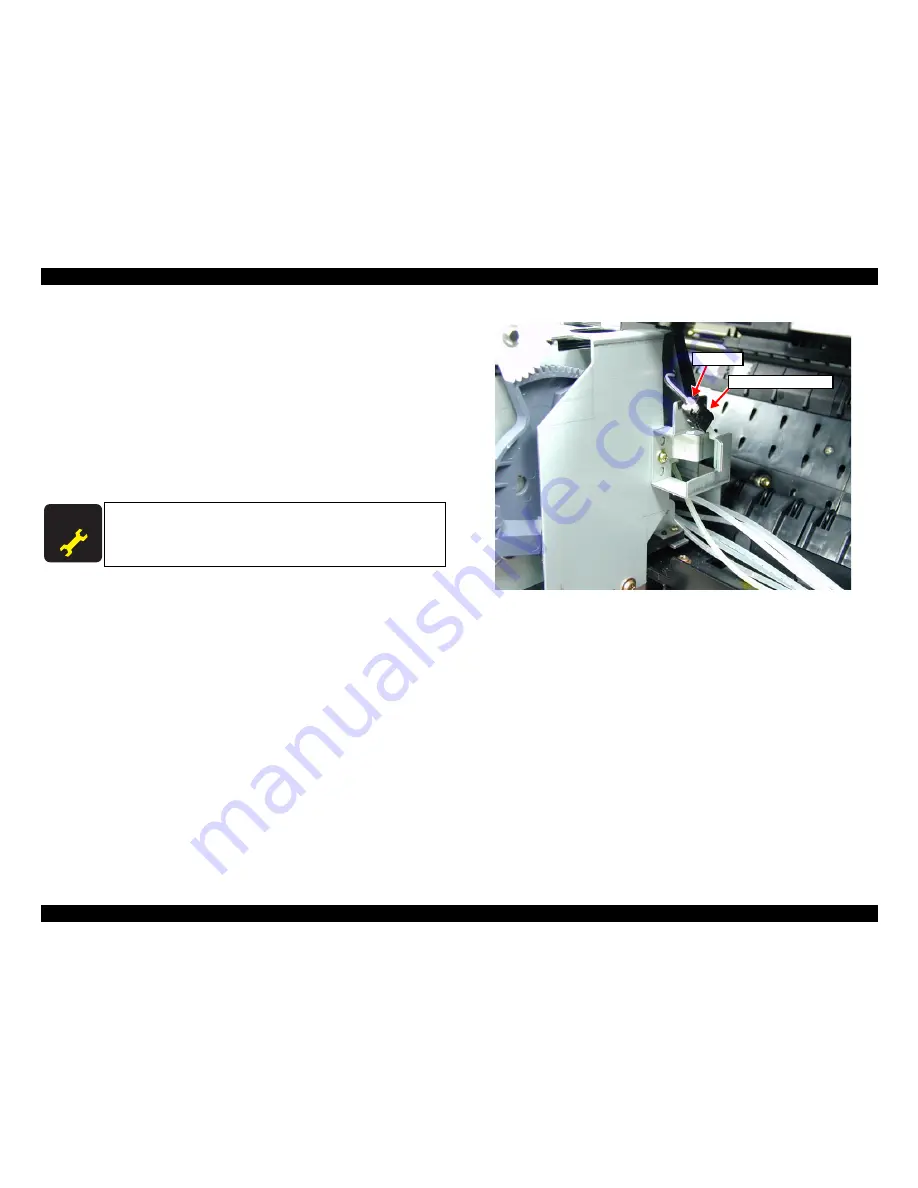
4.5.3 Cover Sensor ASSY
1.
Remove the
L Side Cover. (p.163)
2.
Remove the
I/H Cover. (p.164)
3. Open the Front Cover.
4. Remove two screws (CPP: M3
×
8) securing the Ink Tube Cover and remove the cover.
(See Figure 4-63)
5. Disconnect the harness connector of the Cover Sensor ASSY.
6. Pinch the right and left hooks of the Cover Sensor ASSY and remove the Cover Sensor
ASSY.
Figure 4-71. Removing the Cover Sensor ASSY
A D J U S T M E N T
R E Q U I R E D
Make sure that the Cover Switch Holder is so positioned that the
Cover Sensor ASSY operates coupled with the opening/closing of
the Front Cover.
Refer to
“5.1.4.9 Cover Sensor ASSY Adjustment”
(p.216)
Cover Sensor ASSY
Connector
Summary of Contents for Stylus Pro 7600 Photographic Dye Ink
Page 1: ...EPSONStylusPro7600 9600 Color Large Format Inkjet Printer SERVICE MANUAL SEIJ01017 ...
Page 5: ...Revision Status Revision Date of Issue Description A May 10 2002 First release ...
Page 11: ...C H A P T E R 1 PRODUCTDESCRIPTION ...
Page 100: ...C H A P T E R 2 OPERATINGPRINCIPLES ...
Page 121: ...C H A P T E R 3 TROUBLESHOOTING ...
Page 151: ...C H A P T E R 4 DISASSEMBLY ASSEMBLY ...
Page 210: ...C H A P T E R 5 ADJUSTMENT ...
Page 274: ...C H A P T E R 6 MAINTENANCE ...
Page 281: ...C H A P T E R 7 APPENDIX ...
Page 287: ......
Page 288: ......
Page 289: ......
Page 290: ......
Page 291: ......
Page 292: ...EPSON Stylus Pro 7600 9600 Revision A Appendix Exploded Diagrams 292 7 4 Exploded Diagrams ...
Page 304: ...851 850 854 Rev 01 C472 MECH 081 PX 7000 EPSON STYLUS PRO 7600 No 12 853 853 855 851 856 ...
Page 315: ...851 850 854 Rev 01 C473 MECH 081 PX 9000 EPSON STYLUS PRO 9600 No 12 853 853 855 851 856 ...


