


C
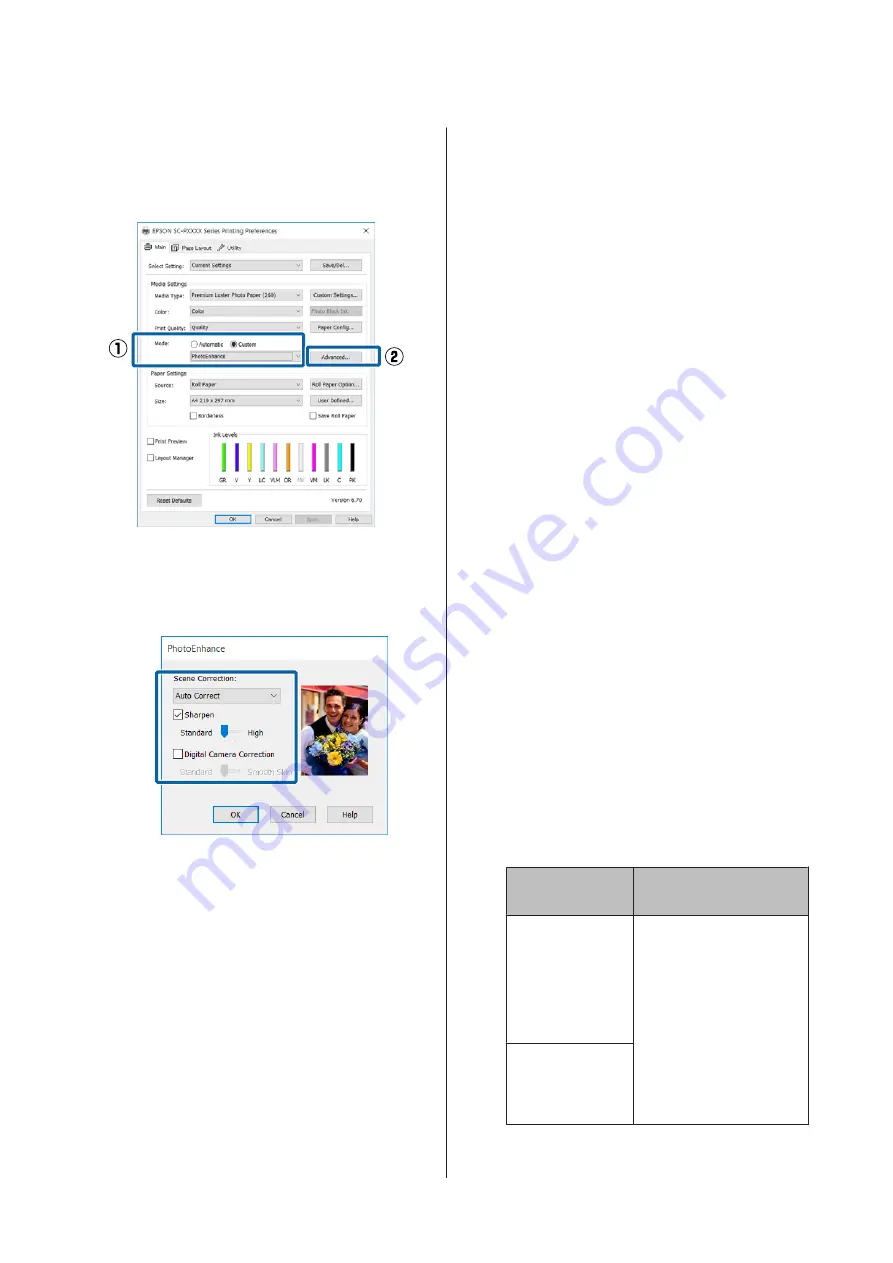
Select
Custom
from
Mode
, and then select
PhotoEnhance
.
To make more detailed adjustments, click
Advanced
, and then proceed to step 4.
D
On the
PhotoEnhance
screen, you can set
effects to apply to the print data.
See the printer driver help for more details on
each item.
E
Check other settings, and then start printing.
Correct color and print
The printer driver automatically and internally
corrects colors to match the color space. You can
select from the following color correction modes.
❏
Charts and Graphs
Performs color correction to sharpen your images
based on the sRGB space.
❏
EPSON Standard (sRGB)
Optimizes the sRGB space and corrects the color.
❏
Adobe RGB
Adobe RGB Optimizes the sRGB space and
corrects the color.
Note that if you click
Advanced
when one of the
above color processing options is selected, you can
fine-tune Gamma, Brightness, Contrast, Saturation,
and color balance for the selected option.
Use this option when the application in use does not
have a color correction function.
Making Settings in Windows
A
When using applications featuring a color
management function, specify how to adjust
colors from these applications.
When using applications without a color
management function, start from step 2.
Depending on the type of the application, make
the settings following the table below.
Adobe Photoshop CS3 or later
Adobe Photoshop Elements 6.0 or later
Adobe Photoshop Lightroom 1 or later
OS
Color Management
Settings
Windows 10,
Windows 8.1,
Windows 8,
Windows 7,
Windows Vista
Printer Manages Colors
Windows XP
(Service Pack 2 or
later and .NET 3.0
or later)
SC-P5000 Series User's Guide
Printing Varieties
67