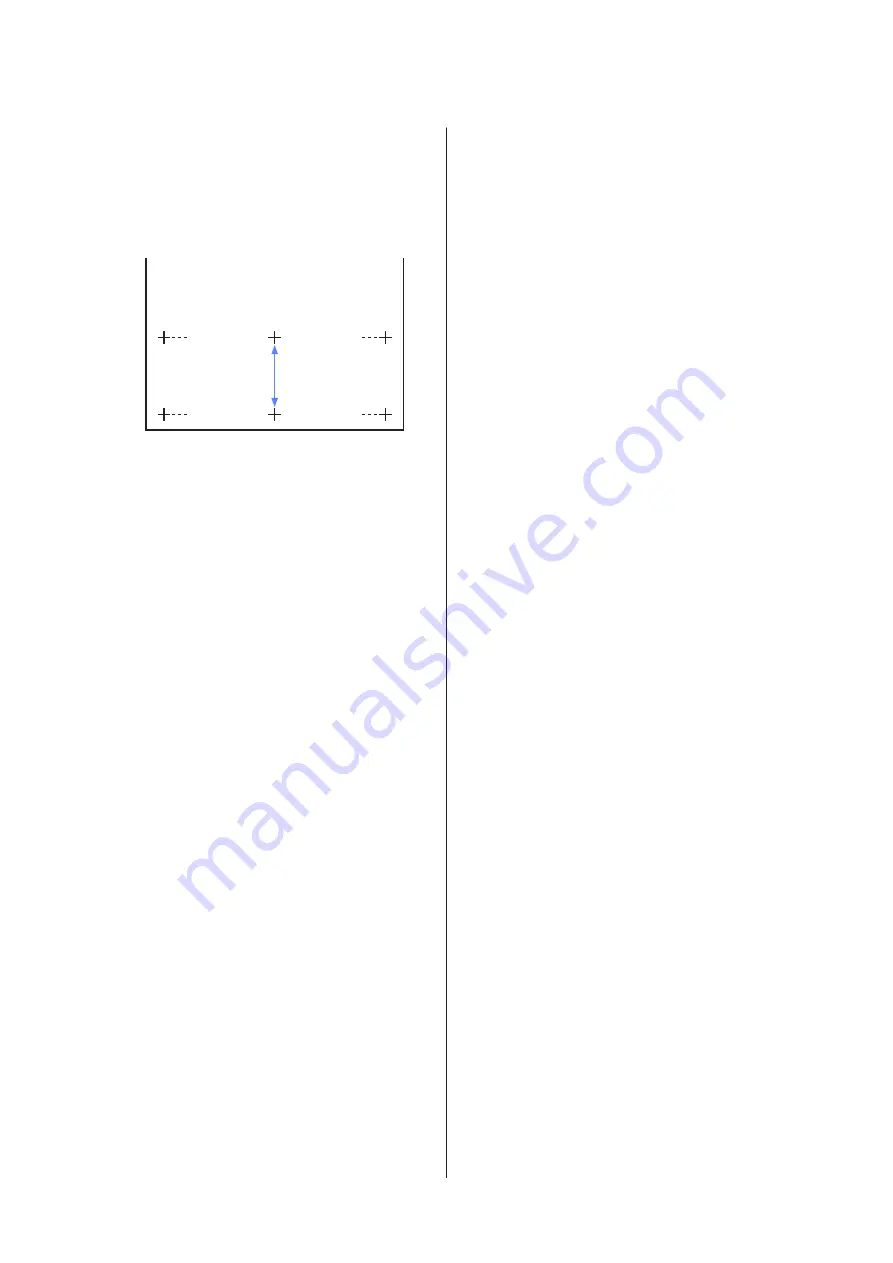
F
Measure the distances between the "+" symbols
in the printed adjustment pattern.
Use only the distance between the center symbols
or the average of the distances between the left,
center, and right symbols.
G
Press the
d
/
u
buttons to enter the measured
value and press the
Z
button to return the
printer to the ready-to-print state.
Manually Changing the Value for Adjustment
A
Select
Custom Paper Setting
from the paper
menu.
B
Press the
d
/
u
buttons to select the bank where
you want to save the custom paper settings, then
press the
Z
button.
C
Press the
d
/
u
buttons to highlight
Paper Feed
Adjust
and press the
Z
button.
D
Select
Value
, and then press the
Z
button.
E
Press the
d
/
u
buttons to select the target value,
and then press the
Z
button.
F
Press the
y
button twice to return to the paper
settings menu.
Paper Suction
Choosing too high a value for thin paper will increase
the distance between the paper and the print head,
causing print quality to decline or preventing the paper
feeding correctly. If this happens, lower the paper
suction.
A
Press the
d
/
u
buttons on the paper settings
menu to highlight
Paper Suction
and then press
the
Z
button.
B
Press the
d
/
u
buttons to select the target value,
and then press the
Z
button.
C
Press the
y
button to return to the paper settings
menu.
Roll Paper Tension
Select High or Extra High if the paper wrinkles during
printing.
A
Press the
d
/
u
buttons on the paper settings
menu to highlight
Roll Paper Tension
and then
press the
Z
button.
B
Press the
d
/
u
buttons to select the target setting
value, and then press the
Z
button.
C
Press the
y
button to return to the paper settings
menu.
Remove Skew
This sets the operation performed to prevent the paper
from skewing when it is fed.
A
Press the
d
/
u
buttons on the paper settings
menu to highlight
Remove Skew
, and then press
the
Z
button.
B
Press the
d
/
u
buttons to select either
On
to
reduce paper skew during feeding, or
Off
to
disable this feature, then press the
Z
button.
C
Press the
y
button to return to the paper settings
menu.
Setting Name
You can assign a name to saved custom paper settings.
Choose an easy-to-remember name for quick selection.
A
Press the
d
/
u
buttons on the paper settings
menu to highlight Setting Name, and then press
the
Z
button.
B
Enter the setting name.
You can cycle between different character types
by pressing the Menu button. The order is as
follows: Uppercase -> Lowercase -> Numbers/
Symbols.
SC-B6000 Series User’s Guide
Basic Operations
36


