


Setup & Operation 3. Environments and Installation
48
G6 Rev.21
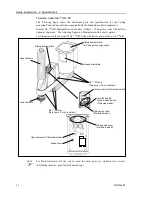
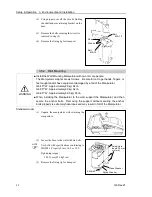
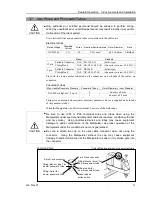
(2) Using nippers, cut off the wire tie binding
the shaft and arm retaining bracket on the
base.
Bolt
:M4
×
15
Bolt
:M5
×
15
Wire tie
Sheet
(3) Remove the bolts securing the wire ties
removed in step (2).
(4) Remove the fixing jig for transport.
3.5.2 Wall Mounting
WARNING
■
Install the Wall Mounting Manipulator with two or more people.
The Manipulator weights are as follows. Be careful not to get hands, fingers, or
feet caught and/or have equipment damaged by a fall of the Manipulator.
G6-45**W : Approximately 29 kg: 64 lb.
G6-55**W : Approximately 29 kg: 64 lb.
G6-65**W : Approximately 29.5 kg: 65 lb.
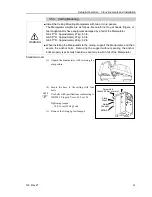
■
When installing the Manipulator to the wall, support the Manipulator, and then
secure the anchor bolts. Removing the support without securing the anchor
bolts properly is extremely hazardous and may result in fall of the Manipulator.
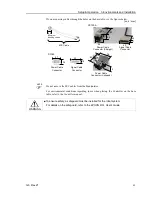
Standard-model
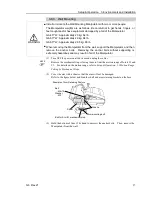
(1) Unpack the manipulator with retaining the
arm posture.
(2) Secure the base to the wall with six bolts.
Use bolts with specifications conforming to
ISO898-1 Property Class: 10.9 or 12.9.
Tightening torque:
32.0 N·cm (326 kgf·cm)
Screw Hole
(depth 20 mm
or more)
6-M8
×
40
Spring Washer
Plane Washer
(3) Remove the fixing jig for transport.
NOTE
Summary of Contents for G6 series
Page 1: ...Rev 21 EM183R3621F SCARA ROBOT G6 series MANIPULATOR MANUAL ...
Page 2: ...MANIPULATOR MANUAL G6 series Rev 21 ...
Page 8: ...vi G6 Rev 21 ...
Page 14: ......
Page 94: ......
Page 216: ...Maintenance 14 Maintenance Parts List 204 G6 Rev 21 ...