
Maintenance 9. Replacing Arm #1
G3 Rev.14
151
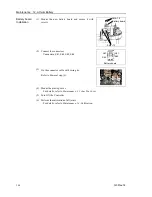
(9)-1 From the Setup Menu, select System Configuration.
(9)-2 Click on
Robots
in the tree on the left.
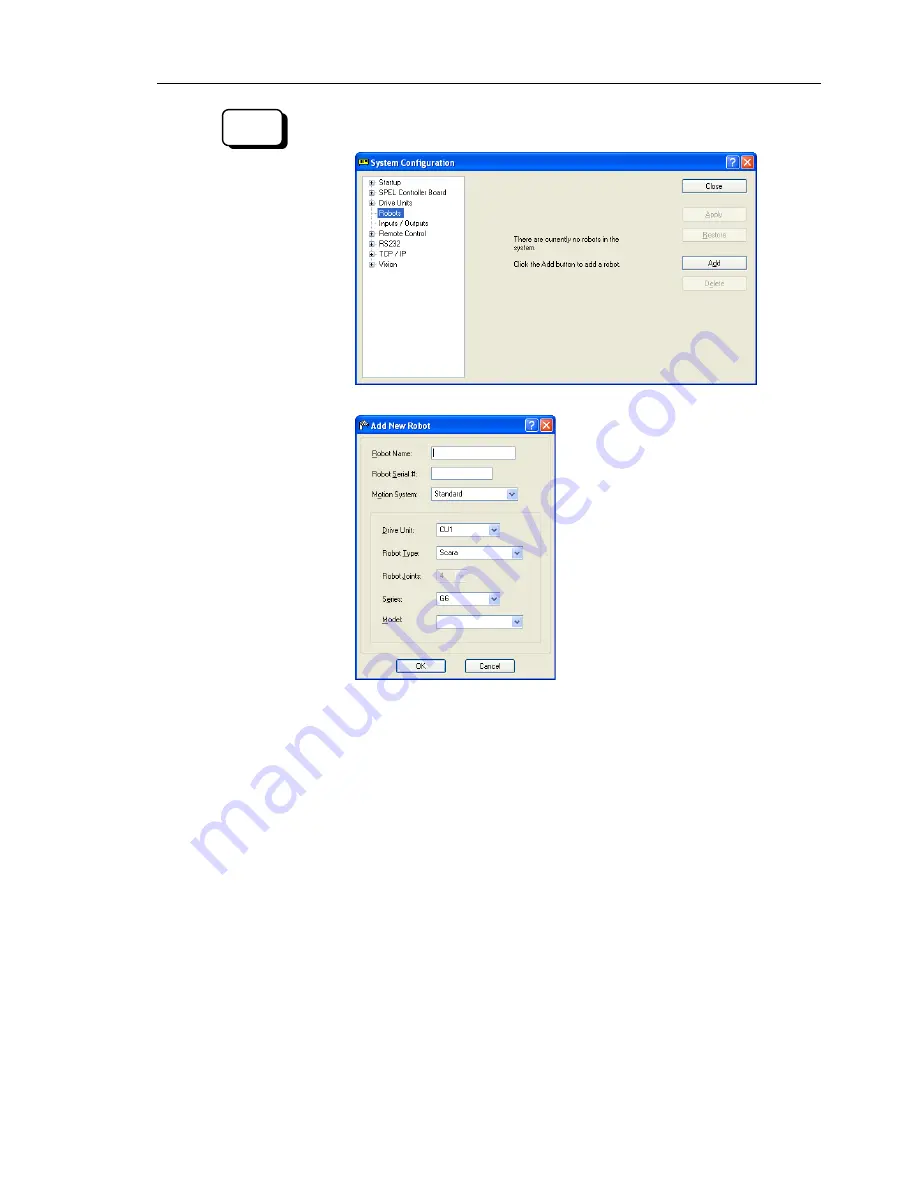
(9)-3 Click
Add
and the next dialog will appear.
(9)-4 Type in a name for the new robot and enter the serial number from the robot’s
nameplate. Any serial number can be used, but it is recommended that you
use the number that is stamped on the robot.
(9)-5 Select a motion system to use from the [Motion System] dropdown list. If
there are no other motion systems installed, then “Standard” will already be
selected.
(9)-6 Select a Drive Unit for your robot from the [Drive Unit] dropdown list.
(9)-7 Select a robot type from the [Robot type] box.
(9)-8 Select a robot series from the [Series] dropdown list.
(9)-9 Select a robot model from the [Model] dropdown list.
After you select a robot model, all robots available for the type of motor
driver currently installed in the controller will be shown. If you use [Dry
run], all robots selected in step 8 will be shown.
(9)-10 Click
OK
and the controller will be rebooted.
EPSON
RC+ 6.0
Summary of Contents for G3 Series
Page 1: ...Rev 14 EM183R3623F SCARA ROBOT G3 series MANIPULATOR MANUAL ...
Page 2: ...MANIPULATOR MANUAL G3 series Rev 14 ...
Page 8: ...vi G3 Rev 14 ...
Page 14: ......
Page 84: ...Setup Operation 5 Motion Range 72 G3 Rev 14 ...
Page 86: ...74 ...
Page 200: ...Maintenance 15 Maintenance Parts List 188 G3 Rev 14 ...