


Setting the top of form position
Finally so that the printer does not print on the perforations, you
need to establish a top of form position. The top of form position is the
position of the paper when the power is turned on. This position is also
reset whenever software initializes the printer or sets the page length.
Setting the top of form position is a simple threestep process:
1. See that the printer is turned off.
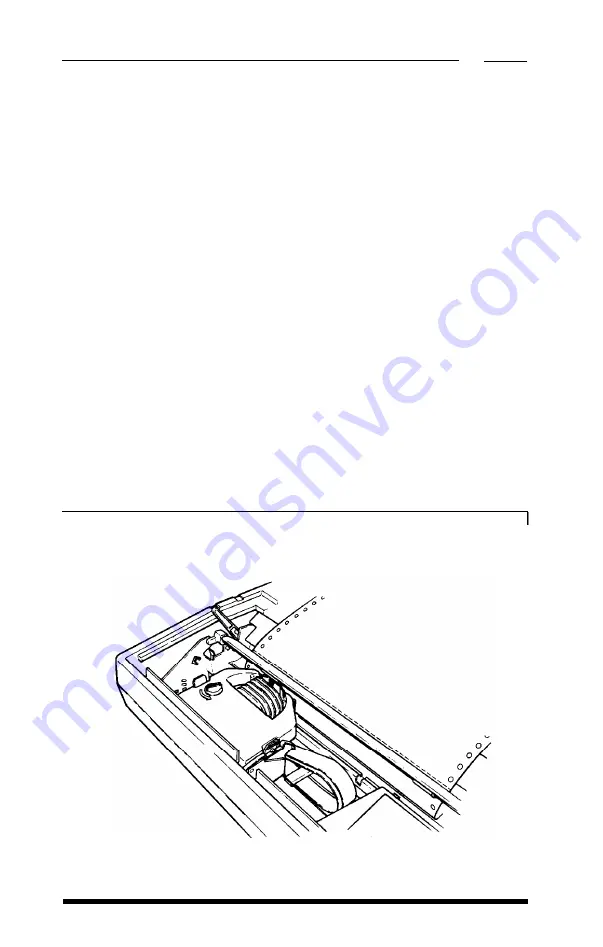
2. Use the paper feed knob to advance the paper until the first row of
perforations is just above the paper bail as shown in Figure 2-6.
3. Turn the printer on.
The printer remembers this position and keeps track of how far the
paper has been advanced. This way when you want to move to the top
of a new page, it always knows how far to advance the paper.
For some software, it is more convenient to set the top of form at the
top of the print head. Try this if the setting above the paper bail does
not work correctly with your software.
Figure 2-6.
The top of form setting
2 - 6
Choosing and Loading Paper
Summary of Contents for EX-1000
Page 1: ......
Page 11: ......
Page 29: ...1 18 Setting Up the Printer ...
Page 38: ......
Page 46: ...3 8 Using the EX with Application Programs ...
Page 51: ......
Page 57: ...5 6 EX Printer Features ...
Page 76: ......
Page 81: ...Command Summary A 5 ...
Page 82: ...A 6 Command Summary ...
Page 121: ......
Page 123: ...Table B 1 Epson mode characters B 2 Character Tables ...
Page 124: ...Table B 1 continued Character Tables B 3 ...
Page 125: ...Table B 1 continued B 4 Character Tables ...
Page 126: ...Table B 1 continued Character Tables B 5 ...
Page 127: ...Table B 1 continued B 6 Character Tables ...
Page 128: ...Table B 1 continued Character Tables B 7 ...
Page 129: ...Table B 1 continued B 8 Character Tables ...
Page 133: ...Table B 4 IBM printer emulation mode characters B 12 Character Tables ...
Page 134: ...Table B 4 continued Character Tables B 13 ...
Page 135: ...Table B 4 continued B 14 Character Tables ...
Page 137: ...Table B 4 continued B 16 Character Tables ...
Page 139: ...Table B 4 continued B 18 Character Tables ...
Page 151: ...D 8 Problem Solving and Maintenance ...
Page 157: ...E 6 Defaults and DIP Switches ...
Page 172: ......
Page 173: ...G 8 Technical Specifications ...
Page 183: ...IN 4 Index ...
Page 184: ...Quick Reference ...
Page 186: ......
Page 187: ......
Page 188: ......
Page 189: ......
Page 190: ......


