E P S O N
EPSON
AMERICA INC.
SERVICE DEPARTMENT
PRODUCT
SUPPORT
BULLETIN
DATE:
4
/
7
/
8
7
NUMBER:
S-0009
SUBJECT: EQUITY III+ CONFIGURATION WITH THIRD PARTY OPTIONS
While we
here at
Epson
can't possibly test all of the various
third-party options with the Equity III+, we can
share some basic
guidelines with you.
Here are some tips for easier installation of
some of the more popular options.
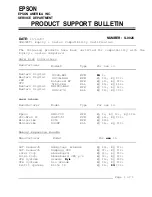
Fixed Disk Drives
All in
all,
fixed disk
installation in
the
Equity
III+ is
virtually the same as for the IBM PC AT. For those that don't have
experience with the AT procedure,
here are some guidelines:
1
- There are certain drive
parameters
that
have
to know.
These
are:
number of
cylinders,
number of
heads,
any
recommended write precompensation value
and
the
location of
the dedicated landing zone.
Once you know these facts, you can
refer to Appendix B in the
Equity III+
Diagnostics Manual to
determine
the
closest
possible
drive
type
selection. The
Diagnostics
Manual is
part of
the
complete
software and
documentation package provided with the III+.
2 -
As for the physical installation,
the drive select jumper (or
switch) must be set for the second drive position (that is, if
the range
is DS0-DS3, pick DS1).
The terminating resistor has
to be installed on
the first
logical drive
in the
system -
that is, if
you
have a
physical C and D drive, you would
terminate C.
The 34 pin data cable from the WHDC controller is
a daisy-chain
configuration
with
2 connectors. Please note
that these are marked C (the end connector) and D
(the middle
or
pass-through
connector).
Finally,
there
are two 20 pin
control cables; the uppermost
(CN4) handles drive C and the
lower one (CN5) connects to drive D.
3 -
Now for
the initialization.
There are
a couple
of ways to
handle
this:
use
the
Epson-supplied
utilities (from
the
Diagnostics diskette) or
some third-party software, such as
SpeedStor or Disk Manager. Be
aware
that
most
drives will
require four
separate steps:
SETUP (to identify the drive to
CMOS RAM);
low-level (physical)
formatting;
partitioning; and
then
high-level
(logical)
formatting.
The
Epson-supplied
programs
w o u l d b e
(in
order):
SETUP.EXE,
HDFMTALL.COM,
FDISK.COM and
either
FORMAT.COM or
SELECT.COM.
SETUP and
HDFMTALL
can be
accessed by
simply booting up
from the
Diagnostics
diskette.
Refer to
the Epson documentation for
detailed instructions on the use of these programs,
Page 1 of 2
Summary of Contents for Equity III
Page 58: ...Page 2 of 2 ...
Page 67: ...N C J 5 r J Page 7 of 17 ...
Page 69: ... Page 9 of 17 ...
Page 75: ...1 3 4 Difference between 10MHz version and 12MHz version ...

