d
Using the [
], [
], [ ], and [ ] buttons on the remote control,
or the [
w
], [
v
], [
a
], and [
b
] buttons on the control panel, select
the corner to correct, and then press the [
] button.
e
Using the [
], [
], [ ], and [ ] buttons on the remote control,
or the [
w
], [
v
], [
a
], and [
b
] buttons on the control panel, correct
the position of the corner.
When you press the [
] button, the screen shown in step 4 that
allows you to select the area to be corrected is displayed.
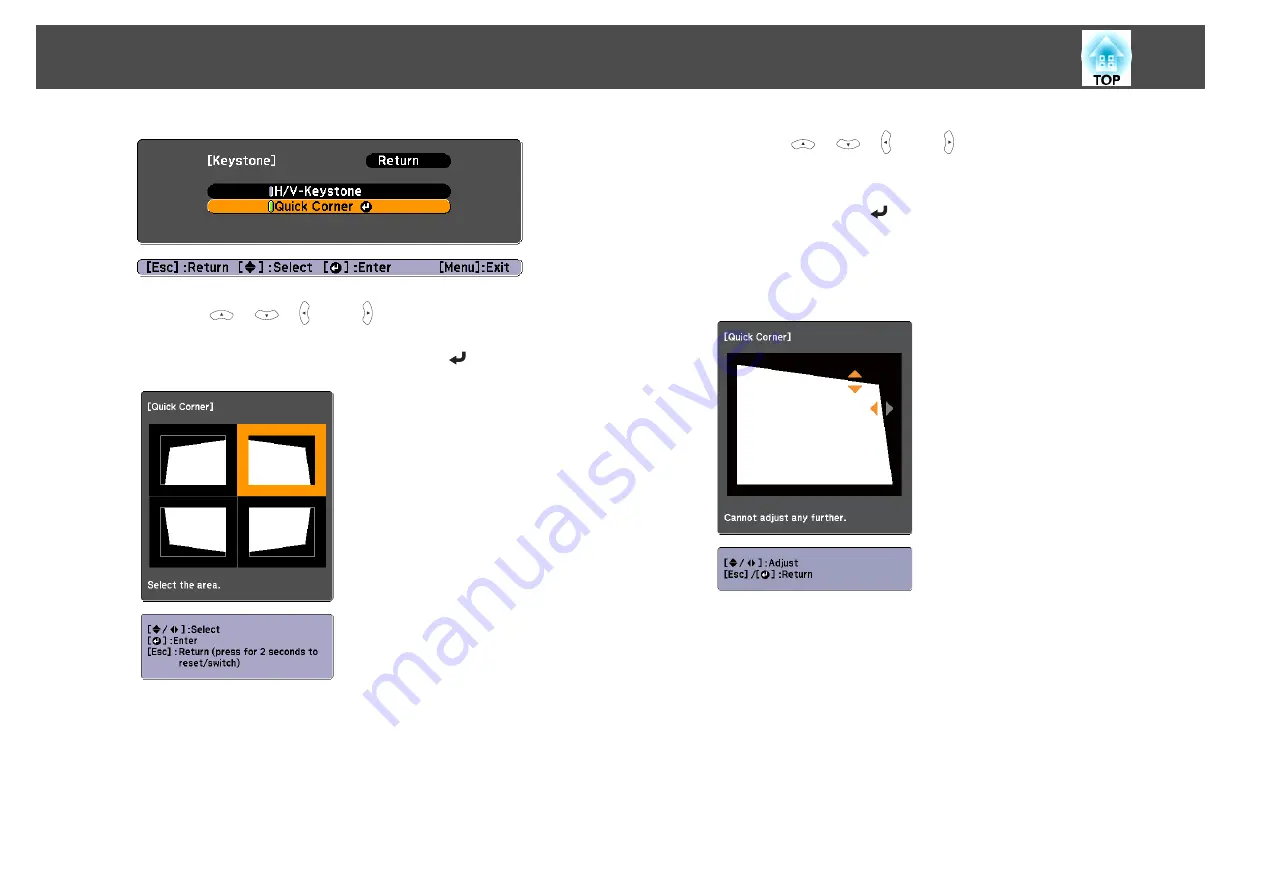
If the message "Cannot adjust any further." is displayed while
adjusting, you cannot adjust the shape any further in the direction
indicated by the gray triangle.
f
Repeat procedures 4 and 5 as needed to adjust any remaining
corners.
g
When you are done, press the [Esc] button to exit the correction
menu.
Because
Keystone
was changed to
Quick Corner
, the corner
selection screen shown in step 4 is displayed the next time you press
the [
w
] or [
v
] button on the control panel. Change
Keystone
to
H/V-Keystone
if you want to perform horizontal and vertical
correction using the [
w
] or [
v
] button on the control panel.
s
Settings
-
Keystone
-
H/V-Keystone
Adjusting Projected Images
39
Summary of Contents for EB-1930
Page 1: ...User s Guide ...
Page 7: ...Introduction This chapter explains the projector s features and the part names ...
Page 22: ...4 3 Screen Size For EB 1960 EB 1950 EB 1930 Installing the Projector 22 ...
Page 29: ...Basic Usage This chapter explains how to project and adjust images ...
Page 84: ...Configuration Menu This chapter explains how to use the Configuration menu and its functions ...
Page 127: ...Appendix ...


