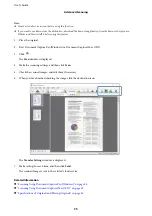


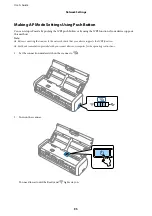


Making Wi-Fi Settigs by Using EpsonNet Config
You can use EpsonNet Config to connect the scanner to a Wi-Fi network. Connect the scanner to your computer
using a AP mode first to register the Wi-Fi network settings on the scanner. Next, reboot the scanner in Wi-Fi
connection mode to connect it to your Wi-Fi network.
Check the following settings before you start.
❏
EpsonNet Config is installed on your computer. If it is not installed, install it from the software disc or
download it from the following web site.
>
Setup
>
Download
❏
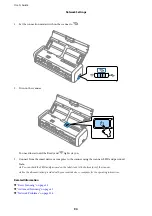
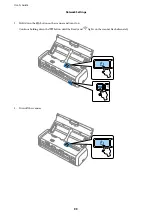
The scanner and your computer are turned on and connected with AP mode connection.
Note:
If you are using iOS or Android devices, you can use Epson DocumentScan to connect the scanner on Wi-Fi network.
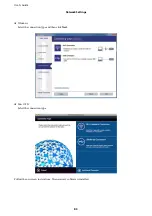
1.
Run EpsonNet Config on your computer.
❏
Windows 10
Click the start button, and then select
All apps
>
EpsonNet
>
EpsonNet Config VX
>
EpsonNet Config
.
❏
Windows 8.1/Windows 8/Windows Server 2012 R2/Windows Server 2012
Enter the application name in the search charm, and then select the displayed icon.
❏
Windows 7/Windows Vista/Windows XP/Windows Server 2008 R2/Windows Server 2008/Windows Server
2003 R2/Windows Server 2003
Click the start button, and then select
All Programs
(or
Programs
) >
EpsonNet
>
EpsonNet Config VX
>
EpsonNet Config
.
❏
Mac OS X
Select
Go
>
Applications
>
EPSON Software
>
EpsonNet
>
EpsonNet Config VX
>
EpsonNet Config
.
Note:
Where "X" is the software version.
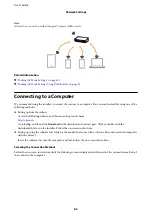
User's Guide
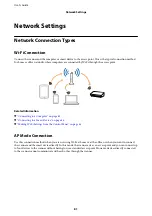
Network Settings
89


