


Owner's Manual for EPILOG Legend Model 6000
December, 2000
16
Section 4 – Job Setup Guide
PRINT SETUP
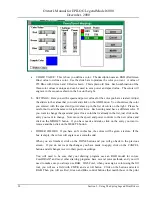
1.
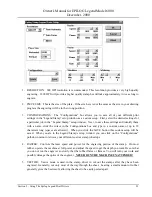
Once you have the image ready to engrave, you can select FILE, PRINT. Change the printer name to
“Legend”, then select the PROPERTIES button to set your print settings. This is where you set the
resolution, speed, power, and again enter the piece size.
2.
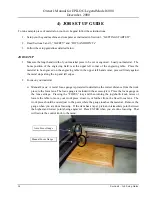
If placement of your artwork is critical, place a couple layers of masking tape onto the area of the
material piece to be engraved and practice at high speed and low power to mark only the tape.
3.
For more information on the print setup read Section 5, “Using the Legend Print Driver” of this
manual. Now press print and you are engraving and cutting.
REMEMBER THE STEPS:
1.
Turn on the power to the engraver, and wait for a “Beep” to note the machine is ready.
2.
Insert the item to be engraved. (make sure table is low enough to accommodate piece)
3.
Focus with gauge (or enable auto focus).
4.
Close the door.
5.
Confirm the exhaust is on.
6.
Press GO on the Legend.
7.
Create your artwork layout on your computer in a software program (i.e. CorelDRAW).
8.
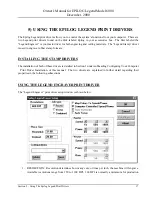
Set your print setup properties in the Legend print driver window.
9.
Print to the Legend.


