


EWS850-FIT Quick Start Guide
1. Determine where the
Access Point
will be placed and
mark the location on the surface for the two mounting
holes. Use the appropriate drill bit to drill two 8.1mm
diagram and 26mm-deep holes on the marks.
2. Screw the
Anchors
into the holes until they are flush
with the wall.
3. Fasten the
Mounting Bracket
with the included
Screws
into the
Anchors.
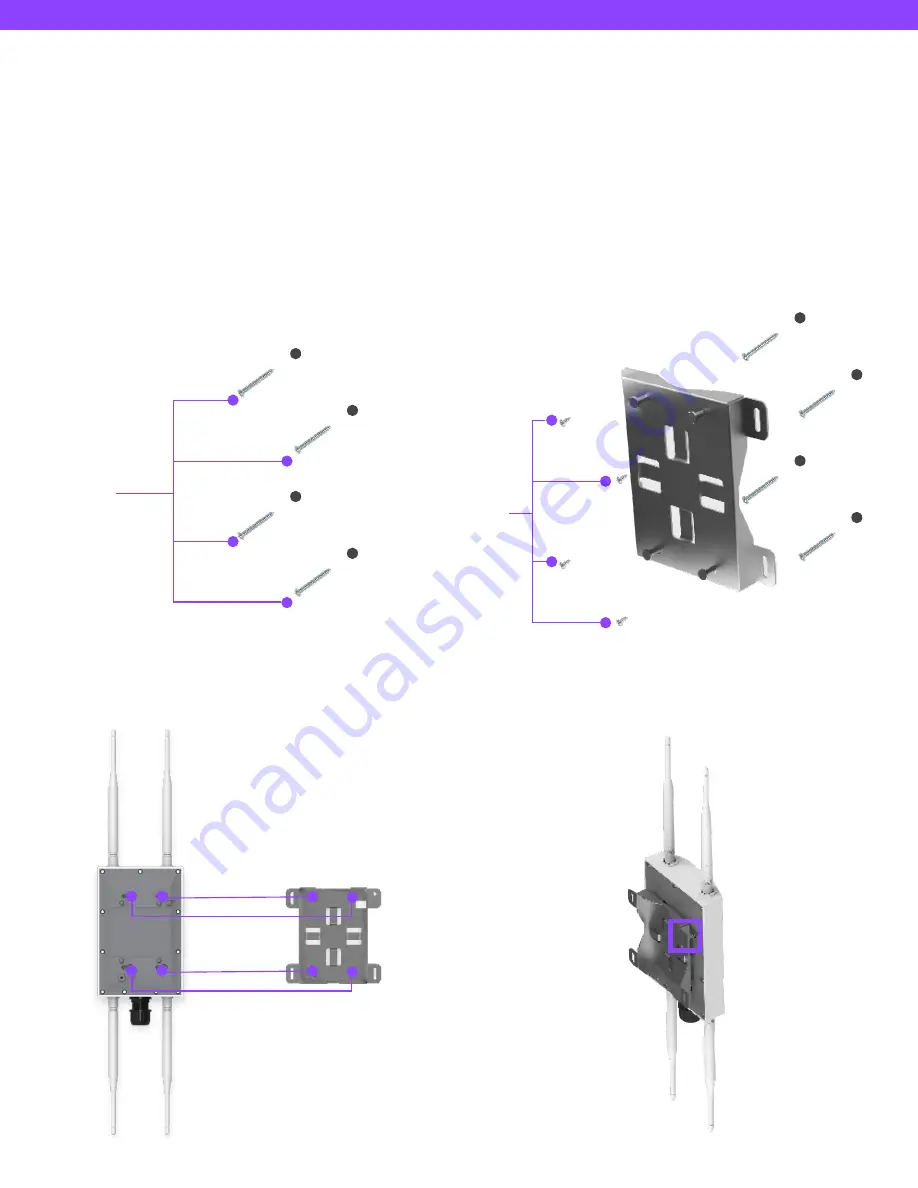
Hardware Mounting
Wall Mount
The access point can be mounted on the Wall and Pole, and
please perform the steps for the appropriate installation.
Anchors
Wall
Screws
Anchors
Wall
4. Hang the
Access Point
against the wall on the
Mounting Bracket.
5. Secure the
Access Point
on the
Mounting Bracket
with the secure lock on the side.
Mounting Bracket
Wall
FIT Bridge Outdoor
Access Point


