Connecting the dial-up modem
www.emachines.com
11
Connecting the dial-up modem
Your computer has a built-in 56K modem that you can use to connect to a
standard telephone line for a dial-up Internet connection.
Warning
To reduce the risk of fire, use only No. 26
AWG or larger telecommunications line
cord.
To connect the modem:
1
Insert one end of the modem cable into the modem jack
on the back
of your computer.
2
Insert the other end of the modem cable into a telephone wall jack. The
modem will not work with digital or PBX telephone lines.
3
Start your computer, then start your communications program.
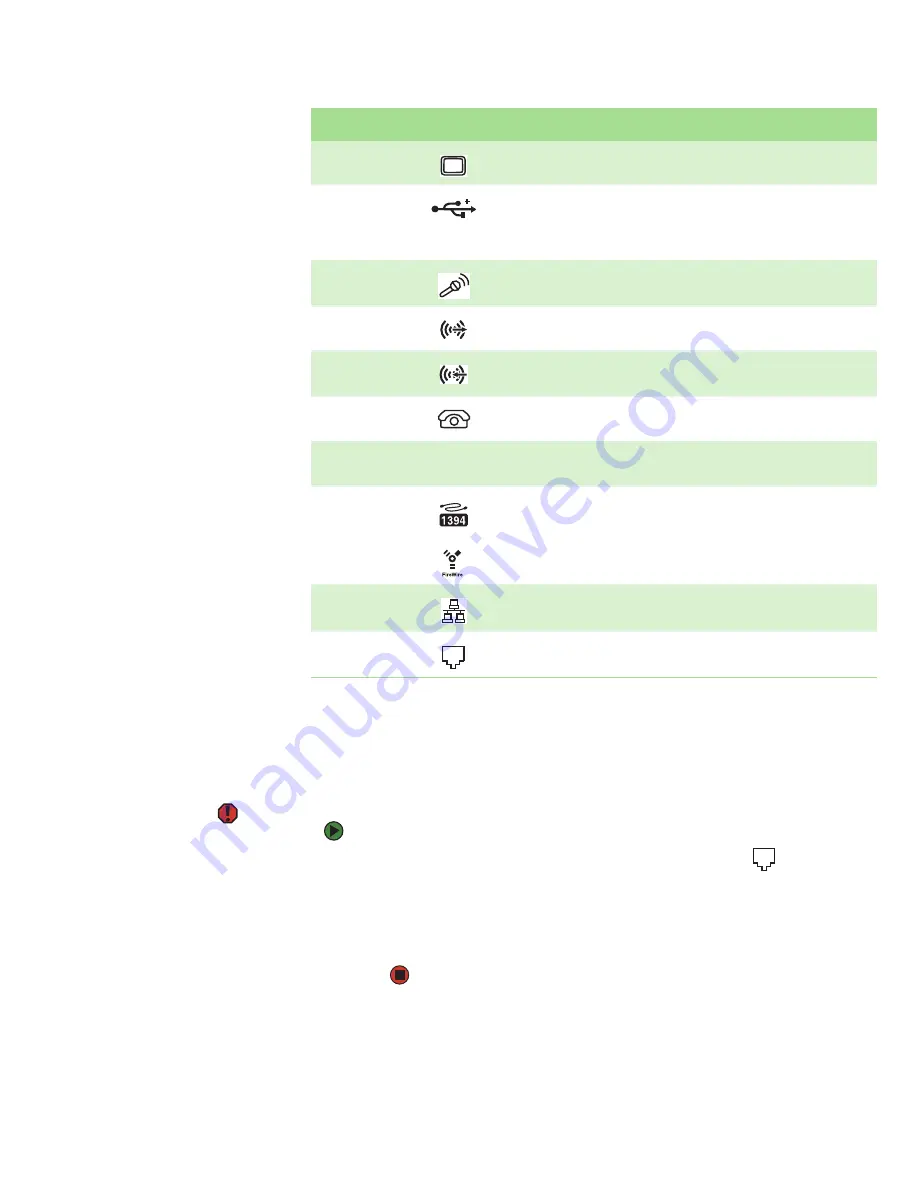
Monitor port
Plug a monitor into this port.
USB ports
(optional)
Plug USB (Universal Serial Bus) devices (such as a USB Iomega™ Zip™ drive,
printer, scanner, camera, keyboard, or mouse) into these ports. For more
information, see
“Installing a printer, scanner, or other peripheral device” on
page 13
.
Microphone jack
Plug a microphone into this jack. This jack is color-coded red or pink.
Audio output (Line
out) jack
Plug powered, analog front speakers, an external amplifier, or headphones into
this jack. This jack is color-coded lime green.
Audio input
(Line in) jack
Plug an external audio input source (such as a stereo) into this jack so you can
record sound on your computer. This jack is color-coded blue.
Telephone jack
(optional)
If your modem has a telephone jack, plug the cable for a telephone into this jack.
Case cover
thumbscrews
Remove these screws before opening the case.
IEEE 1394 ports
(optional)
Plug an IEEE 1394 (also known as Firewire
®
or i.Link
®
) device (such as a digital
camcorder) into one of these 6-pin IEEE 1394 ports. For more information, see
“Installing a printer, scanner, or other peripheral device” on page 13
.
Ethernet (network)
jack
Plug a 10/100 Ethernet network cable or a device (such as a DSL or cable modem
for a broadband Internet connection) into this jack.
Modem jack
Plug a modem cable into this jack.
Component
Icon
Description
Summary of Contents for H3120
Page 21: ...CHAPTER 2 Getting to Know Your Computer www emachines com 14 ...
Page 31: ...CHAPTER 3 Using Your Computer www emachines com 24 ...
Page 47: ...CHAPTER 4 Using Windows XP www emachines com 40 ...
Page 55: ...CHAPTER 5 Using the Internet www emachines com 48 ...
Page 116: ...CHAPTER 10 Protecting Your Computer Hardware security Data security Security updates ...
Page 149: ...CHAPTER 12 Maintaining Your Computer www emachines com 142 ...
Page 172: ...CHAPTER 14 Troubleshooting Safety guidelines First steps Troubleshooting Telephone support ...
Page 203: ...Index www emachines com 196 ...
Page 223: ...CHAPITRE 2 Faites connaissance avec votre ordinateur www emachines com 14 ...
Page 233: ...CHAPITRE 3 Utilisation de votre ordinateur www emachines com 24 ...
Page 257: ...CHAPITRE 5 Utilisation d Internet www emachines com 48 ...
Page 374: ...CHAPITRE 14 Dépannage Directives de sécurité Premières étapes Dépannage Support par téléphone ...
Page 405: ...Index www emachines com 196 ...
Page 406: ...8511128 MAN EM HW REF GDE FRCA R0 ...


