CHAPTER 13: Adding and Replacing Components
www.emachines.com
154
4
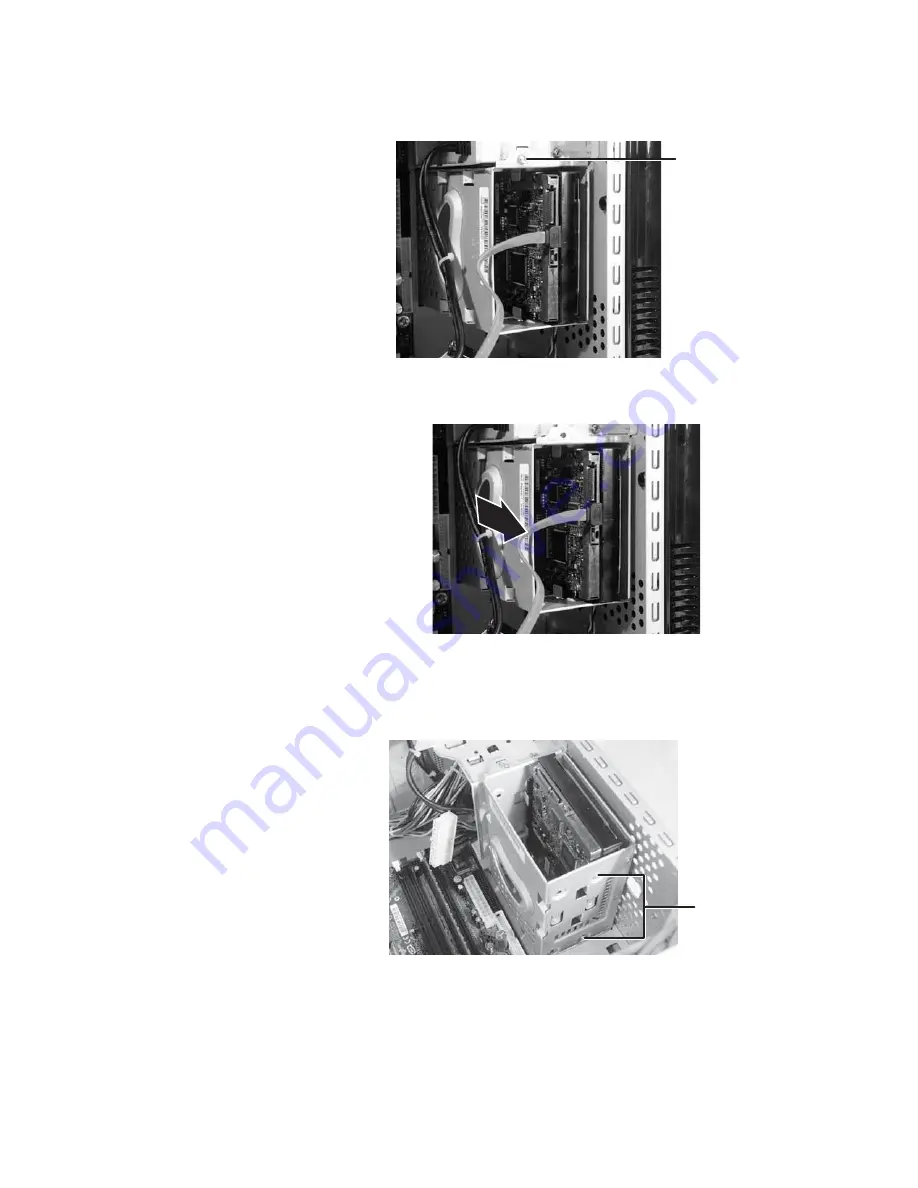
Remove the screw that secures the hard drive bay to the case.
5
Slide the hard drive bay away from the system board and toward the open
side of the case, then remove the hard drive bay from the case.
6
If you are adding a new drive, go to
Step 9
. If you are replacing an existing
drive, go to the next step.
7
Remove the four screws that secure the hard drive to the drive bay. (Only
the two screws on one side of the bay are shown below.)
8
Slide the old drive out of the bay.
9
Slide the new drive into the drive bay.
10
Use the four screws you removed previously to secure the hard drive to
the hard drive bay.
Screw
Screws
Summary of Contents for H3120
Page 21: ...CHAPTER 2 Getting to Know Your Computer www emachines com 14 ...
Page 31: ...CHAPTER 3 Using Your Computer www emachines com 24 ...
Page 47: ...CHAPTER 4 Using Windows XP www emachines com 40 ...
Page 55: ...CHAPTER 5 Using the Internet www emachines com 48 ...
Page 116: ...CHAPTER 10 Protecting Your Computer Hardware security Data security Security updates ...
Page 149: ...CHAPTER 12 Maintaining Your Computer www emachines com 142 ...
Page 172: ...CHAPTER 14 Troubleshooting Safety guidelines First steps Troubleshooting Telephone support ...
Page 203: ...Index www emachines com 196 ...
Page 223: ...CHAPITRE 2 Faites connaissance avec votre ordinateur www emachines com 14 ...
Page 233: ...CHAPITRE 3 Utilisation de votre ordinateur www emachines com 24 ...
Page 257: ...CHAPITRE 5 Utilisation d Internet www emachines com 48 ...
Page 374: ...CHAPITRE 14 Dépannage Directives de sécurité Premières étapes Dépannage Support par téléphone ...
Page 405: ...Index www emachines com 196 ...
Page 406: ...8511128 MAN EM HW REF GDE FRCA R0 ...


