18
Chapter2AdjustingScreens
●
To set the highlight area in the image display area
You can set On/Off for the highlight area in the image display area.
Procedure
1. Choose “Color” from the Adjustment menu, and press
.
2. Choose “Highlight Area” from “Color”, and press
.
3. Select “On” or “Off” with or .
4. Press
to exit.
Note
• When “On” is specified, the monochrome display area is displayed in green, and the color display area is displayed in
red.
• You can set On/Off for the highlight area with .
2-4. Selecting Screen Size
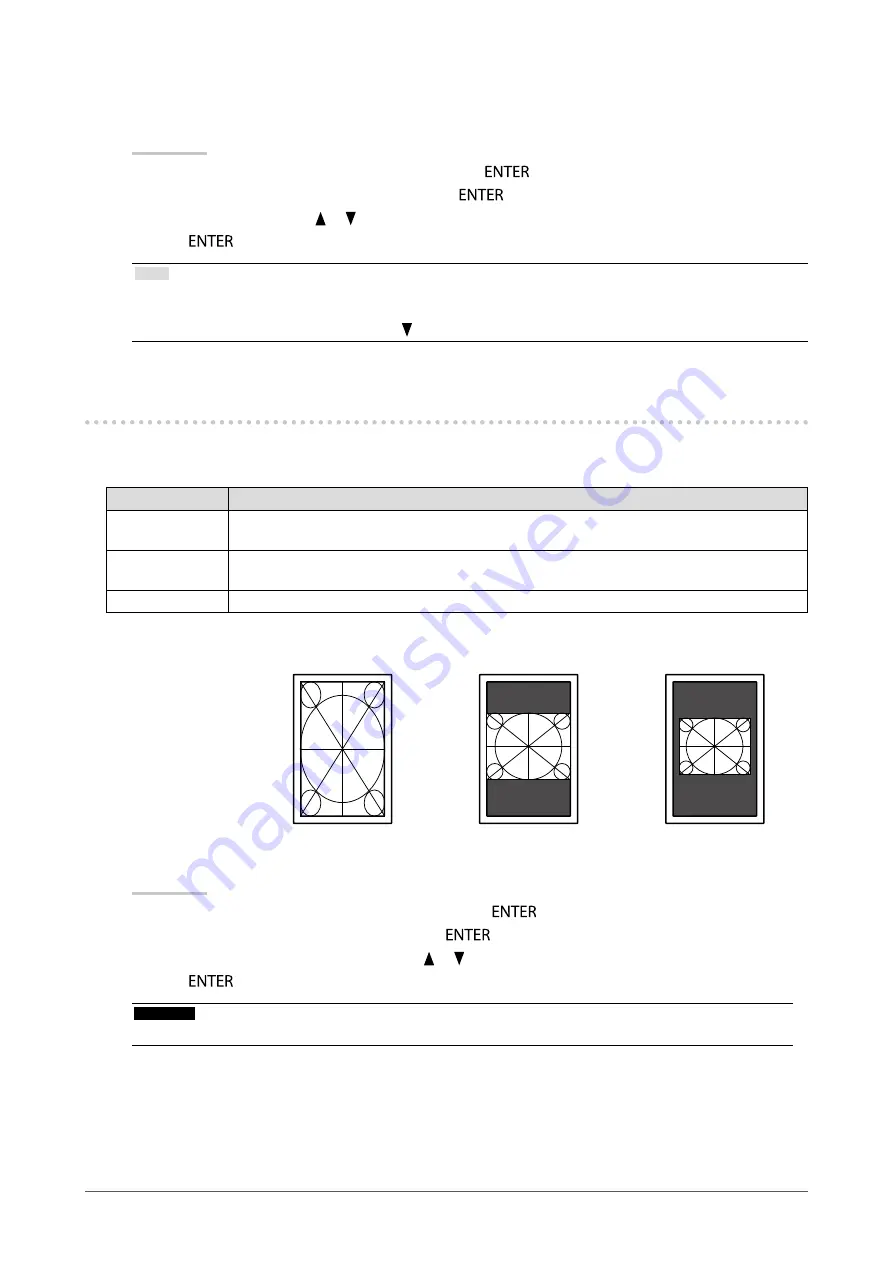
The image with the resolution other than the recommended resolution is displayed in full screen automatically. You
can change the screen size by using the “Screen Size” function from “Screen”.
Settings
Function
Full
Displaysanimageinfullscreen.Imagesaredistortedinsomecasesbecausetheverticalrate
isnotequaltothehorizontalrate.
Enlarged
Displaysanimageinfullscreen.Insomecases,ablankhorizontalorverticalborderappears
toequalizetheverticalrateandthehorizontalrate.
Normal
Displaysimageswiththespecifiedresolution.
Example: Image size 1024 × 768
Full
Enlarged
Normal
RX240:
(1200×1600)
(1200×900)
(1024×768)
RX340/RX340-AR:
(1536×2048)
(1536×1152)
(1024×768)
Procedure
1. Choose “Screen” from the Adjustment menu, and press
.
2. Choose “Screen Size” from “Screen”, and press
.
3. Select “Full”, “Enlarged”, or “Normal” with or .
4. Press
to exit.
Attention
• Selecting “Normal” may make some color gradations unavailable for display.


