USER MANUAL
– PROCAM HD 3D
Page
9
of
15
INMANUUIN136 Rev.2019.04.01 / ENG
9) Carry out para-focalization. To perform a correct para-focalization, place the object to be
displayed at the appropriate focal distance under the objective lens of the microscope.
If your microscope has fine focus control, place it in the middle of its path. Place the
eyepieces in the neutral position (uncorrected) and select the largest magnification of the
microscope. Then adjust the height of the microscope and fine-tune the fine-focus. Select
decreasingly all magnifications, until the minimum magnification, verifying that all are in
focus. If not, make the necessary adjustments with the fine-focus until you reach the
optimum target. If it is necessary to adjust the focus, you should recheck it with all
magnifications. Repeat the procedure until you can focus correctly on all magnifications.
10) Once you have performed the para-focalization with the microscope through the
eyepieces, proceed to check the focusing of the image on the screen. In order to get a
three-dimensional image, the images of the right and left camera of the device are
superimposed; therefore, it is necessary to verify that the images of both cameras are
correctly focused. To do this, place your 3D glasses and cover your left eye. Look at the
image that appears on the screen and check that it is in focus. If this is not the case,
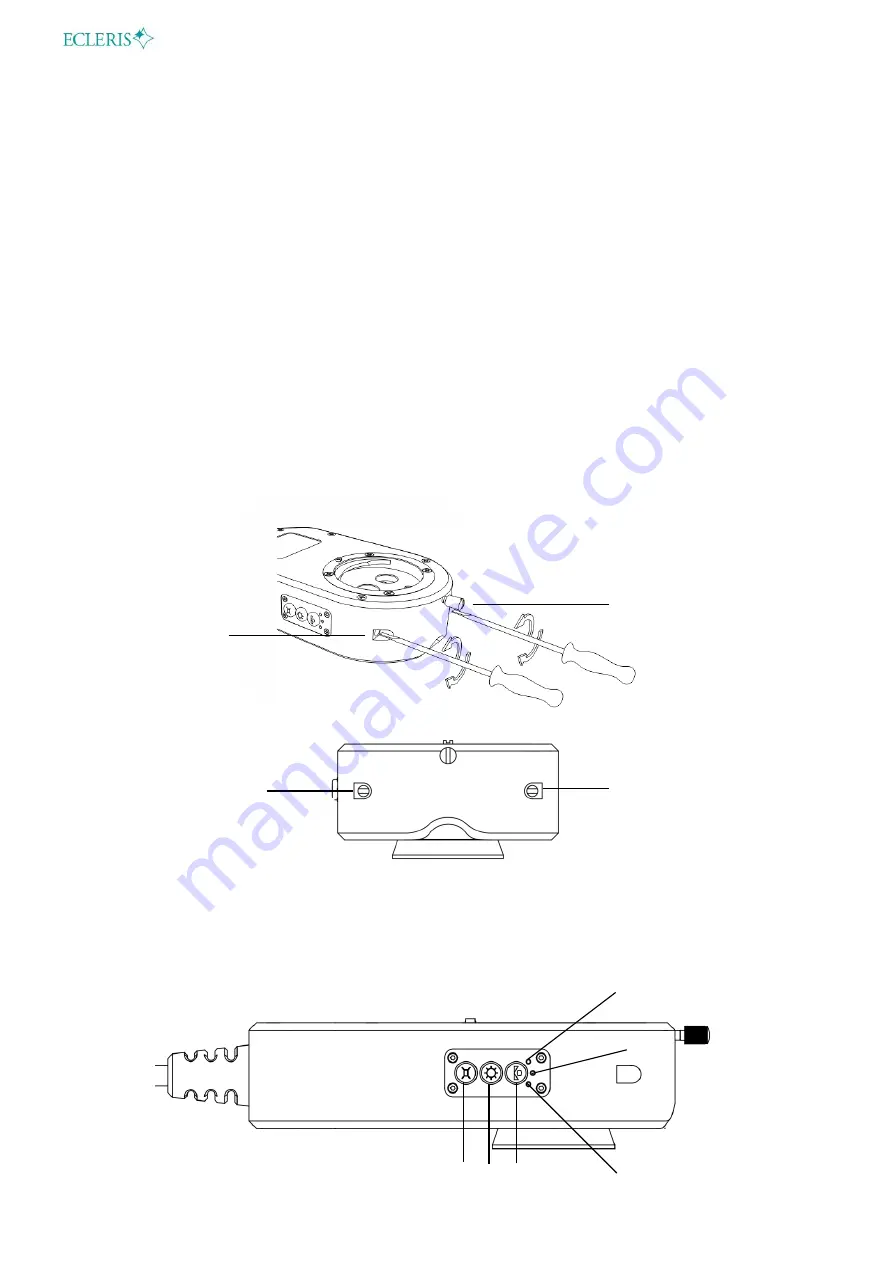
proceed with the adjustment screw located on the body of the 3D splitter, using a flat
screwdriver (for the left eye, use the left side screw). Once you have been able to focus
the image corresponding to the left eye, proceed with the right eye equally; taking care to
use the right side screw.
3D splitter front view
5. FUNCTIONS
Right focus adjustment
Left focus adjustment
Right focus adjustment
screw
Left focus adjustment screw
2
1
3
4
5
6


