


30
XCHARGEIN DC 22 INSTALLATION MANUAL
MN192004EN September 2021 www.eaton.com
00 Title
7.2.1 Configure an online station via LAN network
The router of the EV charging station is usually preconfigured. Final steps are required during the installation. Contact
your Eaton service representative for further details.
Follow the steps below to configure the router of the unit for connection via LAN network:
Step 1
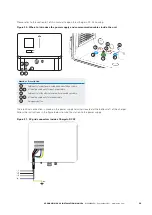
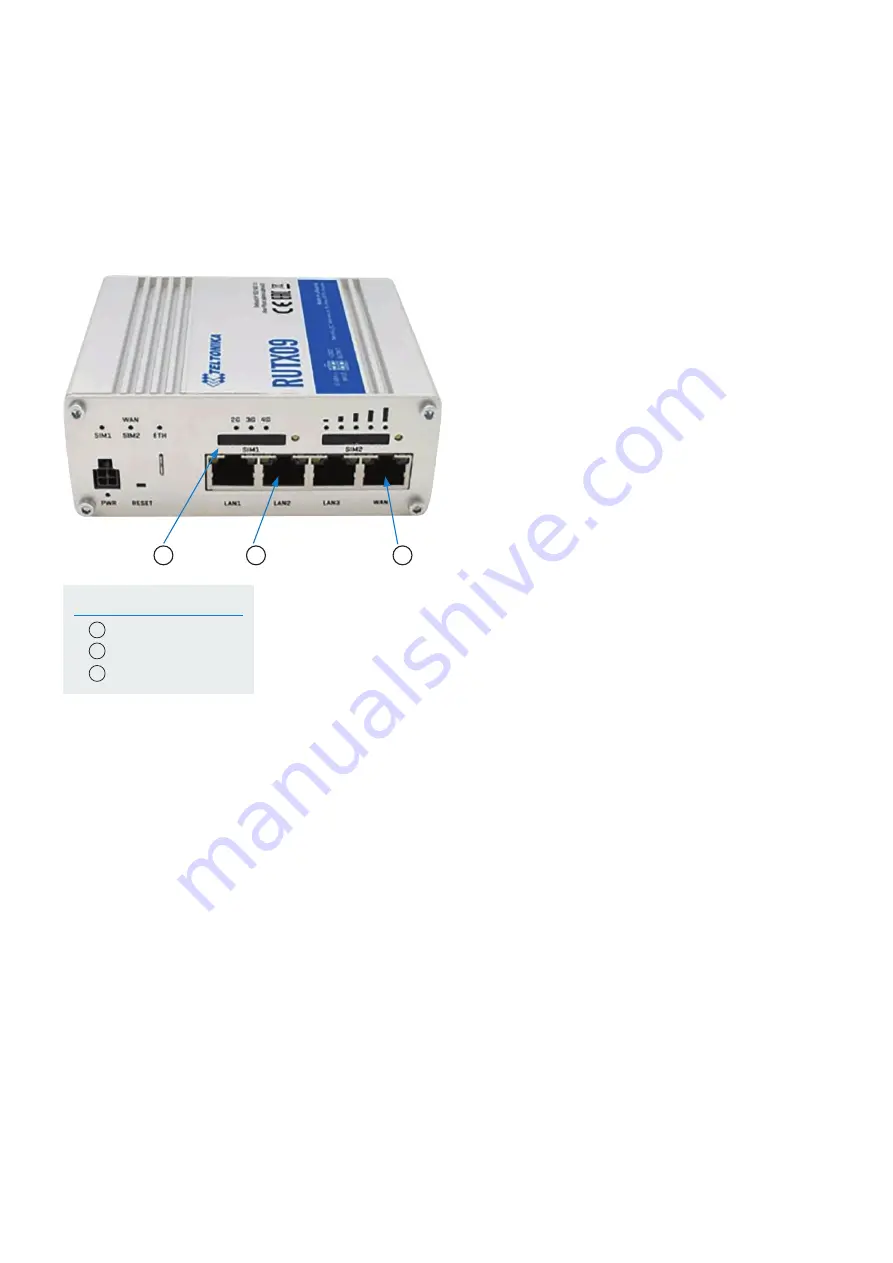
. Connect your laptop with one of the LAN ports of the router via an ethernet cable. See Figure 27.
Figure 27. Teltonika RUTX09 modem/router
Number Description
1
WAN Ethernet port
2
LAN Ethernet ports
3
SIM card slot
Step 2.
Ensure the laptop is below the same subnet of the RUTX09 router. The default IP address of the router is
192.168.52.1. Contact your Eaton service representative for further details for the router credential.
Step 3.
Connect to the router. If a step-by-step configuration menu "Setup Wizard" appears, ignore it and go directly to
the menus described below.
Step 4.
Go to the Network> WAN menu.
Step 5.
Activate the WAN network and deactivate the other networks.
Step 6.
Press Save & Apply.
Step 7.
Authorize the management of the router from the WAN (Only in a private network).
Go to System> Administration> Access control.
Step 8.
Check Enable Remote HTTP and Enable Remote HTTPS.
Step 9.
Connect the WAN ethernet port of the Teltonika RUTX09 router via an ethernet cable to a local modem.
The ethernet cable can be routed through the dedicated opening on the bottom-left or rear-left side of the
xChargeIn DC 22. See Figure 20.
2
1
3


