2-4
1
Getting Started
4
7
5
6
Front View
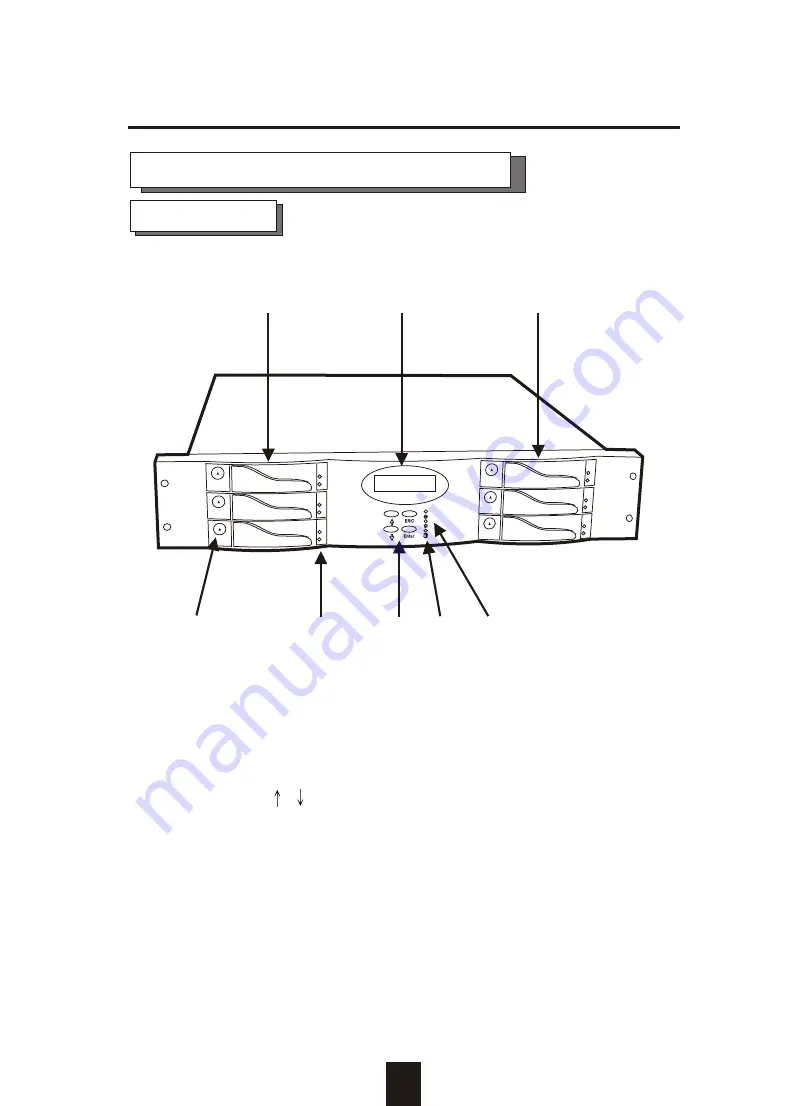
Identifying Parts of the Disk Array
Figure : Front View
1. LCD Status Display Panel
2. HDD Trays 1 ~ 3 (From Up to Down)
3. HDD Trays 4 ~ 6
4. Function Keys ( ,
, Enter , ESC )
5. Power-On Indicator ( PWR Unit 1 , PWR Unit 2 )
6. Host Computer Access Indicator
7. HDD Tray Lock ( Lock / Unlock )
8. HDD Status Indicator
( Error (Red), Access (Yellow), Power-On (Green))
2
3
8
Summary of Contents for E6
Page 45: ...3 9 Configuration Main Screen ...
Page 60: ...Advanced Information 4 8 Step 2 ...
Page 61: ...Advanced Information 4 9 Step 3 Enter a name for your Terminal ...
Page 62: ...Advanced Information 4 10 Step 4 Select a connecting port in your Terminal ...
Page 63: ...Advanced Information 4 11 Step 5 Port parameter settings ...
Page 64: ...Advanced Information 4 12 Step 6 ...
Page 68: ...4 16 Advanced Information 3 Select transfer Send Text File and press Enter ...
Page 69: ...4 17 Advanced Information 4 Locate the new Firmware file on your PC ...
Page 70: ...4 18 Advanced Information 5 Press Go to confirm to download the new firmware ...
Page 76: ...5 3 Hot Swap b Gently pull out the HDD tray Figure Swap HDD Pull out ...


