


rev_0.6
116 / 135
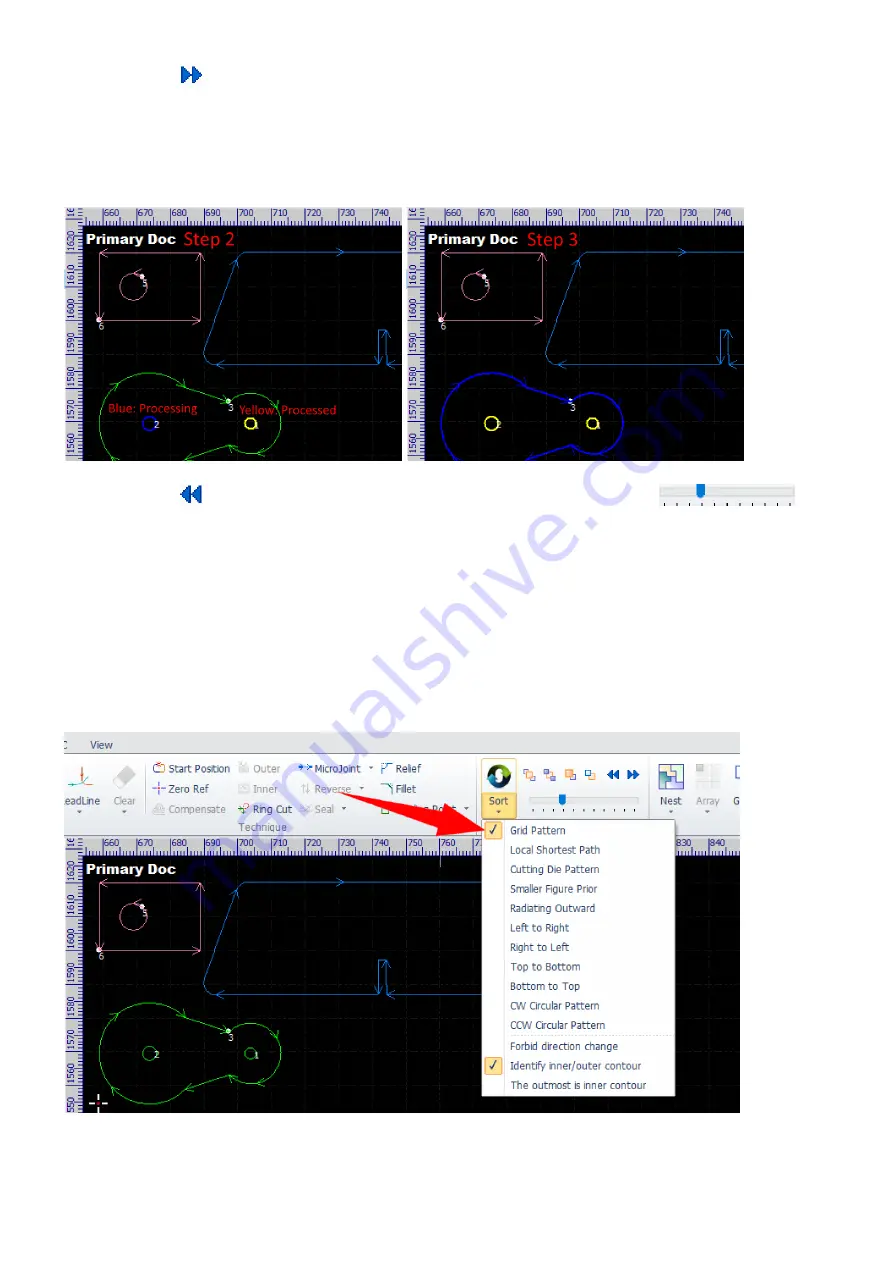
Click the button
to push the processing forward one step. The contours appear in bold yellow have been
processed, the contour appears in bold blue is being processing, others are waiting. The picture on the left
shows that the contour 1 has been processed and the contour 2 is being processing. The picture on the right
shows that, after one step forward, the contour 1 and 2 have been processed, and the contour 3 is being
processing.
Click the button
to pull the processing back one step, and you can drag the slider
back and forth to go through the processing quickly when there are many objects, e.g. in a nesting result.
In addition, you can use the simulation function to preview the processing sequence, refer to
CypCut has a set of strategies for sorting the processing sequence automatically. In general, we recommend
to use the grid pattern, the software will split a big area into an array of small areas, sort the parts in each
small area in an optimized way, and then combine them back into a big picture in the "S" shaped order. You
can try other strategies by yourself to check it out which one is best for a specific job.
Sometimes, especially in case of some open cutting paths in the drawing, the software will try to change the
direction of the cutting paths if the traveling paths can be cut down. You can check the option Forbid
Summary of Contents for EV-30
Page 41: ...rev_0 6 41 135 Machining Now you can start machining the parts...
Page 126: ...rev_0 6 126 135 3 Remove the access panel on top of the Z axis...
Page 127: ...rev_0 6 127 135 4 Remove the covers of the X axis drag chain...
Page 129: ...rev_0 6 129 135 7 Remove the corner access panel of the X Y intersection...
Page 133: ...rev_0 6 133 135 2 Remove the laser head from the Z axis slider...


