Electrical Quick Disconnect 6–2
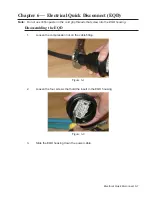
4.
Loosen the six retaining screws and remove the wires from the EQD insert.
Reassembling the EQD
1.
Slide the EQD housing (with cable fitting installed and compression nut loose) over
the power cable.
2.
Tray cable side: install the watertight grommet onto the wires. Keep the tapered side
toward the cable jacket, not the cable end.
3.
Insert the wire ends of the power cable into the EQD insert, ensuring proper pin
number and wire color alignment:
Figure 6-3
Taper
Figure 6-4
EQD Pin #
Wire Color
Function
1
Brown
Manual run
2
Red
L1
3
Black
L2 (240V) or Neutral (120V)
4
Green w/ yellow stripe
Ground
5
Yellow
Alarm power feed
6
Blue
Alarm power return
Table 6–1
Summary of Contents for Extreme Series
Page 1: ...Service Manual E One Extreme Grinder Pumps 240V 60 Hz Hardwired Controls...
Page 2: ......
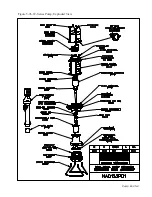
Page 32: ...Pump End 5 8 Figure 5 9a D Series Pump Exploded View...
Page 33: ...Pump End 5 9 Figure 5 9b W Series Pump Exploded View...
Page 34: ...Pump End 5 10 Figure 5 9c Gatorgrinder GH Series Pump Exploded View...
Page 35: ...Pump End 5 11 Figure 5 9d IH091 Pump Exploded View...
Page 36: ...Pump End 5 12...
Page 58: ...Level Sensor 8 10 Figure 8 35 Level Sensor Assembly Exploded View all hardwired pumps...
Page 70: ...Mechanical Seal Assembly 11 2...
Page 75: ......


