background image

8

CC 100  M100EN1

MAINTENANCE MEASURES

Item in

Measure

See page

Comments

Fig. 1

3

Clean the outside of the hydraulic fluid cooler

15

5

Check the battery

15

6

Change the lubricating oil of the diesel engine
(Isuzu)

16

See engine manual

6

Clean the engine cooling fins

See engine manual

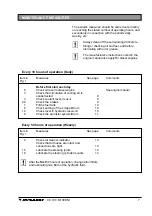
Every 250 hours of operation (Monthly)

Item in

Measure

See page

Comments

Fig. 1

18

Check oil level in rear drum

17

11

Check the cap/vent of the hydraulic reservoir

17

10

Lubricate controls and pivots

17

19

Check rubber elements and bolted joints

18

6

Change the lubricating oil of the diesel engine
(Deutz)

18

See engine manual

6

Change engine oil filter

19

See engine manual

6

Check engine V-belts

19

See engine manual

6

Change the engine fuel filter (Isuzu)

19

See engine manual

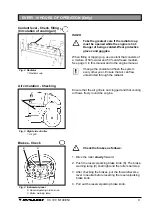
Every 500 hours of operation (Every 3 months)

Item in

Measure

See page

Comments

Fig. 1

13

Change the hydraulic filter

20

12

Drain off condense water from the hydraulic
reservoir

21

4

Change the main filter in the air cleaner

21

6

Change the engine fuel filter (Deutz)

21

6

Change the engine pre-filter

22

6

Check the engine cogged V-belt

See engine manual

6

Check engine valve clearance

See engine manual

Every 1000 hours of operation (Every 6 months)

Item in

Measure

See page

Comments

Fig. 1

12

Change the fluid in hydraulic reservoir

23

18

Change oil in rear drum

23

7

Clean the water tank

23

1

Clean the fuel tank

24

Every 2000 hours of operation (Yearly)

Summary of Contents for CC100

Page 1: ...SVEDALA COMPACTION AND PAVING Box 504 SE 371 23 Karlskrona Sweden Telephone 46 455 30 60 00 Telefax 46 455 30 60 30 DYNAPAC CC100 M100EN1 MAINTENANCE ...

Page 2: ......

Page 3: ...ns apply from CC 100 Deutz PIN S N 60710100 Isuzu PIN S N 60750100 K EEP TH IS M A N U A L AVA ILA B LE FO R FU TU R E U SE CC 100 are primarily designed for repair work on asphalt but are also ideal for the compaction of new layers on small streets pavements and cycle tracks They are frequently used as a complement to larger rollers for the compaction of transverse joints and areas with limited a...

Page 4: ...oper care of the roller is essential to ensure satisfactory operation Keep the machine clean so that any leakage loose bolts or loose connections can be easily detected TAKE CARE OF THE ENVIRONMENT Do not spill oil or fuel or leave anything else that could be detrimental to the environment This manual contains directions for periodical servicing which should normally be carried out by the operator...

Page 5: ...he machine may have been filled with biodegradable fluid The same type must be used when changing or topping up the fluid DRUM OIL Ambient temperature 15 C to 40 C 5 F to 104 F Shell Spirax SAE 80W 90 HD API GL 5 Ambient temperature above 40 C 104 F Shell Spirax HD85W 140 or equivalent GREASE Shell Calithia EPT2 or equivalent FUEL See engine manual COOLANT Isuzu Shell Anti Freeze 402 or equivalent...

Page 6: ...60 A Fuses 5 7 5 10 15 A Vibration data Static linear load kg cm pli 10 3 57 7 Amplitude mm in 0 50 0 02 Frequency Hz vmp 56 0 3 360 Centrifugal force kN lb 21 5 4 83 Traction Deutz Isuzu Speed range km h 0 10 0 0 10 0 Climbing ability theoretical 0 50 Weight CECE standard equipped roller kg Deutz lbs 2350 5 181 Length standard equipped roller mm in 2395 94 29 Width standard equipped roller mm in ...

Page 7: ...ation on the operator s seat is 0 06 m s2 Vibration on the floor of the operator s position is 0 06 m s2 The limit value is 0 5 m s2 Tightening torque in Nm for oiled bolts when using torque wrench Tightening torque Hydraulic system Noise levels ISO 6394 Operator s position Vibrations ISO 2631 M STRENGTH CLASS Thread 8 8 10 9 M4 2 5 3 4 M5 4 9 7 0 M6 8 4 12 M8 21 28 M10 40 56 M12 70 98 M16 169 240...

Page 8: ...round and underneath the machine to detect any sign of leakage or other faults 19 20 1 2 3 4 5 6 7 10 18 17 16 15 14 13 12 11 8 9 10 1 Fuel tank 2 Refuelling 3 Radiator 4 Air cleaner 5 Battery 6 Diesel engine 7 Water tank 8 Sprinkler system drum 9 Scrapers drum 10 Rubber elements and mounting bolts 11 Hydraulic fluid filling 12 Hydraulic fluid reservoir 13 Hydraulic fluid filter 14 Hydraulic fluid...

Page 9: ... oil level in diesel engine See engine manual 3 Check that circulation of cooling air is unobstructed 9 3 Check coolant level Isuzu 9 20 Check the brakes 9 1 Fill the fuel tank 10 9 Check setting of the scraper Drum 10 14 Check level in hydraulic reservoir 10 8 Check the sprinkler system Drum 11 Every 10 hours of operation Daily Item in Measures See page Comments Fig 1 4 Check air cleaner indicato...

Page 10: ...al 6 Change engine oil filter 19 See engine manual 6 Check engine V belts 19 See engine manual 6 Change the engine fuel filter Isuzu 19 See engine manual Every 500 hours of operation Every 3 months Item in Measure See page Comments Fig 1 13 Change the hydraulic filter 20 12 Drain off condense water from the hydraulic reservoir 21 4 Change the main filter in the air cleaner 21 6 Change the engine f...

Page 11: ...the brakes put the forward reverse lever in neutral before resetting the reserve parking brake knob 4 Pull out the reserve parking brake knob 1 6 9 Brakes Check Coolant level Check filling Circulation of cooling air ISUZU Take the greatest care if the radiator cap must be opened while the engine is hot Danger of being scalded Wear protective gloves and goggles When filling or topping up use coolan...

Page 12: ...mounting bolts 1 and adjust the scraper in relation to the drum tighten the mounting bolts 2 If the scraper does not make contact all the way across the drum loosen the adjusting screws 2 and push the scraper against the drum and then tighten the adjusting screws Scrapers Checking Adjustment 2 1 1 2 Fig 7 Hydraulic fluid reservoir 1 Fluid level glass 1 Hydraulic reservoir Checking 1 Position the r...

Page 13: ...1 Nozzle 1 2 3 4 Fig 10 Nozzle 1 Sleeve 2 Nozzle 3 Seal 4 Strainer Nozzle Dismantling Cleaning Dismantle the clogged nozzle Blow the nozzle and strainer clean with compressed air or replace with clean items and then clean the parts that are removed at a later opportunity Wear protective goggles when working with compressed air 1 Fill with fresh water through the tank filter Make sure the sprinkler...

Page 14: ...mp system 1 Waterfilter 2 Stop cock 3 Waterpump To clean close the stop cock 2 Loosen the filter housing 1 Clean the insert and filter housing with water Place one hand on the water pump or listen to check that the pump is working There is also a drain cock on the end piece of the water pump 2 1 3 ...

Page 15: ...r 2 2 Wipe the outside of the filter housing clean with a clean rag Change or clean the main filter Fit a new backup filter every third time the main filter is changed or after cleaning it three times The backup filter cannot be cleaned and reused 1 2 3 4 5 Fig 13 Air cleaner 1 Filter housing 2 Backup filter 3 Wing nut 4 Main filter 5 Wing nut 3 Blow up and down the inside of the filter element Ho...

Page 16: ...s on the right hand side of the machine Switch off the engine and electric power 2 Wipe all the nipples clean and lubricate each nipple with five strokes of the grease gun Make sure that grease penetrates the bearings Use grease recommended on page 3 Leave a little grease on the nipples after greasing This will prevent dirt from entering the nipples Steering cylinder and steering joint Lubrication...

Page 17: ...ttery terminals must be clean and well tightened Clean the terminals if corroded and grease them with acid free Vaseline Always release the negative cable first when disconnecting the battery When connecting the battery always fit the positive cable first Dispose of the old battery properly when replacing it The battery contains lead which is detrimental to the environment Fig 18 Electrolyte level...

Page 18: ...unning the engine indoors Hazardous carbon dioxide fumes Switch off the engine and push the reserve parking brake knob 2 Place a receptacle for at least 8 litres underneath the drain plug Risk of scalding when draining hot oil Protect your hands and arms 3 Unscrew the drain plug 1 and allow all of the oil to drain off Refit the plug 4 Fill with fresh engine oil see page 3 or the engine manual with...

Page 19: ... Switch off the engine and push the reserve parking brake knob 2 Screw out the plug and ensure that the oil level reaches the lower edge of the hole Top up with fresh transmission oil as required see page 3 with regard to the right quality of the oil 3 Clean the magnetic oil plug 1 to remove any metal particles and then refit the plug EVERY 500 HOURS OF OPERATION Every 3 months Fig 20 Engine compa...

Page 20: ... position 1 Forward Reverse control 2 Mounting screws 1 Fig 23 Engine compartment 1 Forward Reverse controls DEUTZ 1 Run the engine warm before draining Ensure that ventilation is adequate extractor when running the engine indoors Hazardous carbon dioxide fumes Place the roller on a level surface switch the engine OFF and apply the reserve parking brake 2 Place a receptacle for at least 8 litres u...

Page 21: ...ge from the oil filter or drain plug Ensure that ventilation is adequate extractor when running the engine indoors Hazardous carbon dioxide fumes 5 Refit the engine protective plate 1 2 Oil filter Change Fig 26 Diesel engine Deutz 1 Oil filter 2 V belt Fig 27 Diesel engine Isuzu 1 Oil filter 1 1 Changing the fuel filter Fig 28 Engine compartment 1 Fuel filter ISUZU 1 Loosen screw off and discard t...

Page 22: ... allow it to run at full revs for half a minute and ensure that the filter cover 3 does not leak Ensure that ventilation is adequate extractor when running the engine indoors Hazardous carbon dioxide fumes Fig 30 Hydraulic fluid filter 3 Cover Fig 29 Engine compartment 1 Mounting screws 2 Safety plate 3 5 Hydraulic fluid filter Change 3 Loosen the red cover 3 and pull up the filter cartridge 4 4 R...

Page 23: ...Fig 33 Air cleaner 1 Filter housing 2 Backup filter 3 Wing nut 4 Main filter 5 Wing nut Change the main filter of the air cleaner even if it has not yet been cleaned the specified five times See page 13 with regard to changing the filter Changing the air cleaner DEUTZ 1 Loosen screw off and discard the fuel filter 1 and fit a new one 2 Collect the fuel that runs out See the engine manual for detai...

Page 24: ...river 2 Remove and discard the pre filter 1 3 Collect fuel that runs out 4 Fit a new pre filter and tighten the hose clips 5 Start the engine and ensure that the pre filter is tight Ensure that ventilation is adequate extractor when running the engine indoors Hazardous carbon dioxide fumes Fig 35 Engine compartment 1 Pre filter 2 Hose clips ...

Page 25: ...indoors Hazardous carbon dioxide fumes 1 Position the roller on a level surface and slowly drive the roller till the oil plug 1 is at the bottom Risk of scalding when draining hot oil Protect your hands 2 Place a vessel for at least 6 litres under the plug 3 Unscrew the plug and allow all the oil to drain off 4 See page 17 with regard to filling with oil Drum Changing the oil Fig 37 Drum vibrator ...

Page 26: ...or the drain plug and check for leakage The water tank is made of polythene plastic and is recyclable Fig 40 Water tank 1 Drain plug 1 Fig 39 Pump system 1 Water pump 2 Drain cock 1 The tank is easiest to clean when it is almost empty Empty any remaining fuel and sediment using a suitable pump eg an oil draining pump 1 Collect the contents in a suitable receptacle The fuel tank is made of polythen...

Page 27: ...prevent condensation and rust Drain off any condense water from the hydraulic reservoir Drain all water from the tank Hoses filter housing and water pump must also be drained Remove all sprinkler nozzles of the drum and wheels Also drain the emulsion tank and hoses filter housing and pump Lubricate the steering joint bearings and both bearings of the steering cylinder with grease Coat the piston r...

Page 28: ... and the hydraulic reservoir This is especially important when using a high pressure jet Put a plastic bag over the filler cap and secure with an elastic band This will prevent water under pressure from being forced through the breather hole which would otherwise cause malfunctioning eg clogging of the filter Do not direct the jet against electric components or the instrument panel In the event of...

Page 29: ...ering column Fig 43 and 44 show the ampere rating of the various fuses and their function The left hand fuse box is fitted on all machines The right hand fuse box is fitted only on machines that are equipped with electrical accessories Fig 43 Left fuse box Standard 10 A 1 Brake valve warning panel hour meter 10 A 2 Vibration valve 7 5 A 3 Water pump 7 5 A 4 Horn 7 5 A 5 Water pump combi 6 Reversin...

Reviews: