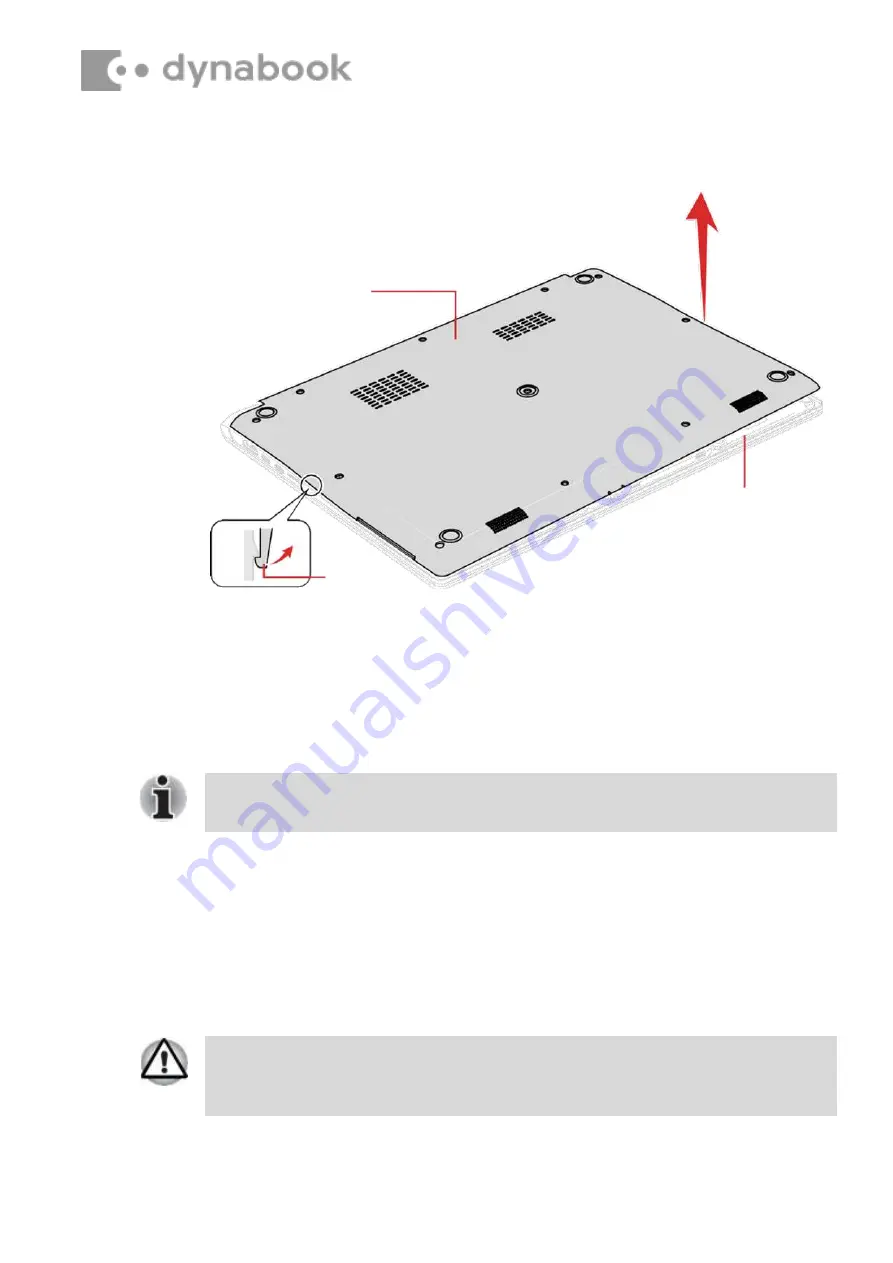
Base assembly
Cover Assembly
Latch
When securing the Base Assembly, be sure to drive the screws in the order of the
number on
Figure 4-4
.
Take care not to short circuit the terminals when removing the battery pack.
Similarly, do not drop, knock, scratch, disassemble, twist, or bend the battery pack.
Figure 4-5 Removing the Base Assembly (2)
4.11.2 Installing the Base Assembly
To install the Base Assembly, follow the steps below and refer to
Figure 4-4
to
Figure 4-5
.
1. Set the Cover Assembly on the Base Assembly while securing the
latch.
2. Secure the Cover Assembly and Base Assembly with the screws.
3. Stick a new
BOTTOM CUSHION M
to the Base Assembly.
4. Turn the computer, and open the display.
4.12 Battery pack
4.12.1 Removing the Battery pack
To remove the battery pack, follow the steps below and refer to
Figure 4-6
.
1. Disconnect the
BATTERY HARNESS
from the connector
CN8021
on
the SYSTEM board.
2. Remove the following screws and the battery pack.
Summary of Contents for PORTEGE X40-G
Page 7: ......


