Thread cutter
Service manual 567 classic - 01.0 - 10/2015
61
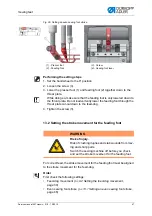
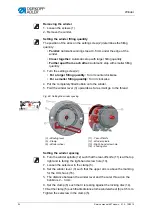
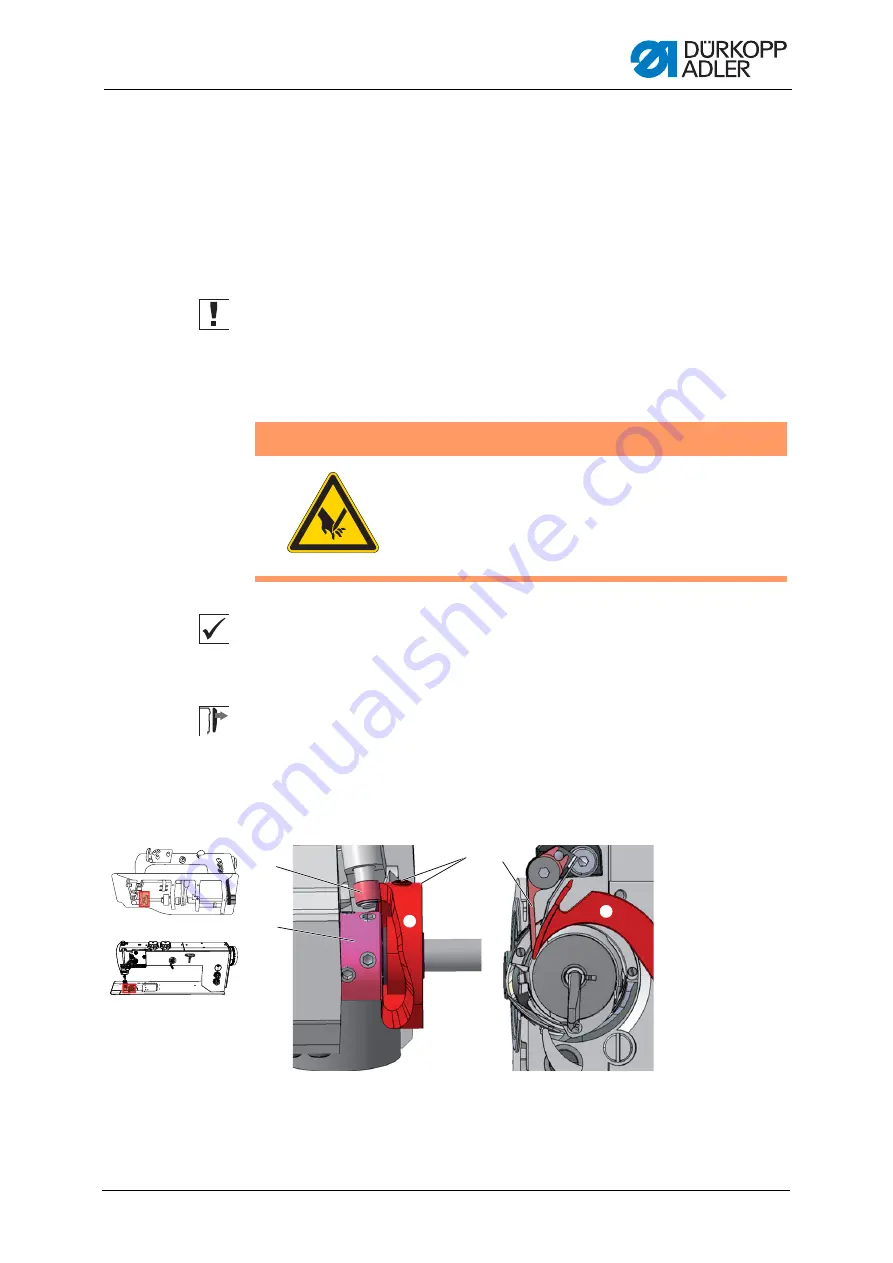
3. Turn the clamp until the thread-pulling knife (3) is positioned such that
the arrow mark is exactly next to the tip of the counter-blade (2).
4. Tighten the screw (6).
5. Loosen the screw (1).
6. Turn the hook thread clamp (5) such that it rests against the thread-
pulling knife (3).
7. Tighten the screw (1).
8. Check the position of the cutters, since the counter-blade can easily
become warped when the screw is being tightened.
16.4 Adjusting the needle thread tension
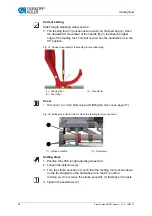
Correct setting
The threads are cut when the thread lever is at the top dead center (hand-
wheel position 60°).
Cover
•
Tilt the upper section (
3.3.1 Access to the machine bottom section
•
Throat plate slide (
3.3.5 Opening and closing the throat plate slide
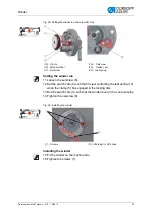
Fig. 52: Setting point in time for cutting
WARNING
Risk of injury.
Risk of crushing injuries and stab wounds from mov-
ing and sharp parts.
Switch off the sewing machine before checking and
setting the point in time for cutting.
6
1
2
3
5
4
(1) - Roller
(2) - Clamping ring
(3) - Control cam
(4) - Setscrews
(5) - Counter-blade
(6) - Thread-pulling knife
Summary of Contents for 567 CLASSIC
Page 1: ...567 classic Service manual...
Page 20: ...Working basis 18 Service manual 567 classic 01 0 10 2015...
Page 79: ......

