
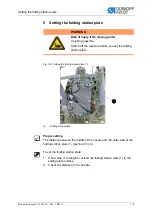


Positioning device
128
Service Instructions 745-35-10 D - 00.0 - 10/2017
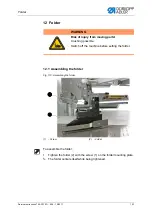
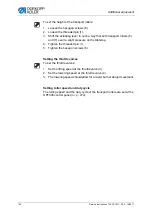
3.
Insert the positioning device (6) into the mounting plate (1).
4.
Align the mounting plate (1) parallel to the edge of the sliding plate (4).
5.
Tighten the screw (7).
6.
Loosen screws (2) and (3).
7.
Align the left edge of the clamp (5) parallel to the edge of the sliding
plate (4).
8.
Tighten screws (2) and (3).
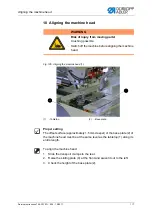
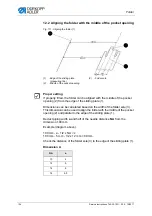
13.2 Setting the pattern shift correction
Information
There will be a design-related pattern shift between the breast welt, as po-
sitioned exactly as per the pattern, and the turned breast welt. The pattern
shift is corrected by the stroke of the cylinder.
Fig. 114: Setting the pattern shift correction
To set the pattern shift correction:
1.
Sew a test seam.
2.
Fit out (turn) the breast welt pocket.
3.
Check the matching of the pattern.
4.
Loosen the screw (2).
5.
Adjust the cylinder (1) in its holder.
6.
Tighten the screw (2).
(1)
- Cylinder
(2)
- Screw
①
②
Summary of Contents for 745-35-10 D
Page 1: ...745 35 10 D Service Instructions...
Page 6: ...Table of Contents 4 Service Instructions 745 35 10 D 00 0 10 2017...
Page 10: ...About these instructions 8 Service Instructions 745 35 10 D 00 0 10 2017...
Page 74: ...Machine head 72 Service Instructions 745 35 10 D 00 0 10 2017...
Page 84: ...Transport carriage 82 Service Instructions 745 35 10 D 00 0 10 2017...
Page 116: ...Light barriers 114 Service Instructions 745 35 10 D 00 0 10 2017...
Page 122: ...Aligning the machine head 120 Service Instructions 745 35 10 D 00 0 10 2017...
Page 128: ...Folder 126 Service Instructions 745 35 10 D 00 0 10 2017...
Page 146: ...Throw over stacker 144 Service Instructions 745 35 10 D 00 0 10 2017...
Page 282: ...Programming 280 Service Instructions 745 35 10 D 00 0 10 2017...
Page 292: ...Maintenance 290 Service Instructions 745 35 10 D 00 0 10 2017...
Page 294: ...Decommissioning 292 Service Instructions 745 35 10 D 00 0 10 2017...
Page 296: ...Disposal 294 Service Instructions 745 35 10 D 00 0 10 2017...
Page 308: ...Troubleshooting 306 Service Instructions 745 35 10 D 00 0 10 2017...
Page 337: ......