29
Enlargement and Reduction
d
d
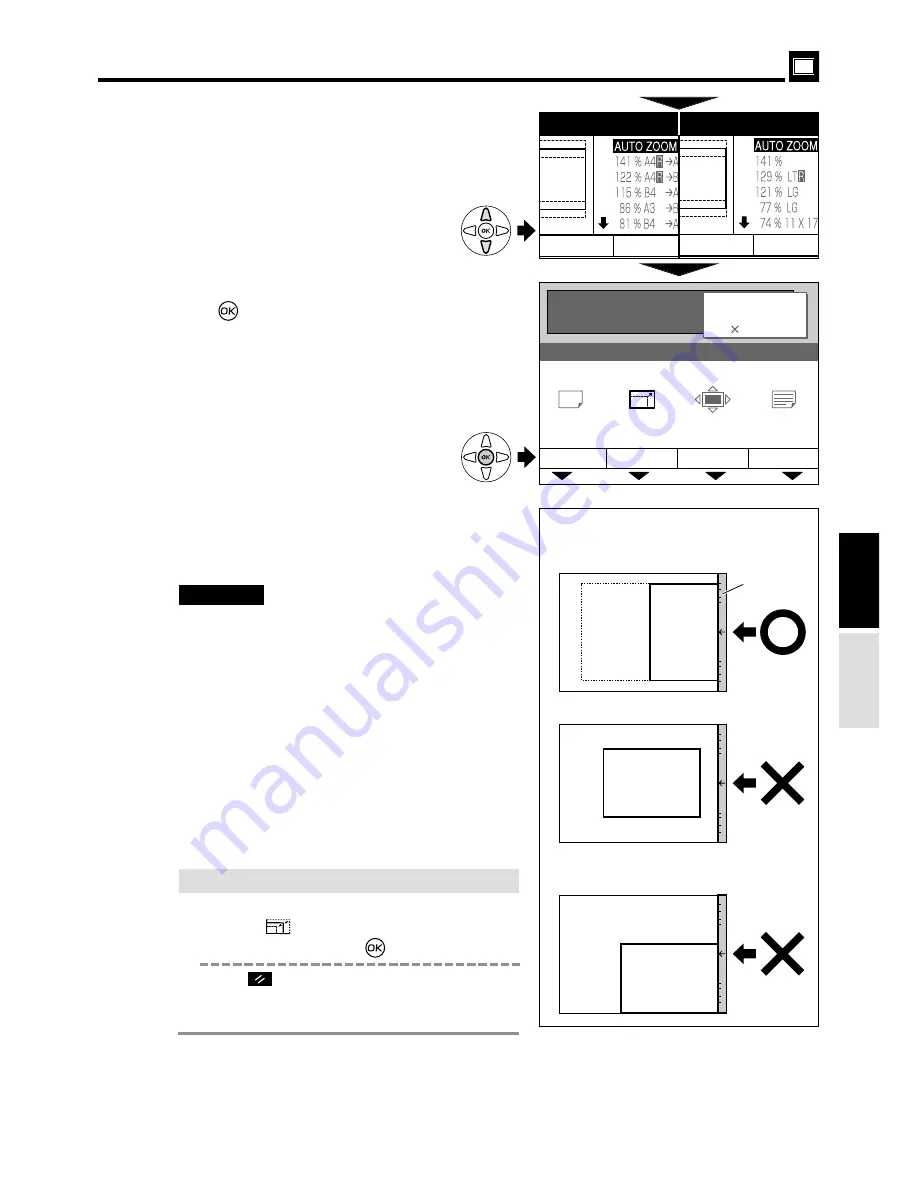
[ Auto Zoom ]
"
Document not positioned centrally
against the scale.
440248
Printing
3.
4
Press “
CURSOR
” keys to select “
AUTO ZOOM”
.
Each press of “
CURSOR
” keys moves to a
different item and that item is displayed
highlighted.
6
Load paper.
“Loading and Replacing Paper”
a
see p.16
7
Start platemaking and printing.
Proceed with steps
6
to
9
of the sequence
described in “ Basic Printmaking
”
.
“ Basic Printmaking”
a
see p.14
"
Always select the size of printing paper to
be used.
"
You cannot obtain the correct zoom ratio if
you select a wrong paper size.
"
This machine detects the document size
about 30mm from the scale (the shaded
area in the figure).
The machine cannot, therefore, detect the
size correctly if the document is positioned
as shown on the right.
IMPORTANT:
¡
If you cancel AUTO ZOOM
Use one of the following methods.
• Press the
(ZOOM) key, then “CURSOR” keys.
Select “100%” and press
(
OK
) key
.
• Press
(ALL CLEAR) key. In this case, all
settings are reset to standard mode.
“ Standard mode”
a
see p.10
"
Edge of paper not touching scale.
"
Paper positioned sideways.
Machine senses a paper size twice as
large as actual size of paper.
Scale
Document
5
Press
(
OK
) key. The auto zoom ratio is set, and
the main screen is redisplayed.
PAPER SIZE
A 3
115%
AUTO
0.0 mm
0.0 mm
TEXT
ZOOM
PRINT POS. IMAGE MODE
READY
0
SHT
1
SET
ZOOM
ZOOM
¡
European
¡
U.S.
The auto zoom ratio is set when the
cursor is moved to “
AUTO ZOOM”
.
Document
Document
Select
Set
(Advanced)


