background image


11.


Pickup After Rings:

 Input the number of the ring count allowing the system to answer calls. 

12.


Flash Timing

: The Flash function was set on the MENU button of the IP phones. Set the Flash Timing 

allowing IP phones to use functions provided by Centrex. 

13.


Voice Quality

: Adjust the parameters below to fine tune the voice input and output quality. 


Transmit Gain: this field edits the TX Gain of the CO Line ports, or how loud the external party 

hears your voice. 


Receive Gain: this field edits the RX Gain of the CO Line ports, or the volume of incoming calls. 


DTMF Volume:


this field edits the intensity of the DTMF tones in the CO Line ports. 

14.


Apply Settings

: After finalizing the settings in this port, if you want them to be identical as this one, 

you may apply the settings to other CO Line ports present in the system, saving you the hassles of 

configuring each port individually. 


Configure SLT Ports 

1.


Go to Main Menu>Gateway Configuration>Analog Gateways. 

2.


From “Analog Gateway List”, select the gateway you would like to edit and click Port Setting. 

3.


Select a SLT port from the “Port List” and click the Port Parameters button to configure the settings for 

this port. 


4.


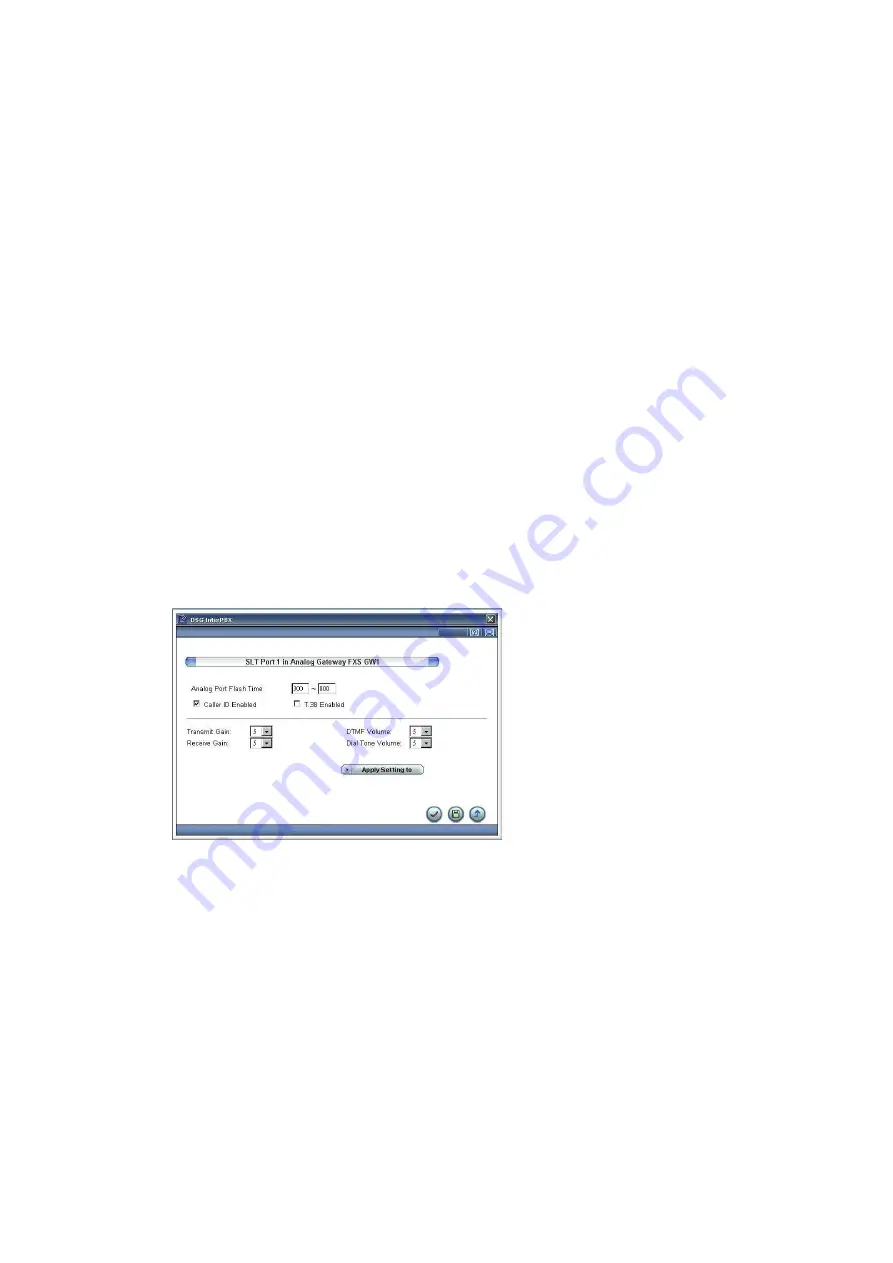
Analog Port Flash Time:

 You may set the Flash Timing of the SLT ports to check whether the Hook 

action (quick press and release of the phone’s hook) on the analog phones works properly. 

5.


Caller ID

: The SLT ports have the ability to detect either DTMF or FSK Caller ID modes. Note that 

your local telephone company must provide Caller ID service in order to display the incoming party’s 

number. 

6.


Fax

: T.38 is a fax relay protocol. It allows fax to be transported across IP networks between fax 

machines. When selected, please be sure the T.38 is also enabled at the CO line port setting. 

7.


Voice Quality

: Adjust the parameters below to fine tune the voice input and output quality. 


Transmit Gain: this field edits the TX Gain of the CO Line ports, or how loud the external party 

hears your voice. 

Summary of Contents for Blaze 1200 Series

Page 1: ...number for each SLT port so that the associated extension number can reach each analog phone that is connected to it IP Phone Prepare an extension number for each IP phone Group Number If you plan to...

Page 2: ...nalog extension to a SLT port 4 Preparing a Computer Prepare a computer with web browser and be sure it is on the same subnet as of your Blaze Server Change the computer s IP settings if necessary The...

Page 3: ...Settings 1 Go to Main Menu System Configuration General Parameters 2 Edit the basic IP settings of your Blaze Server including IP address gateway subnet mask and DNS 3 Enter the SMTP Server IP address...

Page 4: ...8 Restart the system 1 Go to Main Menu Operation Management Reboot to restart the system 2 When finished set your PC s IP setting back to the original Next time input the new IP address of your Blaze...

Page 5: ...tension number The CO Line extension numbers will be assigned automatically For example if you set it as 4000 for an 8 port FXO gateway the CO Line extension number of this gateway will be 4000 4007 6...

Page 6: ...gure the settings for this port 4 Extension Number The Extension Number will follow your setting at CO Line Extension Base to display the automatically assigned number You may also modify the extensio...

Page 7: ...ly Configure SLT Ports 1 Go to Main Menu Gateway Configuration Analog Gateways 2 From Analog Gateway List select the gateway you would like to edit and click Port Setting 3 Select a SLT port from the...

Page 8: ...Group Management Add a CO Line Group 1 Go to Main Menu Group Management CO Line Groups Click Add to increase a group 2 Assign a Group Access Code and Group Name 3 Hunting Method Select one of the hun...

Page 9: ...up Management Class of Service Click the Add button to increase a Class of Service and select features you would like to offer Setting CO Priority 1 Go to Main Menu Group Management Class of Service S...

Page 10: ...k on the Modify button 3 In Description shown as blank describe the purpose for this AA Menu for example Business Hours 4 Assign an Access Code which is needed while Ring Assignment is being configure...

Page 11: ...on to record greetings 4 Choose an extension preferably one that is close to you start recording when Record of a Prompt dialogue pops out Input the selected extension number in the Action Ext box and...

Page 12: ...he Class of Service you have created from the list of Set Default CoS for Auto Discovery Select the one you would like to set as the default value and click the Set Default button You will see an arro...

Page 13: ...keypad to input the extension number assigned to the IP phone Press the button again to save 4 Press the downward button and the LCD screen will display IP ADDRESS Press the button to start editing a...

Page 14: ...he middle button for 3 seconds to enter the setup menu Input your password if any The default password is 1234 3 You will see EXT NUMBER shown on the LCD screen Press the button to start editing and u...

Page 15: ...on System from being accessed by unauthorized users NOTE Do not connect IP phones to LAN unless you have turned on Auto Discovery function Setting the IP Phone on Blaze You may create IP phone extensi...

Page 16: ...a call but might cause delays and the lower value will help to transmit the voice packets faster but might cause packet loss problems 12 Silence Suppression This function reduces network traffic when...

Page 17: ...sable Paging Disable Enable and Apply Setting to please refer the previous IP phone settings for more details Recording System Recording functions are built in in certain models Stand alone BlazeLogge...

Page 18: ...rnment s regulation When the Recording Beep is activated the caller and the receiver will hear the beep sound every 15 seconds during a call 6 Recording Flash You can enable the Recording Flash functi...

Page 19: ...e the new recording or press 2 to search the old recording by entering the date and time Please follow the following procedure to help you listen to the recording 4 During the system prompts you can p...

Page 20: ...20 10IPBXQ BZ2 32b EN3...

Reviews: