21
[29] [30] [31] [32] Split Arming
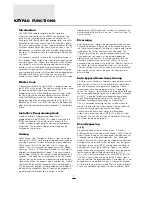
“Split Arming” feature permits a single control panel to act
as two independent alarm systems, each with its own
opening and closing schedules, zone assignments and
authorized users.
The allowable zone and access code assignments to
system A or system B are described below. Typically, zones
and access codes are assigned to either Group A or Group
B but the PC3000 can be programmed for zones and
access codes that are common to both Group A and Group
B.
The following four sections are each programmed the same
as section [18].
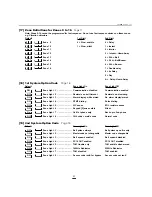
Split System Zone and Access Assignments
[29]
Group A Zone Assignment for Zones 1 to 8.
Note: Zones 9 to 16 are always assigned to Group A.
[30]
Group B Zone Assignment for Zones 1 to 8.
Note: Zones 9 to 16 cannot be assigned to Group B.
[31]
Group A Access Code Assignment for Codes 1 to 8.
Note: Codes 9 to 16 are always assigned to Group A.
[32]
Group B Access Code Assignment for Codes 1 to 8.
Note: Codes 9 to 16 cannot be assigned to Group B.
Common Zones
If a zone (1 through 8 only) is assigned to both Group A and
Group B then both Group A and Group B must be armed for
that zone to be armed.
Common Access Code
If an access code (1 through 8 only) is assigned to Group A
and Group B then that access code will arm and disarm the
entire panel.
Armed Status Indications
When the panel is established as a split system, and ONE
side only [Group A or B] is armed, the “Armed” indicator will
flash and the zone indicators for the group that has been
armed will flash.
If both Group A and Group B are armed the “Armed”
indicator will be on steadily and the zone lights will not flash.
Zone Bypassing Access Code
When the system is established for split arming, user zone
bypassing should be set so that bypassing requires the use
of an access code. (See section [19].)
Communicator
When the PC3000 is set up for “split arming” and both
Group A and Group B systems are reporting to the same
telephone number, Group A burglar alarms and restorals are
programmed as [1] in section [33] to call the 1st phone
number only. Light 7 in section [18] must be turned “ON”.
Group B burglar alarms and restorals are programmed with
a [2] in Section [33] to call the 2nd phone number only. It is
necessary to program both the 1st and 2nd phone number
locations with the same telephone number.
Notes:
1. The following restrictions apply to split arming
applications:
• The master code must be assigned to side A and B.
• All codes and zones must be assigned even if not
used.
• Transmission delay must not be used.
• Home- Away zones must not be used.
• The maids code must not be used.
2. PGM OUT Option A, Quick Exit and Alarms Displayed
while Armed will only work in a fully armed system.
3. Keyswitch arming will report with side A openings and
closings only.
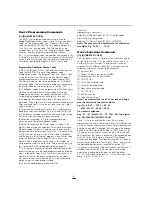
[33] Communicator Call Direction
Options
Programming this section tells the dialer whether to send
transmissions to the 1st or 2nd telephone number.
There are four classes of dialer call direction options.
[0] No transmission for this group
[1] Call 1st phone number with back up to 2nd number
[2] Call 2nd phone number only
[3] Always call both phone numbers
Option [1] becomes “Call 1st number only” when item [7] in
section [18] is turned on (LIGHT ON). Do not program
backup to 2nd phone number in section [18] unless a 2nd
phone number is programmed.
After entering the section number, enter [0], [1], [2] or [3] for
each of the following reporting code groups in the order
given (total of six digits).
• Zone Group A Alarms and Restorals
• Zone Group B Alarms and Restorals
• Access Codes Group A Openings and Closings
• Access Codes Group B Openings and Closings
• Priority Alarms and Restorals
• Maintenance Alarms and Restorals
Where all reporting codes are to be sent to one telephone
number, enter [1] for all of the above groups.
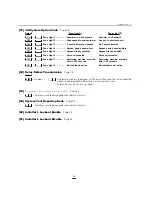
[34] Software Reset EEPROM Memory
to Factory Defaults
This section is used to reset the EEPROM memory to the
original factory default values. As soon as [34] is entered
the EEPROM is reset and the program is restarted as
though power has just been applied.
Hardware Reset of EEPROM Memory to Factory Defaults
If the Installer’s Code is lost through inadvertent
programming, the only means of reprogramming the system
is via a hardware reset. If the Installer’s Lockout is enabled,
there is no way to reprogram the system without entering the
correct Installer’s Code.
Follow the sequence outlined below to reset the panel to
factory default conditions.
1. Power unit down by removing both AC and battery power.
Summary of Contents for PC3OOO
Page 1: ...INSTALLATION MANUAL PC3OOO Version 7 51...
Page 40: ...HOOKUP DIAGRAMS 36...
Page 44: ...29000543 R7...


