


1BHF t %3*45&&. 7BQPSMPHJD *OTUBMMBUJPO BOE 0QFSBUJPO .BOVBM
Installation
* O T U B M M B U J P O 4 U F Q 4 F U V Q
To simplify the field-installation process, humidifiers are sent from
the factory configured as ordered. However, some settings are
unknown at the factory and need to be defined during the setup
process using the Setup menu. The Setup menu is also where you
make future system setting changes.
To begin the field setup process, go to the Setup menu on either the
keypad/display or the Web interface. Setup menu parameters are
listed in tables starting on Page 26. Options and defaults are the
same whether viewed from the keypad/display or Web interface.
However, labels may be abbreviated on the keypad/display.
Using the keypad/display
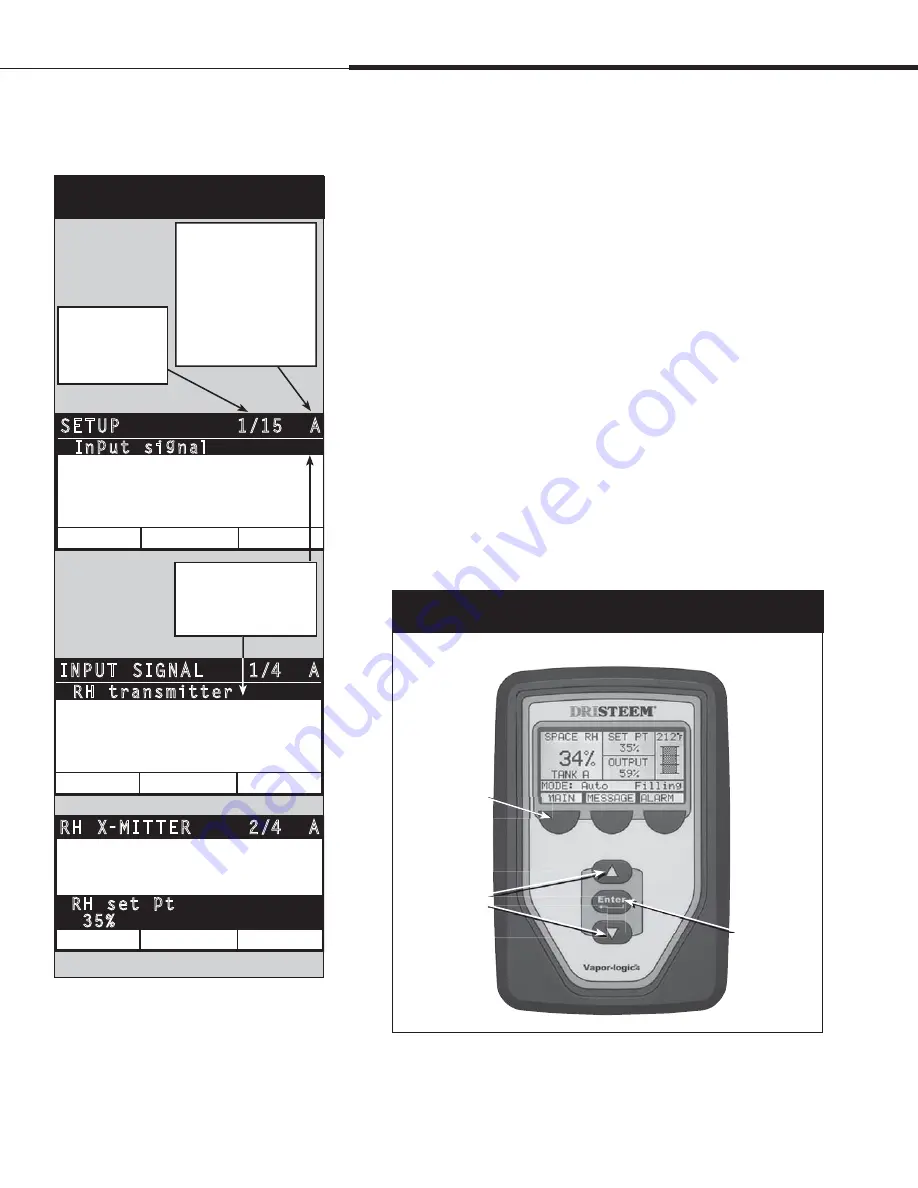
To access the Setup menu on the keypad/display, press the Main
softkey on the Vapor-logic4 keypad (see figure below). Press the
Down arrow on the keypad until Setup is highlighted. Press Enter.
After entering the Setup menu, press the Up and Down arrows to
scroll through all setup parameters or to change values. Use the
Enter key to select parameters.
Figure 24-1:
Keypad/display screens
“A” indicates that these
settings apply to Tank A.
All humidifier tanks are
labeled as “A” except
in applications where
multiple humidifiers
are controlled by one
controller.
“1/15” indicates
the highlighted
item is the first of
fifteen items
Push Up or Down arrow
to scroll through menu
items; press Enter to
select highlighted item
MAIN
BACK
1/15 A
SETUP
HOME
Limit controls
Water type
Water m anage m ent
Input signal
Fan-based dispersion
MAIN
BACK
1/4 A
INPUT SIGNAL
HOME
De w pt transmitter
De m and signal
Hu midistat
R H transmitter
MAIN
BACK
2/4 A
RH X-MITTER
HOME
On
R H set pt
35%
Transmitter enabled
Figure 24-2:
Using the Vapor-logic4 keypad
Press Main softkey
to go to Main
menu; press Up
or Down arrow
to move through
menus and screens
Press Up
or Down
arrow to move
through menus
and screens
Press
Enter
to select or
confirm
Typical Home screen


