


66
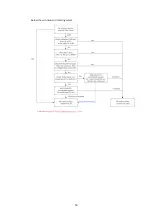
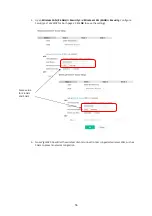
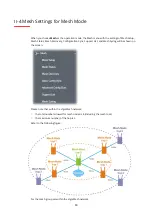
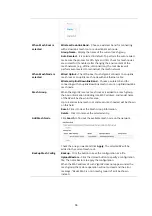
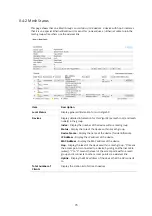
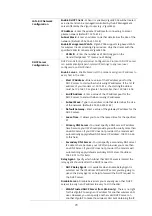
When Mesh Root is
selected
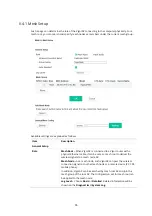
Wireless Downlink Band
– Choose a wireless band for connecting
with a downlink mesh root or a downlink mesh node.
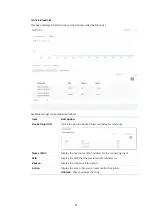
Group Name
- Display the name of the current mesh group.
Auto Reselect
- It is selected in default. To perform the auto reselect,
make sure the process for CFG Sync and CFG Check for mesh nodes
are successful. If enabled, after changing the environment of the
mesh network (e.g., offline, disconnection), the root device will
perform auto reselect to reconstruct the mesh network.
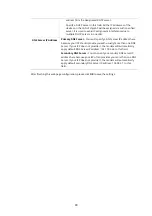
When Mesh Node is
selected
Wired Uplink –
Check the box if such VigorAP connects to an uplink
mesh root or an uplink mesh node with an Ethernet cable.
Wireless Uplink/Downlink Band
– Choose a wireless band for
connecting with an uplink/downlink mesh root or an uplink/downlink
mesh node.
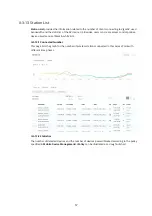
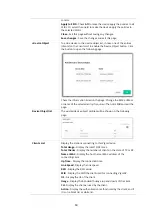
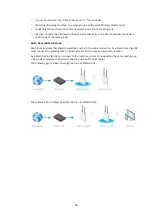
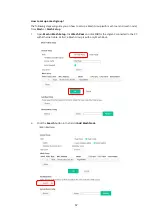
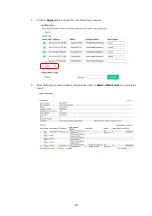
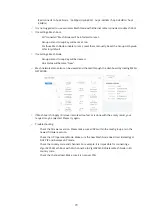
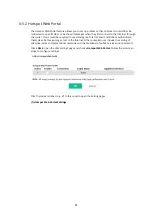
Mesh Group
When the VigorAP is set as mesh root or is added to a mesh group,
the basic information including role, MAC address, and model name
of the AP will be shown in this area.
Up to 8 entries (one mesh root and seven mesh nodes) will be shown
on this field.
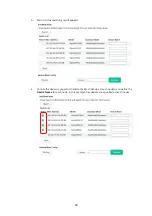
Reset -
Click it to clear the Mesh Group information.
Delete
- Click it to remove the selected entry.
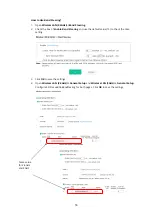
Add Mesh Node
Click
Search
to find out the available mesh node on the network.
Check the one you want and click
Apply
. The selected AP will be
added to the current mesh root.
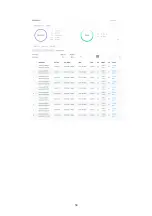
Backup Mesh Config
Backup
– Click the button to save the configuration as a file.
Upload/Restore
– Click the Upload button to specify a configuration
file. Then click Restore to apply the configuration.
When the MAC address of such VigorAP does not appear under the
mesh group, the restore operation will not succeed and the error
message, ”Device MAC is not in mesh group list”, will be shown
instead.
Summary of Contents for VigorAP 906
Page 1: ...I ...
Page 7: ...VII Chapter I Installation ...
Page 8: ......
Page 18: ...10 Next click Change adapter options Click the local area connection ...
Page 28: ...20 4 A summary of the settings configuration will be shown on the screen Click Finish ...
Page 33: ...25 8 Later a summary page of mesh root with mesh node will be shown on the screen ...
Page 35: ...27 Chapter II Connectivity ...
Page 39: ...31 ...
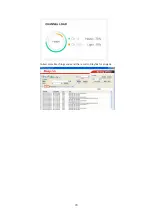
Page 62: ...54 Below shows how Band Steering works ...
Page 66: ...58 ...
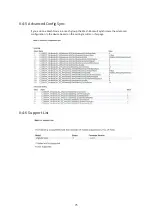
Page 82: ...74 Collect some Mesh logs and send the result to DrayTek for analysis ...
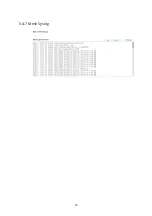
Page 84: ...76 II 4 7 Mesh Syslog ...
Page 95: ...87 Chapter III Management ...
Page 116: ...108 ...
Page 127: ...119 Chapter IV Others ...
Page 140: ...132 This page is left blank ...
Page 141: ...133 Chapter V Mobile APP DrayTek Wireless ...
Page 157: ...149 Chapter VI Troubleshooting ...
Page 161: ...153 VI 1 4 WLAN 2 4GHz Statistics This page is used for debugging by RD only ...
Page 169: ...161 ...