


5
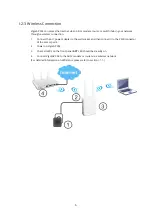
I-2-2 Wired Connection for Notebook in WLAN
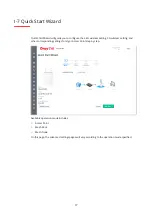
1.
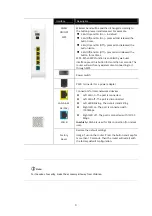
Connect VigorAP 906 to the ADSL modem or router in your network through the
LAN A
port of
the access point by Ethernet cable.
2.
Connect the A/C power adapter to the wall socket, and then connect it to the PWR connector
of the access point.
3.
Power on VigorAP 906.
4.
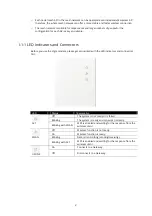
Check all LEDs on the front panel.
ACT
LED should be steadily on,
LAN
LEDs should be on if
the access point is correctly connected to the ADSL modem or router.
(For detailed information on LED status, please refer to section I-1-1.)
Summary of Contents for VigorAP 906
Page 1: ...I ...
Page 7: ...VII Chapter I Installation ...
Page 8: ......
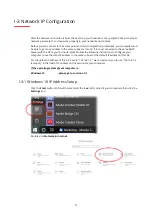
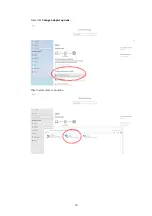
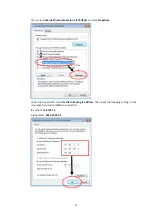
Page 18: ...10 Next click Change adapter options Click the local area connection ...
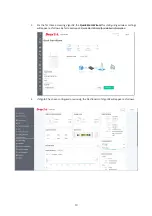
Page 28: ...20 4 A summary of the settings configuration will be shown on the screen Click Finish ...
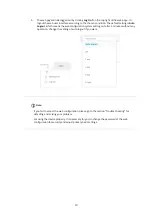
Page 33: ...25 8 Later a summary page of mesh root with mesh node will be shown on the screen ...
Page 35: ...27 Chapter II Connectivity ...
Page 39: ...31 ...
Page 62: ...54 Below shows how Band Steering works ...
Page 66: ...58 ...
Page 82: ...74 Collect some Mesh logs and send the result to DrayTek for analysis ...
Page 84: ...76 II 4 7 Mesh Syslog ...
Page 95: ...87 Chapter III Management ...
Page 116: ...108 ...
Page 127: ...119 Chapter IV Others ...
Page 140: ...132 This page is left blank ...
Page 141: ...133 Chapter V Mobile APP DrayTek Wireless ...
Page 157: ...149 Chapter VI Troubleshooting ...
Page 161: ...153 VI 1 4 WLAN 2 4GHz Statistics This page is used for debugging by RD only ...
Page 169: ...161 ...