

VigorAP 800 User’s Guide
9
N
N
e
e
t
t
w
w
o
o
r
r
k
k
C
C
o
o
n
n
f
f
i
i
g
g
u
u
r
r
a
a
t
t
i
i
o
o
n
n
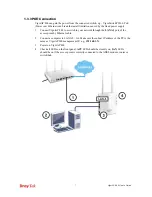
After the network connection is built, the next step you should do is setup VigorAP 800 with
proper network parameters, so it can work properly in your network environment.
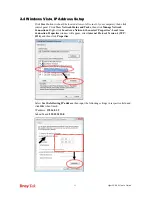
Before you can connect to the access point and start configuration procedures, your
computer must be able to get an IP address automatically (use dynamic IP address). If it’s set
to use static IP address, or you’re unsure, please follow the following instructions to
configure your computer to use dynamic IP address:
For the default IP address of this AP is set “192.168.1.2”, we recommend you to use
“192.168.1.X (except 2)” in the field of IP address on this section for your computer.
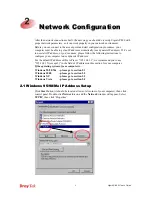
If the operating system of your computer is…
Windows 95/98/Me - please go to section 2.1
Windows 2000 - please go to section 2.2
Windows XP
- please go to section 2.3
Windows Vista
- please go to section 2.4
2
2
.
.
1
1
W
W
i
i
n
n
d
d
o
o
w
w
s
s
9
9
5
5
/
/
9
9
8
8
/
/
M
M
e
e
I
I
P
P
A
A
d
d
d
d
r
r
e
e
s
s
s
s
S
S
e
e
t
t
u
u
p
p
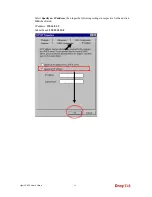
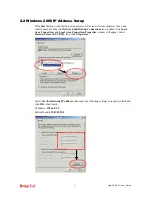
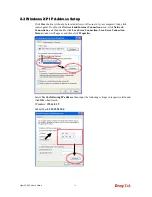
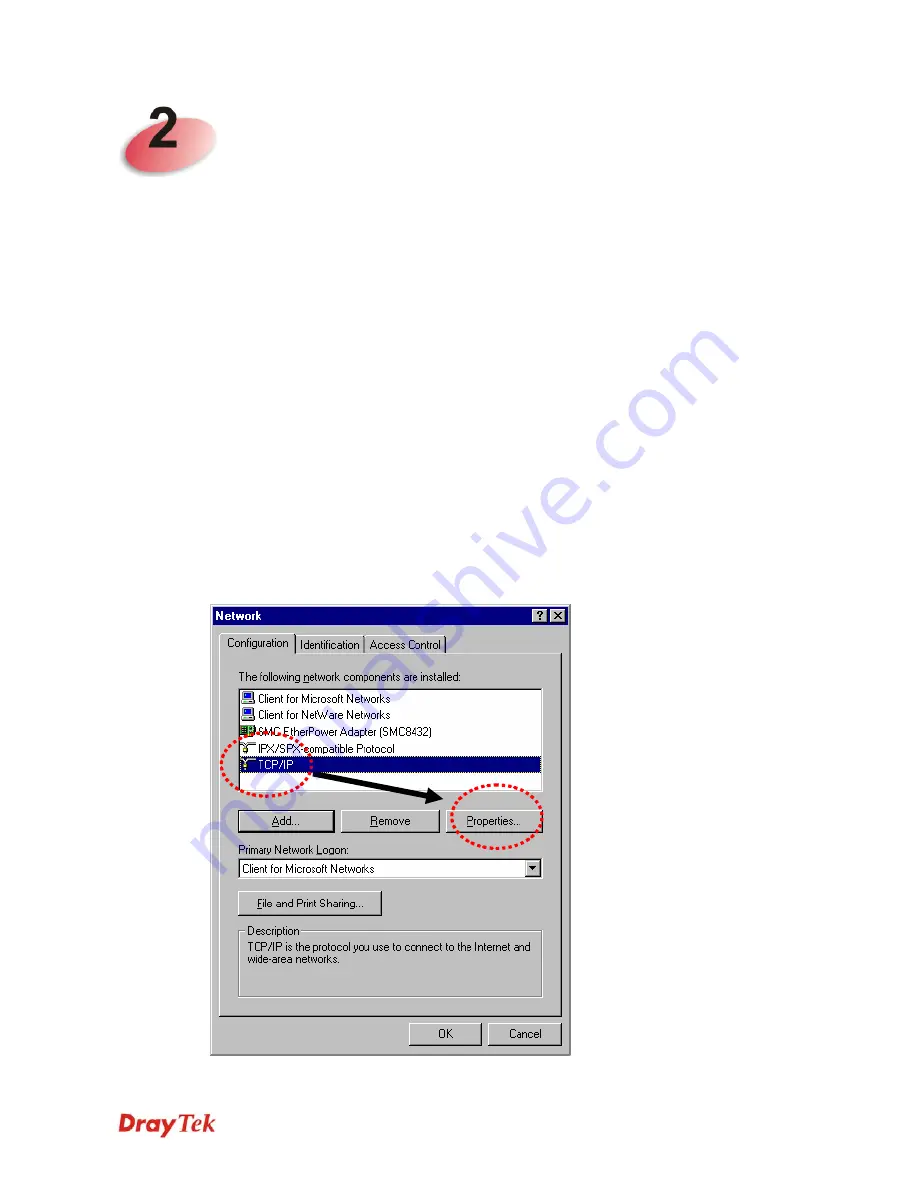
Click
Start
button (it should be located at lower-left corner of your computer), then click
control panel. Double-click
Network
icon, and the
Network
window will appear. Select
TCP/IP
, then click ‘Properties’.
Summary of Contents for VigorAP 800
Page 1: ...VigorAP 800 User s Guide i ...
Page 2: ...VigorAP 800 User s Guide ii ...
Page 6: ...VigorAP 800 User s Guide vi ...
Page 10: ......
Page 18: ...VigorAP 800 User s Guide 8 This page is left blank ...
Page 38: ...VigorAP 800 User s Guide 28 ...
Page 106: ...VigorAP 800 User s Guide 96 This page is left blank ...
Page 109: ...VigorAP 800 User s Guide 99 10 Click Send 11 Now the firmware update is finished ...