


40
4. At the
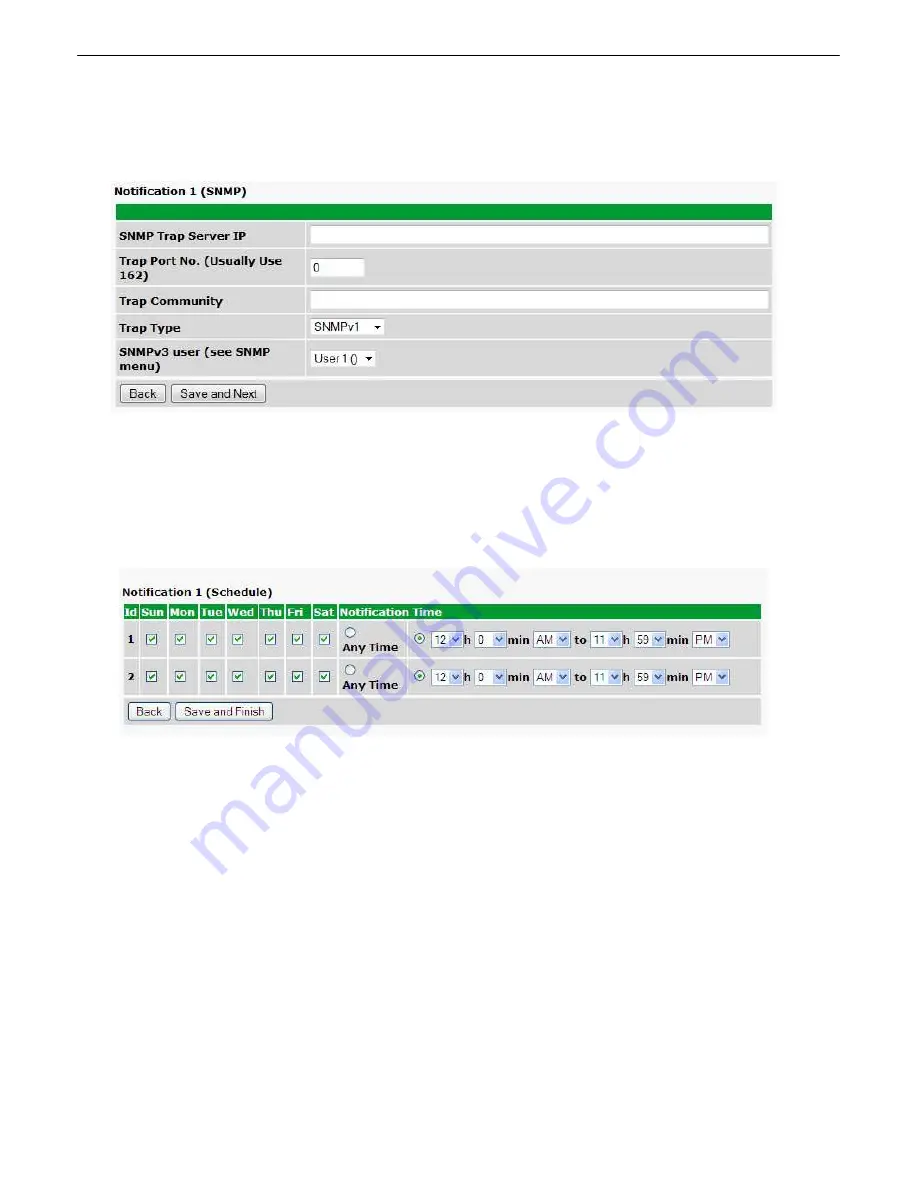
SNMP Notification
screen, you'll enter your network's SNMP settings. Enter the
IP address
of
your SNMP Trap Server. Enter the
Trap Port Number
(usually 162) and the
Trap Community
password. Click
Save and Next
.
Fig. 10.9
5. At the
Schedule
screen, you'll select the exact days/times you want to receive SNMP notifications.
You can set 2 schedules per notification. For example, you may want to receive notifications at certain
times during the week, and at different hours on the weekend. Use the check boxes to select the days of
the week, and select the time from the drop down menus. Click
Save and Finish.
To try a test
notification, click the
Test
button (See next step.)
Fig. 10.10
6. If you chose to test the email notification you've just setup, you will prompted with a pop up . Click
OK
to send a test SNMP alarm notification. Confirm all your settings by checking your alarm master to see if
the SNMP trap was received.
NOTE:
This test only means that your notification settings are correct, but you still need to assign the
notification to an alarm point. See Step 6 in "How to Send Email Notifications" for more detail.
Summary of Contents for D-PK-NG216
Page 13: ...9 Fig 4 2 Fig 4 3...
Page 18: ...14 Fig 5 7 Amphenol connector pinout...
Page 20: ...16 Fig 5 9 Optional 66 block connector pinout for controls...
Page 40: ...36 Fig 10 3...
Page 43: ...39 Fig 10 8...
Page 88: ...84...
Page 98: ......


