DP VIDEO DZP912 Operational Manual Download Page 6

Before You Start

01

6

39

07

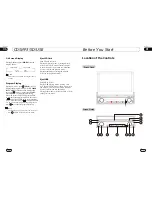
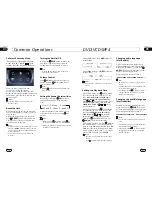
Tuner

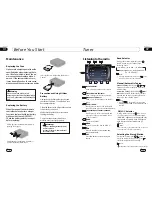
Listening to the radio

Band Indicator

Shows which band the radio is tuned 
to.

1

Preset Number Indicator

Shows what preset has been selected.

2

Shows  to  which frequency the tuner is
tuned.

Frequency  Indicator

3

SEEK+/SEEK-

Briefly press to tune by the presettable 
range, hold and press to tune automatically.

4

5

6

BAND

To select the bands.

The 6 stations of the current band.

Briefly press to select station, hold and
press to save the current station to one
of the 6 stations.

Note:

FM2

MW2(AM2)

MW1(AM1)

FM3

FM1

During radio status, repeatedly press
BAND button to select bands in 

lowing order:

 the 

fol

Band Selector

3

(For Two Bands)

Manual/Automatic Tuning

Manual Tuning:

 Briefly press     

(     

button on the remote control to select the
different band.

or     

Automatic Tuning:

 ress 

and 


)

 button the radio 

a station 

 or 

 respectively 

and plays when it finds a station.

P

hold     (

or


automatically searches 

downward

upward

Note:

7

MENU

Press it to enter the  MAIN MENU.

9

SRC

Press this button to select the signal 
source.

*   Pressing BAND on the main unit or        in the 
     monitor performs the same function.

6


LOC ON

appears on the display and only 

      local station is available. when it disappears
      both distance and local stations can be 
      received.

DX/LOC Selector

During radio status, press      LOC button 
to select 

or weak station reception.

strong 

5

The function is only valid on the remote control.
The function is invalid in AM tuning.

Note:

*
*

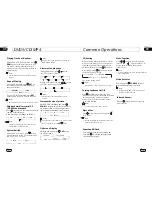
Selecting the Stored Station

During radio status, press           button to 
select the stored station upward, press     to
select downward.

the stored station 

27

Note:

The function is only valid on the  remote control.

*

Pressing        in the monitor or pressing and 
holding SEEK+/SEEK- also performs the same
function.

*

4

8

AMS

Press to scan the current station and 
tune automatically.

87.50M

106.10M

107.90M

87.50M

98.10M

90.10M

4

5

FM1

CH:1

+

BAND

7

MENU

SRC

87.50MHz

8

AMS

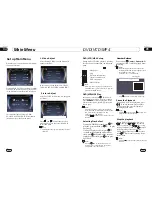
Replacing the Fuse

Make sure the amperage matches the 
specified value when replacing the fu-
ses. If the fuse is blown, check the po-
wer connection and replace with a n-
ew one. If the same problem occurs, 
it may be a malfunction. In such cases,
please consult the nearest service dealer.

When the range of the card remote 
control becomes short or no longer
functions, replace the lithium battery 
with a new button cell (CR2025). 
Check the battery polarity is correct 
before replacing.

Precautions on Using Lithium 
Battery 

Always keep the lithium battery beyond 
the reach of children. If   swallowed, see a 
doctor immediately.

Clean the battery with a dry cloth to ensure 
it is perfectly connected.

Make sure the polarity is correct when
loading the battery.

To prevent short circuit, do not use 
metal tweezers to clip the battery. 

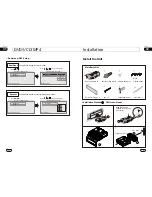
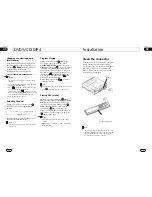
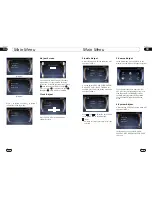
Gently pull out the Battery Holder while
pressing the Stopper. 

Put the button-type battery with mark(+) 
upward into the Battery Holder.

Replacing the Battery

Insert the Battery Holder into the Remote 
Control.

!

Maintenance

Warning

Never use a fuse with a rated 
amperage more than that supplied to 
you 

r unit ,otherwise i twil ldamage the 

unit.


Warning!

Improper handling of the battery may 
lead to explosion.

It cannot be charged  ,disassembled or 

thrown

  int o a fire.

!

Summary of Contents for DZP912

Page 1: ...NU LOC LOC SUB T SUB T ST ST AUDIO AUDIO RPT RPT RDM RDM GOTO GOTO ANGLE ANGLE OSD OSD PROG PROG ZOOM ZOOM P N P N SETUP SETUP ENTER ENTER CLEAR CLEAR ANGLE ANGLE Warning Professional installation is required Watching TV whiledriving is illegal in most states There is a safety feature on this device which enables viewing videos only when parked All other features may still be used while driving su...

Page 2: ...djust 20 Audio Adjust 21 Source Setup 21 System Adjust 21 4 DVD VCD MP4 5 5 DVD VCD MP4 Setup 25 DVD VCD MP4 Play 25 Selecting Tracks Fast 25 Number Buttons 25 Pause the Playback 25 Stop the Playback 25 Play tracks at Random 26 Repeat Playing 26 Skip backward forward F F F REW the Playback 26 System Switch 26 Slow Motion Playback 26 Increase Picture Size 26 On Screen Display 26 Setting the Playbac...

Page 3: ... is properly connected if not insert the antenna or connect it properly Antenna may not be the proper length Make sure the antenna is fully extended if broken replace the antenna with a new one A CD is loaded in the mechanism The CD is dirty or damaged The Video line from main unit to the TVis not connected properly Improper setting of the color system Set the color system according to the connect...

Page 4: ...explanatory This manual will help you understand the functions and operations of the unit This manual primarily explains remote control operation However in addition to those functions related with DVD VCD CD MP3 MP4 operation that can only be operated by the remote control there are also functions that can be operated by the buttons provided on the main unit Improvements and changes to this User ...

Page 5: ...tively wh ich are Number Buttons from 1 to You can press responding N umber Buttons or ton when your desired station is And it starts pl aying that station station 6 stored in the 6 the cor AMS but charged 23 4 Press and hold AMS automatically memory storing The radio automatically selects and has it stored in any one of Number Buttons from1 to 6 button it will activate the function a station the ...

Page 6: ... Stored Station During radio status press button to select the stored station upward press to select downward the stored station 27 Note The function is only valid on the remote control Pressing in the monitor or pressing and holding SEEK SEEK also performs the same function 4 8 AMS Press to scan the current station and tune automatically 87 50M 106 10M 107 90M 87 50M 98 10M 90 10M 4 5 FM1 CH 1 BA...

Page 7: ...o exit the program playing Move the cursor to and press ENTER to go to the previous page move the cursor to and press ENTER to go to the next page During this process press to cancel the program playing 13 18 The function is only valid on the remote control Note 27 Press CLEAR to clear the input mistake 22 ò µ Ê Õ Ï Å Å ý Ö Ä Ï Eject SD Card Push SD card to eject it During SD playing mode ejecting...

Page 8: ...ck to play automatically 23 Press track region and the screen shows the number keys touch the number to select tracks Note Selecting Track 2 This function is operated by using the remote control Note Press CLEAR to clear the mistake input 22 During CD playback first press GOTO and TFT shows disc go to press your desired time of the playback by using num ber buttons Second press GOTO button track g...

Page 9: ...aded press SOURCE to switch to play or back to play source to select menu press DVD to play Note 8 16 Press SRC on the main unit to switch to DVD mode When SD card and USB were inserted into press this key again and again to switch among SD card USB and disc Pressing to turn to mode switch MODE Track Region Press this region and the screen shows the following menu number keys appears touch the num...

Page 10: ...information 30 LOUD loudness SETUP F R F F CLEAR 0 9 Number Buttons Eject Button Stop Playing Pause Play EQ equalizer Button Previous Next Track ENTER Left Right Up Down ENTER 35 05 DVD VCD MP4 Preferencespage Default Example showing how to set load factory setting Press or thenpressENTER Press PreferencePage Go to language page Reset to the factory settings TVType Audio Subtitles DVDMenu Parental...

Page 11: ...40Hz to 16KHz Frequency Response 34 05 DVD VCD MP4 Preferencespage DVDMenu Example showing howto set Disc Menu Language Press or thenpressENTER Press PreferencePage Go to language page Set theDVDmenulanguage TVType Audio Subtitles DVDMenu Parental ChangePSW Default Auto Eng Eng Eng PreferencePage TVType Audio Subtitles DVDMenu Parental ChangePSW Default Auto Eng Eng Eng Parental Example showing ho...

Page 12: ...ess or thenpressENTER Press PreferencePage Go to language page SelecttheTVsystem TVType Audio Subtitles DVDMenu Parental ChangePSW Default Auto Eng Eng Eng PreferencePage TVType Audio Subtitles DVDMenu Parental ChangePSW Default Auto Eng Eng Eng PAL NTSC Audio Example showing how to set Audio language Press or thenpressENTER Press PreferencePage Go to language page Set the audio Language TVType Au...

Page 13: ...sary To support the unit Fire Wall 32 05 DVD VCD MP4 Dualmono DRC Setup DualMono Example showing howto set stereo mode Press Press or thenpressENTER Dualmono DRCSetup DualMono Dynamic Dualmono DRCsetup DualMono Dynamic DualMono Setup Stereo L Mono R Mono Mix Mono Dynamic Example showing how to set dynamic range compression Press Press or thenpressENTER DualMono Dynamic Dualmono DRCsetup Dynamic De...

Page 14: ...ashboard orConsole 31 05 DVD VCD MP4 GeneralSetupPage Captions Example showing howto set captions on off Press Press or thenpressENTER GeneralSetupPage TVshape AngleMark OSDLanguage Captions ScreenSaver Wide On Eng Off On GoToGeneralSetupPage GeneralSetupPage TVshape AngleMark OSDLanguage Captions ScreenSaver Wide On Eng Off On Closed Captions Off On ScreenSaver Example showing howto set Screen Sa...

Page 15: ...lSetupPage GeneralSetupPage TVshape AngleMark OSDLanguage Captions ScreenSaver Wide On Eng Off On Set the TV shape Normal PS4 3 Normal LB4 3 Wide16 9 AngleMark Example showing howto set picture mode Press Press or thenpressENTER GeneralSetupPage TVshape AngleMark OSDLanguage Captions ScreenSaver Wide On Eng Off On GoToGeneralSetupPage GeneralSetupPage TVshape AngleMark OSDLanguage Captions ScreenS...

Page 16: ...n the main unit or in the monitor main menu and sub menu will appear on TFT pressing on the remote control to select your desired items then press ENTER The selections are the preferred options that will be chosen if they are available on a disc If the disc that is inserted does not have the preferred option then the discs own prefer ence will be used Regarding SETUP MENU please refer to the follo...

Page 17: ...3 7 Notes 3 Selecting Channel During VCD status repeatedly press AUDIO button to select the following channel 6 Stereo Mono Left Mono Right Selecting the corresponding channel to set the different sound characters This function is operated by using the remote control only Note Program Playing During VCD mode press PROG the TFT displays the program menu Press NUMBER BUTTONS to select the track Numb...

Page 18: ...ngle title time chapter time repeat time disp Press to select the options press ENTER to set the status Then press NU MBER BUTTONS or to set the current status title 2 27 27 During VCD mode press GOTO button to set the playing time when the TFT dis play disc time track time repeat time disp Press to select the options press ENTER to set the status Then press NUMBER BUTTONS or to set the current st...

Page 19: ...5 Repeat Playing During DVD playback press ing RPT on the remote control to perform replay function as follows This function is only valid on the remote control 15 Note Chapter Title Off During VCD MP4 playback press RPT on the remote control to TRACK REPEAT Slow motion playback During DVD mode press to slow play The speeds as follows During VCD MP4 mode press to slow play The speeds are as follow...

Page 20: ...o stop playing completely then press to return to the beginning of the current track During MP4 playback press first then press to return to the beginning of the current track Pressing in the monitor perform the same function Note During DVD VCD MP4 playback touching the screen at the bottom show the following menu DVD VCD MP4 Setup Play pause Stop Decrease volume level Increase volume level DVD s...

Page 21: ...or example press FAD the setting menu will appear as follows Press and to adjust the desired FAD level press EXIT to exit this menu Note Adjusting the other options performs the same operation CLOCK SYS KEY BEEP MONI FLEX EXIT EXIT VOLUME FAD F4 VOLUME 24 EXIT LOCAL AREA LOCAL GOTO FREQ Main Menu 04 Picture 1 Picture 2 Press in picture 1 or press in picture 2 to enter the following menu Adjust Scr...

Page 22: ...BWOOFER CLOCK SYS KEY BEEP EXIT MONI FLEX CLOCK SYS KEY BEEP EXIT MONI FLEX EXIT SUBWOOFER EXIT SUBWOOFER 23 04 Main Menu Press to display the next menu press to display the previous one To set the above options as the same operation AMS Fullup In this menu to set the modes of AMS When the setup is ON the presettable stations are full no new stations are allowed When you select OFF it will search ...

Reviews: