background image

29

EN

ENGLISH

4

13.  A short power-supply cord or detachable power-supply cord is provided to 

reduce the risk resulting from becoming entangled in or tripping over a longer 

cord. Do not let cord hang over edge of table or touch hot surfaces.

14.  Always plug cord into wall outlet before operation. There is no on/off switch. To turn 

off, remove plug from wall outlet. Allow unit to cool completely before putting away.

15.  Longer detachable power-supply cords or extension cords are available and 

may be used if care is exercised in their use. Exception: An extension cord or 

longer detachable cord is not recommended for use with this appliance.

16.  If a long detachable power-supply cord or extension cord is used: 1) The marked 

electrical rating of the cord or extension cord should be at least as great as the 

electrical rating of the appliance; 2) If the appliance is of the grounded type, 

the extension cord should be a grounding 3-wire cord; and 3) The longer cord 

should be arranged so that it does not drape over the countertop or table top 

where it can be pulled on by children or tripped over unintentionally. 

17.  This appliance has a polarized plug (one blade is wider than the other). To reduce the 

risk of electric shock, this plug is intended to fit into a polarized outlet only one way. 

If the plug does not fit fully into the outlet, reverse the plug. If it still does not fit, 

contact a qualified electrician. Do not attempt to modify the plug in any way.

18.  Extreme caution should be used when moving an appliance with hot food.

19.  Do not attempt to service this appliance yourself, as opening or 

removing covers may expose you to dangerous voltage or other 

hazards. Refer all servicing to qualified service personnel. 

20.  Food will be very hot. Use a plastic or wooden kitchen 

utensil to carefully remove from unit.

21.  Extreme caution must be used when opening and closing the Lid on this unit. 

Use an oven mitt or pot holder when opening and closing the Lid for safety.

SAVE THESE INSTRUCTIONS!

INTRODUCTION

Thank you for purchasing the WAFFLE & FRENCH TOAST STICK MAKER from Nostalgia 

Electrics™! This multipurpose unit bakes everyone's favorite breakfast foods in a matter of 

minutes.  The interchangeable cooking plates allow you to make five waffle or French toast 

sticks per batch. You can also make delicious pancake sticks or breakfast bars. Use the 25 

included sticks to bake fun, easy-to-eat meals for the kids or a handy breakfast on the go. 

With the WAFFLE & FRENCH TOAST STICK MAKER, eating breakfast has never been more fun!

FC640-NOTICE.indd   29

19/09/14   15:55

Summary of Contents for Simeo FC640

Page 1: ...GAUFRES ET CROQUE MONSIEUR FC640 NOTICE D UTILISATION FR DE EN ES FC640 NOTICE indd 1 19 09 14 15 55 ...

Page 2: ...t d utiliser votre appareil Conservez la vous pourriez avoir besoin de vous y référer dans le futur Descriptif technique 1 2 3 4 1 Appareil 2 Plaques pour gaufres Mise en place des plaques ÉTAPE 1 Insérez le haut des plaques puis le bas dans l appareil et alignez les bien ÉTAPE 2 Clipsez les plaques dans leur logement en veillant à dégager le loquet situé sur l avant au préalable puis repositionne...

Page 3: ...rsonne responsable de leur sécurité d une surveillance ou d instructions préalables concernant l utilisation de l appareil Il convient de surveiller les enfants pour s assurer qu ils ne jouent pas avec l appareil Ne pas manipuler l appareil les mains mouillées S assurer que la tension du secteur corresponde bien à celle de l appareil S assurer avant chaque utilisation que le cordon d alimentation ...

Page 4: ...chaque utilisation Avant tout nettoyage En cas de dérangement ou de mauvais fonctionnement En cas de non utilisation prolongée Placer l appareil sur une surface plane horizontale sèche et non glissante Veiller à ne pas mettre l appareil au bord de la table ou du plan de travail pour éviter qu il bascule S assurer que le cordon d alimentation et toute éventuelle rallonge électrique ne soient pas di...

Page 5: ...é Ne jamais raccorder d accessoires de démarrage différé ex minuterie entre la prise électrique et le cordon d alimentation de l appareil Déplacer uniquement l appareil à froid S assurer que le cordon d alimentation n entre pas en contact avec les parties chaudes de l appareil Ne pas utiliser l appareil comme chauffage d appoint Ne pas placer dans l appareil des matériaux inflammables tels papier ...

Page 6: ... et laissez cuire 5 à 7 minutes Unefoisletempsécoulé ouvrezlecouvercleen vous munissant d un gant ou d une manique retirez les gaufres ou les croques Monsieurs cuits en utilisant une spatule en bois ou en plastique n utilisez pas d ustensiles en métal qui pourraient endommager le revêtement antiadhésif Si vous cuisez plus qu une fournée refermez le couvercle pour que l appareil préserve bien la te...

Page 7: ...le couvercle et laisser cuire 3 à 7 minutes et ainsi de suite jusqu à épuisement du stock 6 Retirer les gaufres à l aide d une spatule en bois ou en plastique thermorésistant Gaufres salées aux pommes de terre 400 g de pomme de terre environ 100 g de carottes râpées 100 g de crème fraîche épaisse sel poivre 1 petit oignon 1 gousse d ail hachée persil 3 œufs entiers 1 Préchauffer l appareil 2 Râper...

Page 8: ...nnelle et l extrait de vanille 3 Couper les tranches à la taille des formes des plaques 4 Déposer les tranches de pain dans le mélange œufs lait et laisser les tranches bien s imbiber quelques instants 5 Placer une tranche de pain par forme puis refermez le couvercle 6 Laisser cuire 3 à 7 minutes selon votre goût 7 Retirer les tranches de pain perdu à l aide d une spatule en bois ou en plastique t...

Page 9: ...e les fruits secs raisins ou autre et le sel 3 Faire un puits au centre et ajoutez le miel l œuf battu la vanille et le beurre fondu Mélanger bien à la main 4 Remplir les formes plates à et lisser le dessus à l aide d une spatule en bois ou en plastique thermorésistant 5 Refermer et laisser cuire 3 à 7 minutes 6 Retirer à l aide d une spatule en bois ou en plastique thermorésistant Mes recettes FC...

Page 10: ...10 Mes recettes FC640 NOTICE indd 10 19 09 14 15 55 ...

Page 11: ...vement destiné à une utilisation domestique Destruction de l appareil Merci de respecter les recommandations ci dessous Vous ne devez pas vous débarrasser de cet appareil avec vos déchets ménagers Un système de collecte sélective pour ce type de produit est mis en place par les communes vous devez vous renseigner auprès de votre mairie afin d en connaître les emplacements En effet les produits éle...

Page 12: ...ngen Dies ist das Warnsymbol für Ihre Sicherheit Dieses Symbol warnt Sie über potenzielle Gefahren die fatal für Sie oder andere Nutzer sein können Dieses Symbol zeigt Ihnen alle Mitteilungen bezüglich der Sicherheit Alle Sicherheitsmitteilungen werden genau auf eine potenzielle Gefahr hinweisen die Art und Weise wie Sie die Verletzungsgefahr verringern können und weisen Sie auf potenzielle Konseq...

Page 13: ...dwelches Teil dieses Geräts nicht ins Wasser oder in eine andere Flüssigkeit tauchen 5 NICHT das Gerät mit einem Kabel oder einem Netzstecker laufen lassen wenn das Gerät fehlerhaft ist oder wenn es gefallen ist oder wenn es in irgendeiner Weise beschädigt wurde Kontaktieren Sie den Händler bei dem Sie dieses Gerät erworben haben 6 Der Hersteller empfiehlt keine Benutzung von Zubehör außer dem Zub...

Page 14: ...ass er in eine nur in einer Art und Weise unverwechselbare Steckdose gesteckt werden kann Wenn der Netzstecker nicht komplett in die Steckdose passt drehen Sie ihn um Wenn er immer noch nicht passt sprechen Sie mit Ihrem Händler oder einem zugelassenen Elektriker Den Netzstecker nicht in irgendeiner Weise modifizieren 18 Eine ganz besondere Vorsicht ist beim Versetzen eines Gerätes mit warmen Lebe...

Page 15: ... Die obere und untere Backplatte des Hauptgeräts einschieben sie dann nach hinten gleiten lassen bis sie an ihrem Platz sind 2 SCHRITT Lassen Sie die Backplatten an ihrem Platz indem Sie das Federschnappschloss auf die obere und untere Backplatte verschieben und sie auf die Schlitze der Backplatten gleiten lassen FC640 NOTICE indd 15 19 09 14 15 55 ...

Page 16: ...erriegelt ist Dampf kann während des Backens aus dem Gerät entweichen Um die Sicherheit zu gewährleis ten jeden Kontakt mit dem Dampf vermeiden denn er ist sehr heiß und kann Verbrennungen verursachen Die Backzeit variiert zwischen 3 7 Minuten Wenn das Backen beendet ist entriegeln Sie dann den Deckel mit Hilfe eines Kochhandschuhs oder eines Topflappens und heben Sie ihn an Lebensmittel mit Hilfe...

Page 17: ...Waffelstäbchen und French Toast schieben Sie die Bambuss täbchen in die lange Seite des Lebensmittels bis zur Hälfte ein Reihen Sie die Stäbchen in die Einkerbungen der unteren Backplatte auf Im Moment des Backens des Teigs füllen Sie die Vertiefungen der unteren Backplatte bis zum Rand auf Das Stäbchen in die Mitte des Teigs einschieben bis zur Hälfte Vergewissern Sie sich dass das Stäbchen bedec...

Page 18: ...Toast Traditionelle Waffeln 2 Eier 480 g Allzweckmehl 420 ml Milch 120 ml Pflanzenöl 1 EßL weißer Zucker 4 Teelöffel Backpulver Teelöffel Salz Teelöffel Vanilleextrakt 1 Das Gerät für Waffelstäbchen und French Toast wie angegeben vorheizen 2 Eier in einer großen Rührschüssel mit dem Handmixer schlagen bis man eine schaumige Konsistenz erreicht 3 Mehl Milch Pflanzenöl Zucker Backpulver Salz und Van...

Page 19: ...des Stäbchen mit Hilfe eines Küchenutensils aus Holz oder Plastik herausholen 8 Mit frischen Früchten oder Joghurt servieren wenn erwünscht Schokoladenwaffeln 240 g Butter 4 Eier geschlagen 360 g Zucker 120 g Kakao 480 g Mehl 1 Teelöffel Vanille 1 Teelöffel Salz 120 ml Wasser 1 Das Gerät für Waffelstäbchen und French Toast wie angegeben vorheizen 2 In einer großen Rührschüssel alle Zutaten mischen...

Page 20: ...ik herausholen French Toast mit Rosinen und Zimt 7 große Eier 600 g Halb Sahne halb Milch 120 g Zucker 1 EßL Vanilleextrakt 1 Teelöffel gemahlener Zimt Teelöffel gemahlenes Muskat 6 Scheiben Rosinenbrot 38 mm dick 1 Das Gerät für Waffelstäbchen und French Toast Stäbchen wie angegeben vorheizen 2 Die ersten sechs Zutaten in einer Glasauflaufform von 33 x 23 x 5 cm schlagen 3 Die Brotscheiben in Stä...

Page 21: ...t Bestreuen Sie das Brot gleichmäßig damit 7 Jedes Brotstück in die vorgeheizten Vertiefungen der unteren Backplatte legen 8 Den Deckel schließen und 3 bis 7 Minuten backen 9 Den Deckel mit Hilfe eines Topflappens oder eines Kochhandschuhs öffnen 10 Jedes Stäbchen mit Hilfe eines Küchenutensils aus Holz oder Plastik herausholen Traditionelle Crêpes 180 ml Milch 2 EßL weißer Essig 240 g Allzweckmeh...

Page 22: ... Butter hinzufügen 5 Die Eiermischung in die trockenen Zutaten einmischen rühren Sie bis der Teig glatt ist fügen Sie dann die Blaubeeren hinzu Den Eischnee unterheben 6 Den Teig vorsichtig in die vorgeheizten Vertiefungen der unteren Backplatte gießen 7 Den Deckel schließen und 3 bis 7 Minuten backen 8 Den Deckel mit Hilfe eines Topflappens oder eines Kochhandschuhs öffnen 9 Jedes Stäbchen mit Hi...

Page 23: ...zenkeime den Zimt das Mehl die Rosinen und das Salz 2 In der Mitte eine Mulde bilden und den Honig das Ei das Öl und die Vanille hineingeben Gut mit den Händen mischen 3 Mit Hilfe eines hitzebeständigen Utensils aus Holz oder Plastik ca 60 g 1 4 Tasse der Mischung in die Vertiefungen der unteren Backplatte füllen Den Teig mit einem Löffel gleichmäßig vertei len 4 Den Deckel schließen und 3 bis 7 M...

Page 24: ...Gerät reparieren oder alternativ austauschen wird falls irgendwelche Defekte am Material oder an der Qualität nach dem Kauf festgestellt werden Die Garantie ist auf dem beigefügten Garantieschein definiert Sie deckt nicht den normalen Verschleiß ab Der Hersteller kann für eventuelle Schäden durch unsachgemäßen unsauberen fehlerhaften unvernünftigen nicht der Gebrauchsanweisung entsprechenden Gebra...

Page 25: ...25 DE FC640 NOTICE indd 25 19 09 14 15 55 ...

Page 26: ...FrenchToast Stick Maker Máquinaparaprepararvarastostadasfrancesasywaffles Machineàbâtonnetgaufreetdepaindoré Instructions and Recipes Instrucciones y recetas Instructions et recettes FC640 NOTICE indd 26 19 09 14 15 55 ...

Page 27: ...s is very important We have provided many important safety messages in this manual and on your appliance Always read and obey all safety messages This is the safety alert symbol This symbol alerts you to potential hazards that can kill or hurt you and others All safety messages will follow the safety alert symbol All safety messages will tell you what the potential hazard is tell you how to reduce...

Page 28: ...cord plugs or appliance in water or any other liquid 5 DO NOT operate any appliance with a damaged cord or plug after the appliance malfunctions or if it is dropped or damaged in any manner Return the appliance to the nearest authorized service facility for examination or to a repair shop for electrical or mechanical adjustment 6 The appliance manufacturer does not recommend the use of accessory a...

Page 29: ...her To reduce the risk of electric shock this plug is intended to fit into a polarized outlet only one way If the plug does not fit fully into the outlet reverse the plug If it still does not fit contact a qualified electrician Do not attempt to modify the plug in any way 18 Extreme caution should be used when moving an appliance with hot food 19 Do not attempt to service this appliance yourself a...

Page 30: ...ing Plates STEP 1 Insert top and bottom Cooking Plates into Main Unit and push backward until they slide into place STEP 2 Snap Cooking Plates into place by pushing back the Spring Latches on the top and bottom Cooking Plates and releasing them into the slots on the Cooking Plates Spring Latch FC640 NOTICE indd 30 19 09 14 15 55 ...

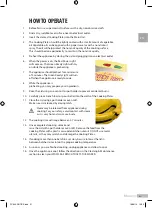
Page 31: ...ing you may prepare your ingredients 9 Raise the Lid using an oven mitt or pot holder to prevent accidental burns 10 Carefully place French toast or pour batter into the wells of the Cooking Plates 11 Close the Lid using a pot holder or oven mitt Make sure Lid is locked by closing latch Steam may be released from appliance during cooking For your safety avoid contact with steam as it is very hot a...

Page 32: ...CH TOAST STICK MAKER Traditional White Wheat Italian French Sourdough Cinnamon Raisin When making French toast sticks cut your desired bread into 1 inch wide by 4 inch long sticks Insert the Bamboo Stick length wise into the bread then dip into your batter Place into preheated wells of the lower cooking surface aligning sticks with notches in Cooking Plates You may also choose to make French toast...

Page 33: ...oking Plates in warm soapy water using a non abrasive cloth Rinse and dry with a non abrasive cloth or towel Wipe the exterior of the Main Unit with a dry non abrasive cloth Bamboo Sticks are reusable if wiped clean with a damp non abrasive cloth and allowed to dry thoroughly NEVER use scouring pads or abrasive cleaners on this unit as it will damage the surface and parts DO NOT put any parts in t...

Page 34: ... until smooth Pour batter into preheated wells of the lower cooking surface Close the Lid and cook for 3 7 minutes or until golden brown Open Lid with a pot holder or oven mitt Remove each waffle stick with a wooden or plastic kitchen utensil OATMEAL WAFFLES 1 Cups All Purpose Flour 1 Cup Quick Cooking Rolled Oats 1 Tbsp Baking Powder Tsp Cinnamon Tsp Salt 2 Eggs slightly beaten 1 Cups Milk 6 Tbsp...

Page 35: ...ut bread slices into 1 inch wide by 4 inch long sticks Dunk each bread stick in egg mixture soaking both sides Place bread in preheated wells of the lower cooking surface Close the Lid and cook for 3 7 minutes Open Lid with a pot holder or oven mitts Remove each French toast stick with a wooden or plastic kitchen utensil CINNAMON RAISIN FRENCH TOAST 7 Large Eggs 2 Cups Half and Half Cup Sugar 1 Tb...

Page 36: ...ICK MAKER as directed Combine 2 tablespoons granulated sugar and cinnamon Sprinkle evenly over bread Place bread in preheated wells of the lower cooking surface Close the Lid and cook for 3 7 minutes Open Lid with a pot holder or oven mitt Remove with a wooden or plastic kitchen utensil TRADITIONAL PANCAKES Cup Milk 2 Tbsp White Vinegar 1 Cup All Purpose Flour 2 Tbsp White Sugar 1 Tsp Baking Powde...

Page 37: ...er into the preheated wells of the lower cooking surface Close the Lid and cook for 3 7 minutes Open Lid with a pot holder or oven mitt Remove with a wooden or plastic kitchen utensil CHOCOLATE CHIP PANCAKES 2 Cups All Purpose Flour Cup Sugar 2 Tbsp Baking Powder 1 Tsp Salt 2 Eggs 1 Cups Milk Cup Vegetable Oil Cup Miniature Chocolate Chips Preheat the WAFFLE FRENCH TOAST STICK MAKER as directed In...

Page 38: ...wooden or plastic kitchen utensil CHOCOLATE PEANUT BUTTER GRANOLA BARS Cup Honey Cup Brown Sugar Cup Peanut Butter 2 Cups Quick Cooking Oats 2 Cups Crisped Rice Cereal Cup Ground Flax Seed 1 2 Tbsp Wheat Germ 1 Cup Miniature Chocolate Chips In a small saucepan mix honey and brown sugar Cook over medium high heat until sugar is completely dissolved stirring constantly Remove from heat and quickly s...

Page 39: ... there be any defects in material or workmanship during the first 90 days of purchase we will repair or replace the unit at our option Our pledge does not apply to damages caused by shipping mishandling or unit being dropped A product deemed defective either from manufacturing or being mishandled is up to the distributor s discretion In order to obtain service under this warranty please contact No...

Page 40: ...importante Hemos proporcionado numerosos mensajes de seguridad importantes en este manual y en su electrodoméstico Siempre lea y obedezca todos los mensajes de seguridad Este es el símbolo de alerta de seguridad Este símbolo le previene de peligros potenciales que pueden causar la muerte o lesiones a usted y a otras personas Todos los mensajes de seguridad estarán antecedidos por el símbolo de ale...

Page 41: ...OMÉSTICO 4 Para proteger contra el riesgo de descarga eléctrica no sumerja el cable los enchufes ni el aparato en agua ni otro líquido 5 NO opere el aparato con un cable o enchufe dañado en caso de que el aparato funcione incorrectamente o si se cae o está dañado de alguna forma Devuelva el aparato al centro de servicio autorizado más cercano para su examen o a un taller para su ajuste eléctrico o...

Page 42: ...n enchufe polarizado una hoja es más ancha que la otra Para reducir el riesgo de una descarga eléctrica este enchufe está diseñado para insertarse en un tomacorriente polarizado solamente en una posición Si el enchufe no encaja totalmente en el toma corriente invierta el enchufe Si aún no encaja contacte a un electricista calificado No intente modificar el enchufe de ninguna forma 18 Se debe usar ...

Page 43: ...ffles PASO 1 Introduzca los Platos para Cocinar superior e inferior en la Unidad Principal y empuje hacia atrás hasta que se deslicen en su lugar PASO 2 Ajuste los Platos para Cocinar en su lugar presionando hacia atrás los Cierres con Resorte sobre los Platos superior e inferior y soltándolos en las ranuras de los Platos para Cocinar Cierre con Resorte FC640 NOTICE indd 43 19 09 14 15 55 ...

Page 44: ...redientes 9 Levante la tapa con una agarradera para prevenir quemaduras accidentales 10 Coloque cuidadosamente la tostada francesa o agregue mezcla en los huecos de las bandejas de cocción 11 Cierre la tapa usando una agarradera o mitón Asegúrese que la tapa quede cerrada con el seguro de bloqueo Puede salir vapor del aparato durante la cocción Por su seguridad evite el contacto con el vapor ya qu...

Page 45: ...adicional De trigo Italiano Francés De masa fermentada De pasas y canela Al cocinar varas tostadas francesas rebane su pan preferido en varas de IVi pulgadas de grosor por 4 pulgadas de largo Inserte el palillo de bambú lo más posible en el pan luego sumérjalo en su mezcla Colóquelo en los huecos precalentados de la superficie inferior de cocción alineando los palillos con las marcas en las bandej...

Page 46: ...limpiar Limpie las placas de cocción y el exterior de la unidad principal con un paño seco y no abrasivo NUNCA use paños o limpiadores abrasivos en la unidad ya que se dañará la superficie y las partes Los Palillos de Bambú también son reutilizables si se lavan con un paño húmedo no abrasivo y se secan muy bien NO coloque las partes en el lava vajilla NUNCA sumerja el WAFFLE FRENCH TOAST STICK MAK...

Page 47: ...a vainilla hasta formar una mezcla homogénea Vertir la mezcla en los huecos precalentados de la superficie de cocción inferior Cerrar la tapa y cocinar durante 3 7 minutos o hasta que la masa sea color marrón dorado Abrir la tapa con una agarradera Retirar las varas de waffles con un utensillo de cocina de madera o plástico WAFFLES DE AVENA 1 taza de harina común 1 taza de copos de avena de fácil ...

Page 48: ... pan de 1 pulgada de grosor por 4 pulgadas de largo Empapar ambos lados de las rebanadas en la mezcla de huevo Colocar el pan en los huecos precalentados de la superficie de cocción inferior Cerrar la tapa y cocinar durante 3 7 minutos Abrir la tapa con una agarradera Retirar las varas tostadas francesas con un utensillo de cocina de madera o plástico TOSTADA FRANCESA DE PASAS Y CANELA 7 huevos gr...

Page 49: ...STADAS FRANCESAS WAFFLES tal como se indica Coloque dos cucharadas de azúcar granulada y canela Esparza en forma uniforme Coloque el pan en los huecos precalentados de la superficie inferior de cocción Cerrar la tapa y cocinar durante 3 7 minutos Abrir la tapa con una agarradera Retirar con un utensillo de cocina de madera o plástico PANQUEQUES TRADICIONALES taza de leche 2 cucharadas de vinagre b...

Page 50: ...a mezcla en los huecos precalentados de la superficie inferior de cocción Cerrar la tapa y cocinar durante 3 7 minutos Abrir la tapa con una agarradera Retirar con un utensillo de cocina de madera o plástico PANQUEQUES DE CHIPS DE CHOCOLATE 2 tazas de harina común taza de azúcar 2 cucharadas de bicarbonato 1 cucharadita de sal 2 huevos 1 taza de leche taza de aceite vegetal taza de chips de chocol...

Page 51: ...OLATE taza de miel taza de azúcar negra taza de mantequilla de maní 2 tazas de copos de avena de rápida cocción 2 tazas de cereal de arroz crocante taza de semillas de lino molidas 1 2 cucharadas de germen de trigo 1 taza de chips de chocolate miniatura En un recipiente pequeño mezclar la miel con el azúcar negra Cocinar a temperatura media alta hasta que el azúcar se disuelva por completo revolve...

Page 52: ...ietario original que si hay algún defecto en materiales o mano de obra durante los primeros 90 días de la compra repararemos o sustituiremos la unidad según nuestra elección Este compromiso no se aplica a daños causados por el envío mala manipulación o caídas de la unidad La determinación de si los defectos del producto son debidos a la fabricación o a una mala manipulación queda a la decisión del...

Page 53: ...53 ES FC640 NOTICE indd 53 19 09 14 15 55 ...

Page 54: ...54 FC640 NOTICE indd 54 19 09 14 15 55 ...

Page 55: ...55 ES FC640 NOTICE indd 55 19 09 14 15 55 ...

Page 56: ...FC640 NOTICE indd 56 19 09 14 15 55 ...

Reviews: