background image

Sync LED:

Green indicates that the unit is synchronized with a source of the highest available
priority.

Yellow indicates that the unit is synchronized with a non-highest-priority source.

Off indicates that the unit is not synchronized with any source.

Error LED (nonfunctional)

User-control screen

Navigation keys

Volume control knob (nonfunctional)

Headphone jack

Dim button (nonfunctional)

Power failure indicator

Over-temperature indicator

Reset button

Power button

Two Universal Serial Bus (USB) 2.0 ports

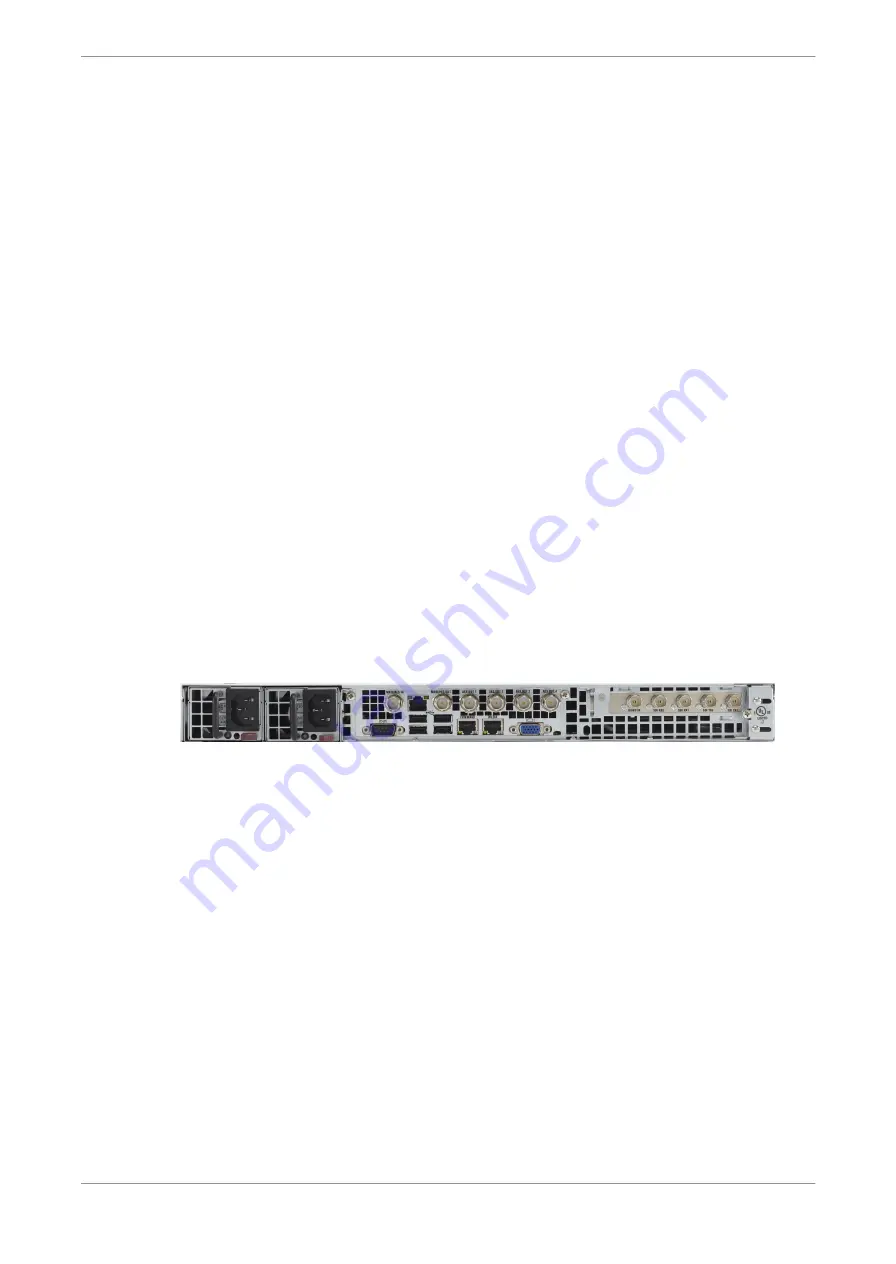
2.3 DP590 rear-panel components

The rear-panel components of the DP590 provide several types of inputs and outputs.

The rear panel includes the components shown in this image.

Figure 2: DP590 rear panel

The DP590 rear-panel components are as follows:

Two AC power connectors

MADI or AES 

IN

 port

Gigabit Ethernet port (not in use)

MADI 

OUT

 port

Four AES 

OUT

 ports

Video 

IN

 port

Two serial digital interface (SDI) 

IN

 ports

Two SDI 

OUT

 ports

Four USB 2.0 ports

Gigabit Ethernet port (

COMMAND

)

Gigabit Ethernet port (

MEDIA

; not in use)

VGA video port

Serial port (not in use)

Overview of Dolby Object Authoring Tool DP590

Dolby Object Authoring Tool DP590 quick-start guide
Preliminary 10 May 2017

9

Summary of Contents for DP590

Page 1: ...Dolby Object Authoring Tool DP590 Quick start guide Preliminary 10 May 2017...

Page 2: ...t is protected by one or more patents in the United States and elsewhere For more information including a specific list of patents protecting this product please visit http www dolby com patents Discl...

Page 3: ...s are designed to provide reasonable protection against harmful interference when the equipment is operated in a commercial environment This equipment generates uses and can radiate radio frequency en...

Page 4: ...t 13 3 4 Default session settings 14 4 Dolby Object Authoring Tool DP590 operation 16 4 1 Creating new or opening existing session 16 4 2 Saving session 16 4 3 Adding beds and dynamic objects 17 4 4 M...

Page 5: ...5 5 Closing error log 29 Glossary 30 Contents Dolby Object Authoring Tool DP590 quick start guide Preliminary 10 May 2017 5...

Page 6: ...cludes these features Support for stereo 5 1 5 1 2 and 5 1 4 speaker configurations Ability to render a selected presentation and monitor mode to a MADI output Ability to ingest 64 out of the 64 PCM c...

Page 7: ...are available to address any questions about this hardware product or its documentation For any questions regarding the described technology contact broadcastsupport dolby com If you have comments or...

Page 8: ...components in the broadcast stream The DP580 also decodes and renders the signal using Dolby technologies as appropriate for reception by a TV or set top box 2 1 Bill of materials These items are incl...

Page 9: ...2 0 ports 2 3 DP590 rear panel components The rear panel components of the DP590 provide several types of inputs and outputs The rear panel includes the components shown in this image Figure 2 DP590 r...

Page 10: ...the SDI clock source is not available then the DP590 attempts to sync with VREF and so on In case the reference source becomes asynchronous with the input source then the DP590 reverts to lock on to...

Page 11: ...uthoring Tool DP590 Operates at temperatures between 10 and 35 C Supports operation with relative noncondensing humidity levels between 5 and 90 2 5 2 Power requirements These are the DP590 power mini...

Page 12: ...o not block the front panel ventilation area on the top surface at the front of the machine 2 Connect the provided power cable to the AC connector 3 Connect your audio and video inputs and outputs 4 C...

Page 13: ...cedure 1 In the front panel navigation key set press the escape key The DP590 menu is displayed 2 Use the left or right arrow key to navigate to the CMD Interface screen The CMD Interface screen displ...

Page 14: ...is delivered with default session settings that include basic object and presentation settings Table 2 Object settings Object type Object label Object information MADI input channel Bed 5 1 M E Six c...

Page 15: ...Related information Downloading and installing DP590 client on page 13 Installation of Dolby Object Authoring Tool DP590 Dolby Object Authoring Tool DP590 quick start guide Preliminary 10 May 2017 15...

Page 16: ...e audio for live broadcast This chapter provides instructions for using the unique functions of the unit 4 1 Creating new or opening existing session Begin the authoring by creating a new or opening a...

Page 17: ...eation window and select the type of bed you want to create Note Double click the bed label to change its name Press Enter to confirm the change Note Only a 5 1 bed is supported across the entire broa...

Page 18: ...2 0 2 Bed 5 1 6 Bed 5 1 2 8 Bed 5 1 4 10 Caution Dropping a bed or dynamic object into an already occupied channels cancels the previous assignment Consequently the red icon appears on the left side...

Page 19: ...Check the Enable box for the bed and dynamic objects you want to activate Note Double click the bed or dynamic object label to change its name Press Enter to confirm the change 3 Click Save to save th...

Page 20: ...esentation Settings for dynamic objects will apply only to those in the chosen presentation 2 Ensure that the dynamic object is enabled and selected 3 Set the gain on the channel to which a dynamic ob...

Page 21: ...e values at a faster pace c Click and hold the blue level indicator for an axis and manually move the indicator horizontally in either direction to the desired value d In the sound mapping display cli...

Page 22: ...ain Dolby Atmos mix About this task Production renderers allow you to create an audio mix with 2 0 and 5 1 formats providing alternative formats to the main immersive audio mix This alternative 2 0 an...

Page 23: ...e 1 From the Settings menu select GPIO Config The GPIO Configuration window opens 2 To connect with a GPIO device enter the IP address and port number in the appropriate fields 3 To assign a function...

Page 24: ...re allows you to monitor the loudness value using the client application However the front panel display also shows this value Procedure 1 From the View menu select Loudness Measurement The Loudness M...

Page 25: ...e influence of dynamic range control on the stereo and 5 1 channel configurations About this task This function allows you to listen to a stereo or 5 1 channel local output with Line or RF mode compre...

Page 26: ...mplete the installation process by connecting to a DP591 You must connect to a DP591 if you want to send metadata as part of the broadcast You can connect to two DP591 units Procedure 1 In the Setting...

Page 27: ...esentations as shown in this figure Figure 10 Bitstream configuration window 3 Select a complete mix with all configuration options by clicking the ON button if it is not already selected Alternativel...

Page 28: ...he left side of DP590 client status bar to open the error log window Press F11 to open the error log window 5 2 Error log browsing options Click the log buttons to manage the log and filter out differ...

Page 29: ...m for further analysis Prerequisites Ensure that the DP590 client application is connected to the DP590 server Procedure 1 Click the Save System Logs button to save the logs available on the DP590 ser...

Page 30: ...Each object must at least have associated positional metadata containing specific information for the renderer The specification of positional metadata is different for each object type object audio r...

Reviews: