`
IP CAM User’s Guide
P
P
a
a
n
n
/
/
T
T
i
i
l
l
t
t
I
I
P
P
S
S
u
u
r
r
v
v
e
e
i
i
l
l
l
l
a
a
n
n
c
c
e
e
C
C
a
a
m
m
e
e
r
r
a
a
IP CAM USER’S GUIDE
PAGE
49
/57 Rev.
PV1.0
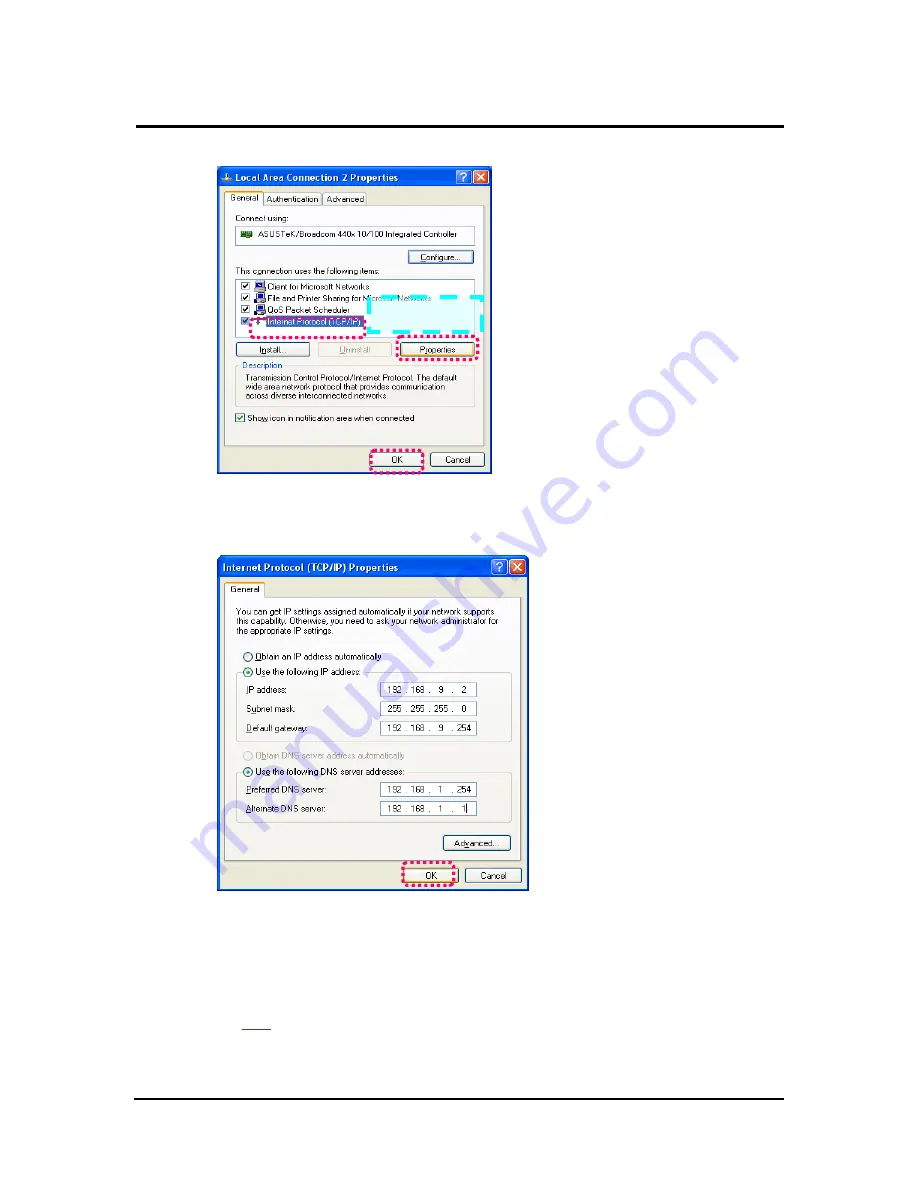
Step 4: Select “Internet Protocol (TCP/IP)”, and click on the preferences (R). Click on “Ok”.
Step 5: Change the IP Address to 192.168.9.2. Change Subnet mask to 255.255.255.0.
The default gateway is 192.168.9.254 (Change the IP address to any numbers
within the range of 192.168.9.2 – 192.168.9.253). Click on “ok”.
Step 6: In EZ Search Tool, click on Update once more to search for IPCAM on the local
network. Double click on “IP CAM7100” from the list, and your browser will automatically take
you to the IP CAM7100 EZ IPCAM login window.
Please refer to
P.10
for information on how to browse the surveillance video from the IP CAM
EZ CAM.
-
select


