9
ENGLISH
RECORDING (DECK B only)
•
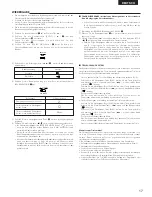
Switch on your amplifier or receiver and the source component.
•
Set the Tape Monitor switch on your amplifier or receiver to the SOURCE
position.
q
Press the POWER switch
q
to the ON (
¢
) position.
w
Load the cassette tape
w
,
!2
.
(Check that the erasure prevention tabs of the cassette housing have not
been broken off.)
e
Move the DOLBY NR switch
y
and select the Dolby NR type that suits the
recording.
DOLBY NR
B OFF C
r
Press the Direction (
0 1
) button
!6
to select the direction of tape
transport.
t
Select the type of tape transport with the REVERSE MODE button
u
.
Mode
To record on only one side
To continuously record
on both sides
Switch position
or RELAY
y
Press the REC/REC MUTE (
4
) button
!6
to set the recording pause mode.
The
4 3
indicator will light up.
u
Adjust the recording level with the INPUT LEVEL control
!0
while watching
the Peak Level Meter.
i
Press the PLAY button
!6
to start the recording.
The PLAY (
or
) and the
4
indicator will light during recording.
o
To pause the recording, press the REC PAUSE (
3
) button
!6
, Press the
PLAY button
!6
to resume recording.
!0
To stop recording, press the stop (
2
) button
!6
.
Caution:
• Be sure to press the stop (
2
) button to stop recording before turning off
the power or unplugging the power supply cord.
• Be careful not to erase important recordings by mistake. Inadvertent start of
recording will happen in the following cases:
1. If the PLAY button is pressed while the
4
indicator lights, recording
starts.
2. If the PLAY and REC/REC MUTE (
4
) button are pressed at the same
time, recording starts.
The best way to avoid accidental erasure is to break off the two erasure
prevention tabs on the cassette housing.
2
PROPER RECORDING LEVEL
A too high recording level can saturate the tape and cause distortion. On
the other hand, if the recording level is set too low, soft passages will be
marked by residual noise. A proper recording level is the single most
important factor for making well balanced recordings.
Guideline for maximum recording level
TYPE
I
(Normal)
TYPE
II
(CrO
2
)
0 dB level on peaks
+1 dB level on peaks
TYPE
IV
(Metal)
+3 dB level on peaks
Note:
The optimum recording level differs depending on the program source
and the type of tape used.
2
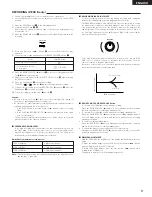
RECORDING BIAS ADJUSTMENT
For best recording results, monitoring during recording and comparing
different recordings using your own judgement are essential.
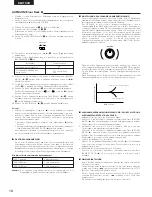
The DRW-695 is equipped with a BIAS FINE control to assist you in setting
the proper bias for different types and brands of tape. At the center stop-
click position, the deck is set to the reference bias level for Normal, CrO
2
and Metal tape. If the resulting recording in this position has too much or
too little high frequency content, adjusting the BIAS FINE control can be
useful to achieve better results.
-
+
BIAS FINE
If the high frequencies (treble sounds) are to be boosted, turn the BIAS
FINE control counter-clockwise to decrease the bias current. Turn the
control clockwise to increase bias current.
By the use of this control, you can record tapes with a frequency response
that will perfectly match your listening taste.
2
REC/REC MUTE AND REC PAUSE Button
1. To record a 5-second blank section during recording:
Press the REC/REC MUTE (
4
) button. A 5-second blank will recorded and
the deck will enter the recording be standby mode.
2. To record a 5-second blank section during the recording standby mode:
Press the REC/REC MUTE (
4
) button from the recording standby mode. A
5 second blank will be recorded and the deck will enter the recording
standby mode again.
3. To cancel recording of blank space:
Press the REC PAUSE (
3
) button. Blank space recording will be cancelled
and the deck enters the recording standby mode.
4. To extend the blank section with another 5 seconds or more:
Simply press the REC/REC MUTE (
4
) button and the blank section will be
increased with another 5 seconds.
2
DIMMER ADJUSTMENT
With the DRW-695, the brightness of the display can be adjusted in seven
steps.
To make the display brighter, press the B deck’s fast forward (
7
) button
while holding in the B deck’s STOP button.
To make the display dimmer, press the fast rewind (
6
) button while
holding in the STOP button.
The display is initially set to the maximum brightness.
Counterclockwise
Clockwise
FREQUENCY (Hz)
OUTPUT LEVEL (dB)
Summary of Contents for DRW-695
Page 68: ...68 MEMO...


