background image

34

EnGlisH

Setting the others [Other]

Firmware Update

• 

In order to update the firmware, the environment and settings 
required for connecting to broadband internet are needed 
(

v

page 7).

• 

Perform the firmware update operation after at least 2 minutes has 
elapsed since turning this unit’s power ON.

1

Press 

[MENU]

.

Turns on the Menu settings mode and the Menu appears on 
the display (

v

page 28 “Menu map”).

2

Use 

ui

 to select “Other” – “Firmware Update”, 

then press 

[ENTER]

<

1

/

3

  ENTER>

 or 

p

.

Check for Update

   Check for firmware updates. You can also check 

approximately how long it will take to complete 
an update.

Start

   Execute the update process.

• 

If updating fails, the set automatically retries, but if updating is still 
not possible, one of the messages shown below is displayed. If 
the display reads as shown below, check the settings and network 
environment, then update again.

Display

Description

Updating fail

Updating failed.

Login failed

Failure to log into server.

Server is busy

Server is busy. Wait a while then try again.

Connection fail

Failure in connecting to server.

Download fail

Downloading of the firmware has failed.

Add New Feature

• 

In order to add new functions, the environment and settings required 
for connecting to broadband internet are needed (

v

page 7).

• 

Perform the add new feature operation after at least 2 minutes has 
elapsed since turning this unit’s power on.

1

Press 

[MENU]

.

Turns on the Menu settings mode and the Menu appears on 
the display (

v

page 28 “Menu map”).

2

Use 

ui

 to select “Other” – “Add New Feature”, 

then press 

[ENTER]

<

1

/

3

  ENTER>

 or 

p

.

Start Upgrade

  Execute the upgrade process.

• 

If the upgrade is not successful, an error message identical to those 
in “Firmware Update”(

v

page  34) will appear on the display. 

Check the settings and network environment, then update again.

Upgrade Status

  Display a list of the additional functions provided 

by the upgrade.

Upgrade ID

  The ID number shown on this screen is needed 

when carrying out the procedure.

See the D&M Professional website for details about updates.
When the procedure is complete, “Registered” is displayed and 
updates can be carried out. If the procedure has not been carried 
out, “Not Registered” is displayed.

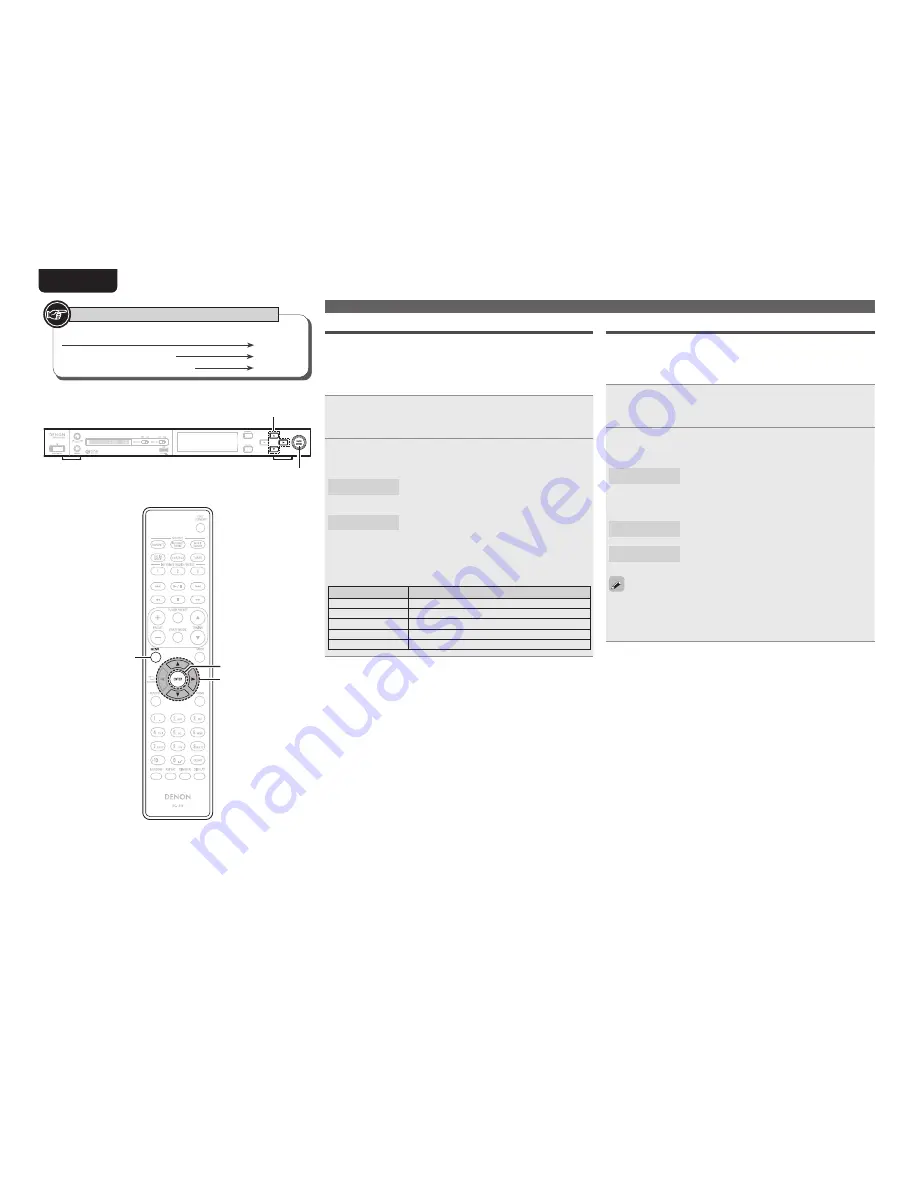
Button located on both the main unit and the remote control


BUTTON

Button only on the main unit


<BUTTON>

Button only on the remote control


[BUTTON]

Symbols used to indicate buttons in this manual

ui


p

<

1

/

3

  ENTER>

ui


p

[ENTER]

[MENU]

Summary of Contents for DN-700H

Page 1: ...NETWORK AUDIO PLAYER DN 700H Fran ais Espa ol DEUTSCH ENGLISH Owner s Manual Bedienungsanleitung Manuel de l Utilisateur Manual del usuario...

Page 2: ...s with Part 15 of the FCC Rules Operation is subject to the following two conditions 1 this product may not cause harmful interference and 2 this product must accept any interference received includin...

Page 3: ...from the wall socket outlet The mains plug is used to completely interrupt the power supply to the unit and must be within easy access by the user Do not expose batteries to excessive heat such as sun...

Page 4: ...e il cavo di alimentazione con le mani bagnate Quando l interruttore nella posizione OFF STANDBY l apparecchiatura non completamente scollegata da MAINS L apparecchio va installato in prossimit della...

Page 5: ...la relativa legge quadro 2009 125 EC in materia di prodotti alimentati ad energia ErP QUESTO PRODOTTO E CONFORME AL D M 28 08 95 N 548 DECLARACI N DE CONFORMIDAD Espa ol Declaramos bajo nuestra exclus...

Page 6: ...accessori inclusi nell imballaggio sono applicabili alla direttiva RAEE ad eccezione delle batterie ACERCA DEL RECICLAJE Los materiales de embalaje de este producto son reciclables y se pueden volver...

Page 7: ...om the favorites list 22 Calling the most recently played station or file from the favorites list 22 Deleting stations or files from the favorite list 22 iPod playback 23 Playing an iPod 23 Disconnect...

Page 8: ...e control unit RC 1159 1 y R03 AAA batteries 2 u Audio cable 1 i AM loop antenna 1 o FM indoor antenna 1 r t u i o U S A and Canada models European U K and Asia Pacific models or Caution This DN 700H...

Page 9: ...s manual may differ from the actual unit for explanation purposes About the remote control unit n nInserting the batteries q Remove the rear cover of the remote control unit w Load the two batteries p...

Page 10: ...OTE To output sound from the front speakers of this unit turn the speaker output switch on the front panel ON To output sound from an external device connected to this unit turn the OUTPUT switch on t...

Page 11: ...ble sold separately Match the shapes Match the shapes then insert firmly Connecting headphones Connect the headphones to the headphone jack PHONES When you press the headphone front speaker volume adj...

Page 12: ...ection through the bottom of the loop antenna from the rear and bend it forward Loop antenna Stand Square hole Projecting part 2 Insert the projecting part into the square hole in the stand n nUsing t...

Page 13: ...lable at retailer Some flat type Ethernet cables are easily affected by noise We recommend using a normal type cable If you have an Internet provider contract for a line on which network settingsarema...

Page 14: ...rform Menu Network Network First Setup Turning the power to standby mode Press ON STANDBY The unit enters standby mode Power indicator Standby Red Network standby Orange Auto standby Off NOTE Power co...

Page 15: ...y With the unit you can play back music files stored on your iPhone iPod touch and music from iTunes vpage 27 AirPlay function n nSelecting the input source using the remote control Press the input so...

Page 16: ...0 9 q Preparation connection 1 Connecting the audio device 2 Connecting to a network LAN 3 Connecting the power cord e Setting the network standby w Connecting to the access point q Preparation conne...

Page 17: ...i Use ui to select Port then press ENTER 1 3 ENTER or p Input Proxy Port menu appears o Use uip or NUMBER 0 9 to input the port then press ENTER or 1 3 ENTER The Proxy settings are completed 6 Select...

Page 18: ...r the bit rate the higher the sound quality but depending on the communication lines and server traffic the music or audio signals being streamed may be interrupted Inversely lower bit rates mean a lo...

Page 19: ...ons Function FAVORITE Calls the Favorite function FAVORITE Press and release Plays back the radio station or file at the top of the Favorite List FAVORITE Press and hold Registers the radio station cu...

Page 20: ...assword and click Register Registration is complete Registering and receiving private radio stations You can receive radio stations on this unit that are not registered in vTuner or a private radio st...

Page 21: ...RNET RADIO to switch the input source to Internet Radio 2 Press ui to select radiodenon com then press ENTER or 1 3 ENTER Added stations is displayed on the display of this unit 3 Press ui to select A...

Page 22: ...ch the computer s server software and set the files as server contents For details see the operating instructions of your server software The order in which the tracks files are displayed depends on t...

Page 23: ...and Password match the top menu for Pandora is displayed NOTE Press HOME to cancel the input n nCreating a Personalized radio station You can create up to 100 personalized radio stations 1 Use ui to s...

Page 24: ...dback to personalize your radio station You can create up to 100 New Stations radio stations n nSign out Disassociate this unit from your Pandora account 1 While the Pandora top menu is displayed pres...

Page 25: ...ER 1 3 ENTER or p The search display appears Network audio playback See the illustration on the previous page for details of the buttons used for the operations on this page r Listening to tracks regi...

Page 26: ...onnect the antenna beforehand vpage 6 Listening to FM AM broadcasts 1 Press TUNER to select the reception band The reception band is toggled as shown below each time TUNER is pressed FM When listening...

Page 27: ...to other stations repeat steps 1 to 5 Listening to preset stations Use NUMBER 0 9 10 PRESET or ui to select the preset number Calling stations registered in Preset List 1 Press TUNER PRESET Preset me...

Page 28: ...tion tuners or file to register is played back When registered the station or file is displayed at the top of the favorites list Calling stations or files from the favorites list 1 Press FAVORITE Favo...

Page 29: ...stored on iPod iPod touch iPod classic iPod nano the fifth or later generation only n n iPod vpage 49 Playing an iPod 1 Connect the iPod to the USB port using the USB cable that was supplied with the...

Page 30: ...tion iPhone iPhone 3G iPhone 3GS iPhone 4 iPod playback n nRemote control and iPod button relations Remote control buttons iPod buttons Operation on this unit 8 9 8 9 Play the track from the beginning...

Page 31: ...operate or receive power When using a portable USB connection type HDD of the kind to which an AC adapter can be connected to supply power use the AC adapter NOTE USB memory devices will not work via...

Page 32: ...back starts n nCanceling random playback Press RANDOM The indicator on the display turns off n nUSB operation Operation buttons Function 8 9 Auto search cue 1 3 Playback Pause 2 Stop ui Cursor operati...

Page 33: ...rPlay icon displayed in the lower right of the window and select this unit from the list 4 Choose a song and click play in iTunes The music will stream to this unit n nMultiple speakers You can easily...

Page 34: ...Friendly Name Edit Edits a name displayed on the Internet 31 Update Notification Set the Update notification on off 31 Upgrade Notification Set the Upgrade notification on off 31 Network Info Display...

Page 35: ...stablished Connection Failed is displayed Perform steps 1 5 again You may need to set the network connection manually depending on the provider you use To set the connection manually use the setting p...

Page 36: ...n the Menu settings mode and the Menu appears on the display vpage 28 Menu map 2 Use ui to select Network Connection Proxy then press ENTER 1 3 ENTER or p Setup Proxy menu appears 3 If Proxy On appear...

Page 37: ...sing this function 1 Press MENU Turns on the Menu settings mode and the Menu appears on the display vpage 28 Menu map 2 Use ui to select Network Other Network Update Notification then press ENTER 1 3...

Page 38: ...MENU Turns on the Menu settings mode and the Menu appears on the display vpage 28 Menu map 2 Use ui to select Other Power on Play then press ENTER 1 3 ENTER or p Power on Play menu appears 3 Use ui t...

Page 39: ...uttons on the main unit 4 GWhen Manual Lock is selectedH Press ui to select the buttons that you want to lock then press ENTER 1 3 ENTER or p PLAY PAUSE Locks the 1 3 ENTER button Cursor Locks the uio...

Page 40: ...mware has failed Add New Feature In order to add new functions the environment and settings required for connecting to broadband internet are needed vpage 7 Perform the add new feature operation after...

Page 41: ...splay and update restarts from the point at which update failed If the error continues despite this check the network environment Information regarding the Firmware Update function and Add New Feature...

Page 42: ...o select PTY Search then press ENTER 1 3 ENTER or p 4 Use ui to call out the desired program type then press ENTER 1 3 ENTER or p Automatically begin the PTY search operation If no program of the spec...

Page 43: ...tly being played back to the Favorite List PRESET Preset channel selection TUNER PRESET Preset menu 2 Stop TUNING df Tuning up down MENU Menu MODE Switch search modes uio p Cursor operation Up Down Le...

Page 44: ...acter is displayed The types of characters that can be input are as shown below 1 _ m n o M N O 6 a b c A B C 2 p q r s P Q R S 7 d e f D E F 3 t u v T U V 8 g h i G H I 4 w x y z W X Y Z 9 j k l J K...

Page 45: ...were immediately before going into the standby mode When the power is turned back on the settings are restored to as they were immediately before going into the standby mode Locking operation buttons...

Page 46: ...thernet straight cable Ethernet straight cable Host Hub Communication protocol The following three data forms are defined COMMAND The message sent to a system from a host A command to a system is give...

Page 47: ...nStructure of Command Codes Item Value the hex value is indicated in parentheses Command Indicate a description of the command Parameter Indicate a description of the parameter End character CR 0 x 0D...

Page 48: ...ENT CR FAVORITE ON FAV ON MNFAVON CR FAVORITE OFF FAV OFF MNFAVOFF CR Analog Tuner AM FM TUNER Frequency UP TF ANUP TFANUP CR TF COMMAND parameters can NOT operate when INPUT source isn t TUNER TUNER...

Page 49: ...NS91 CR Cursor Left Control 92 NS92 CR Cursor Right Control 93 NS93 CR Repeat One 9H NS9H CR USB iPod DIRECT Music Server Repeat All 9I NS9I CR USB iPod DIRECT Music Server Repeat Off 9J NS9J CR USB...

Page 50: ...TFAN CR Frequency TFAN CR kHz at AM band 050000 is AM 6 digits Only enabled when receiving AM broadcasts MHz at FM band 050000 is FM 6 digits Only enabled when receiving FM broadcasts Preset Status TP...

Page 51: ...a_ 35byte Fixed Analog Tuner AM FM TUNER Frequency change TF AN TFAN CR kHz at AM band 6 digits MHz at FM band 6 digits TUNER PRESET change to No AN PRESET No TPAN CR PRESET No Band set to AM ANAM TMA...

Page 52: ...emory devices or iPod oDisplay Displays play status settings etc Q0Remote control sensor 3 Q1Input source select button SOURCE 9 Selects the input source Q2Favorite button FAVORITE 22 Calls stations o...

Page 53: ...9 tDISPLAY button 13 yDIMMER button 9 NOTE The PARTY MODE button is not used for any operations on this unit Also the ONLINE MUSIC button is not used on European models w q e w Q1 Q0 o i t y u r q INT...

Page 54: ...Tuning up Tuning down buttons TUNING df 20 oMODE button 20 Part names and functions n nButtons that work when the input source is USB iPod Buttons that work with all input sources USB iPod TUNER and...

Page 55: ...iPod is connected directly to the USB port of this unit See iPod playback vpage 23 Only USB memory devices conforming to mass storage class and MTP Media Transfer Protocol standards can be played on...

Page 56: ...rotected depending on the computer s settings z3 Depending on the DLNA server specifications formats that can be distributed may differ Check the manual of your DLNA server This table assumes the use...

Page 57: ...compression scheme using the MPEG 1 video compression standard It compresses the data volume to about one eleventh its original size while maintaining sound quality equivalent to a music CD MPEG Movi...

Page 58: ...le properly Connect an outdoor antenna 6 Hissing or continuous noise is heard when receiving AM programs This may be noise from a TV or interference from a broadcast station Turn off the TV Change the...

Page 59: ...cannot be played Files are stored in a non compatible format You are attempting to play a file that is copyright protected Set and computer are connected by USB cable Record in a compatible format Fil...

Page 60: ...s only Symptom Cause Countermeasure Page Cannot login to Rhapsody Incorrect Username or Password is displayed Login information is incorrect Check if the Username for Rhapsody has been properly entere...

Page 61: ...R Type RCA terminal Standard level 2 Vrms Under 10 k load Digital output optical 21 15 dBm Headphone Output 20 mW 32 Monitor speaker Output 600 mW 8 n n Tuner section FM tuner Range of receivable fre...

Page 62: ...IR Remote 33 iTunes 27 51 v v K Key Lock 33 v v L Language 35 v v M Menu map 28 MP3 49 50 51 MPEG 51 MPEG 4 AAC 49 Music server 16 v v N Network First Setup 10 Network Standby 30 v v P Pandora 17 PC L...

Page 63: ...essungen Dimensions Dimensions Weight Gewicht Poids Peso 3 3 kg 7 4 lbs Unit Ger t Unit Unidad mm in 482 6 19 344 0 13 35 64 45 0 1 49 64 45 0 1 49 64 434 0 17 3 32 325 0 12 51 64 44 0 1 47 64 6 0 15...

Page 64: ...D M Holdings Inc Printed in China 5411 10756 00AP V00...

Reviews: