


18
ENGLISH
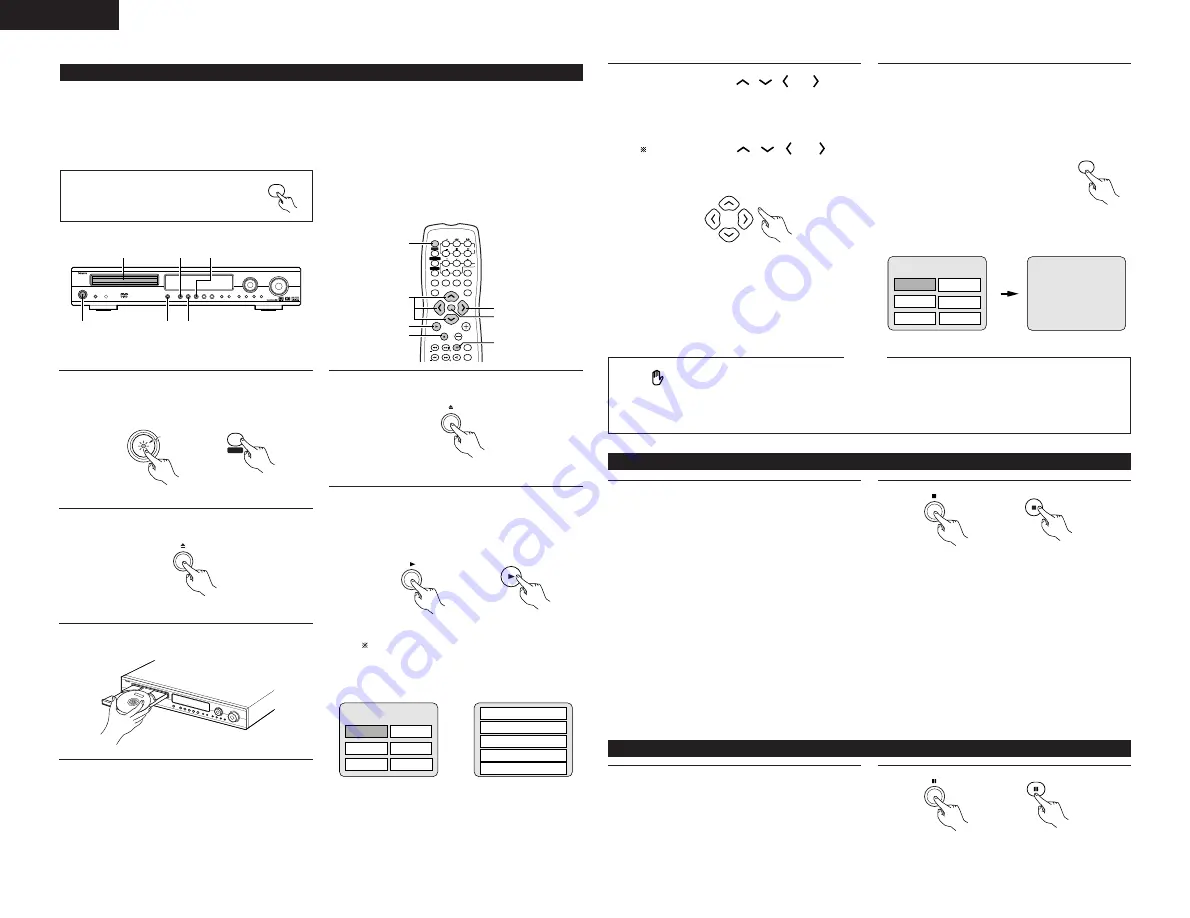
(3) Playback
IMPORTANT SETUP INFORMATION
This set has the following presettings:
“DISC SETUP”, “OSD SETUP”, “VIDEO SETUP”, “AUDIO SETUP”, “RATINGS”, and
“OTHER SETUP”.
These presettings have been preset upon shipment from the factory. If you wish to change them to suit your specific purposes,
refer to pages 40 to 45.
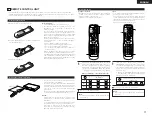
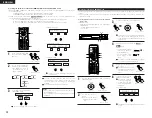
Before operating the remote control unit!
•
Be sure to set the DVD mode using the
remote control mode selector buttons.
DVD
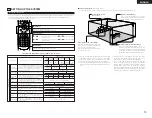
(3)-3
(3)-5
(4)-1
(3)-1
(3)-2,(3)-4 (5)-1
VOLUME
ENTER
BAND
MODE
MENU
FUNCTION
DISPLAY
RETURN
INPUT MODE SURROUND
MUTE
SHIFT
CH
TU
TV/VCR
CH
VOL
SLEEP
ON
OFF
2
3
4
5
6
8
9
CLEAR
CALL
0
+10
7
1
STATUS
VCR POWER
VCR POWER
TV POWER
TV POWER
TV
VCR
NTSC/PAL
MEMO
POWER
POWER
CH
CH
CH
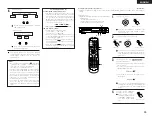
(3)-7
(5)-1
(3)-6
(3)-1
(3)-5
(4)-1
(3)-6
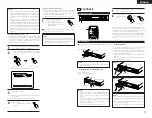
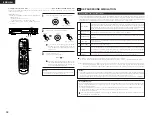
1
Turn on the power.
•
Press the power button, the power indicator lights
and the power turns on.
ON
POWER
ON / STANDBY
Light
(green)
Main unit
Remote control unit
2
Press the OPEN/CLOSE button to open the disc tray.
OPEN / CLOSE
Main unit
3
Set the disc in the disc tray.
C 8 1:02:46
DVD
AUTO
DIG
DIGITAL
4
Press the OPEN/CLOSE button.
OPEN / CLOSE
Main unit
5
Press the PLAY button.
•
For many interactive DVDs and video CDs with
playback control, a menu screen appears. In this
case use the procedure in step 6 to select the
desired item.
Main unit
Remote control unit
Example: For DVDs with
menu screens
Example: For video CDs with
playback control
1. Opening
Banana
Strawberry
Pineapple
TOP MENU
Orange
Peach
Apple
2. 1st movement
3. 2nd movement
4. 3rd movement
5. Ending
Interactive DVDs are DVDs including multiple angles,
stories, etc.
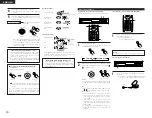
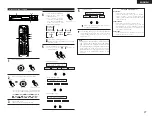
6
Use the cursor buttons (
,
,
and
) to select
the desired item.
•
For some discs there is a second menu screen. If so,
press the
9
button to display the next menu
screen. (See the disc’s jacket.)
The cursor buttons (
,
,
and
) do not
work for video CDs. Use the number buttons to
select the desired item.
Remote control unit
7
Press the ENTER button.
•
The desired item is selected and playback starts.
•
You can return to the menu screen by pressing the
TOP MENU button while the DVD is playing, though
this depends on the disc.
•
Press the RETURN button during playback of a video
CD to return to the menu screen.
ENTER
Remote control unit
Example: When “Apple” is
selected
Apple
Banana
Strawberry
Pineapple
TOP MENU
Orange
Peach
Apple
•
If
appears on the TV screen while buttons are
being operated, that operation is not possible on the
ADV-1000 or with that disc.
•
Set the disc in the disc guide.
•
Only set one disc in the tray.
•
The disc keeps turning while the menu screen is displayed
on the TV screen.
NOTES:
(4) Stopping Playback
1
During playback, press the STOP button on the main
unit or the remote control unit, playback stops and wall
paper is displayed.
<Resume play memory function (DVD only)>
•
With the ADV-1000, when the STOP button is
pressed, that position is stored in the memory. At
this time, “
1
” flashes on the display. When the
PLAY button is pressed after pressing the STOP
button, playback resumes from the position at which
it was stopped.The resume play memory function is
cancelled if the disc tray is opened or the STOP
button is pressed a second time.
BAND
Main unit
Remote control unit
✽
The resume play memory function only works for
discs for which the elapsed time is shown on the
display during playback.
Auto power off function.
•
The ADV-1000 is equipped with a function that
automatically switches the power to standby if no
operation is performed for 30 minutes while in the
stop mode with the function set to DVD.
•
This function is set to off upon shipment from the
factory. If you wish to turn it on, set the “DVD auto
power off setting” to “YES” as described on page
17.
(5) Playing Still Pictures (Pausing)
1
During playback, press the PAUSE button on the main
unit or the remote control unit.
•
Press the PLAY button to resume normal playback.
Main unit
Remote control unit


